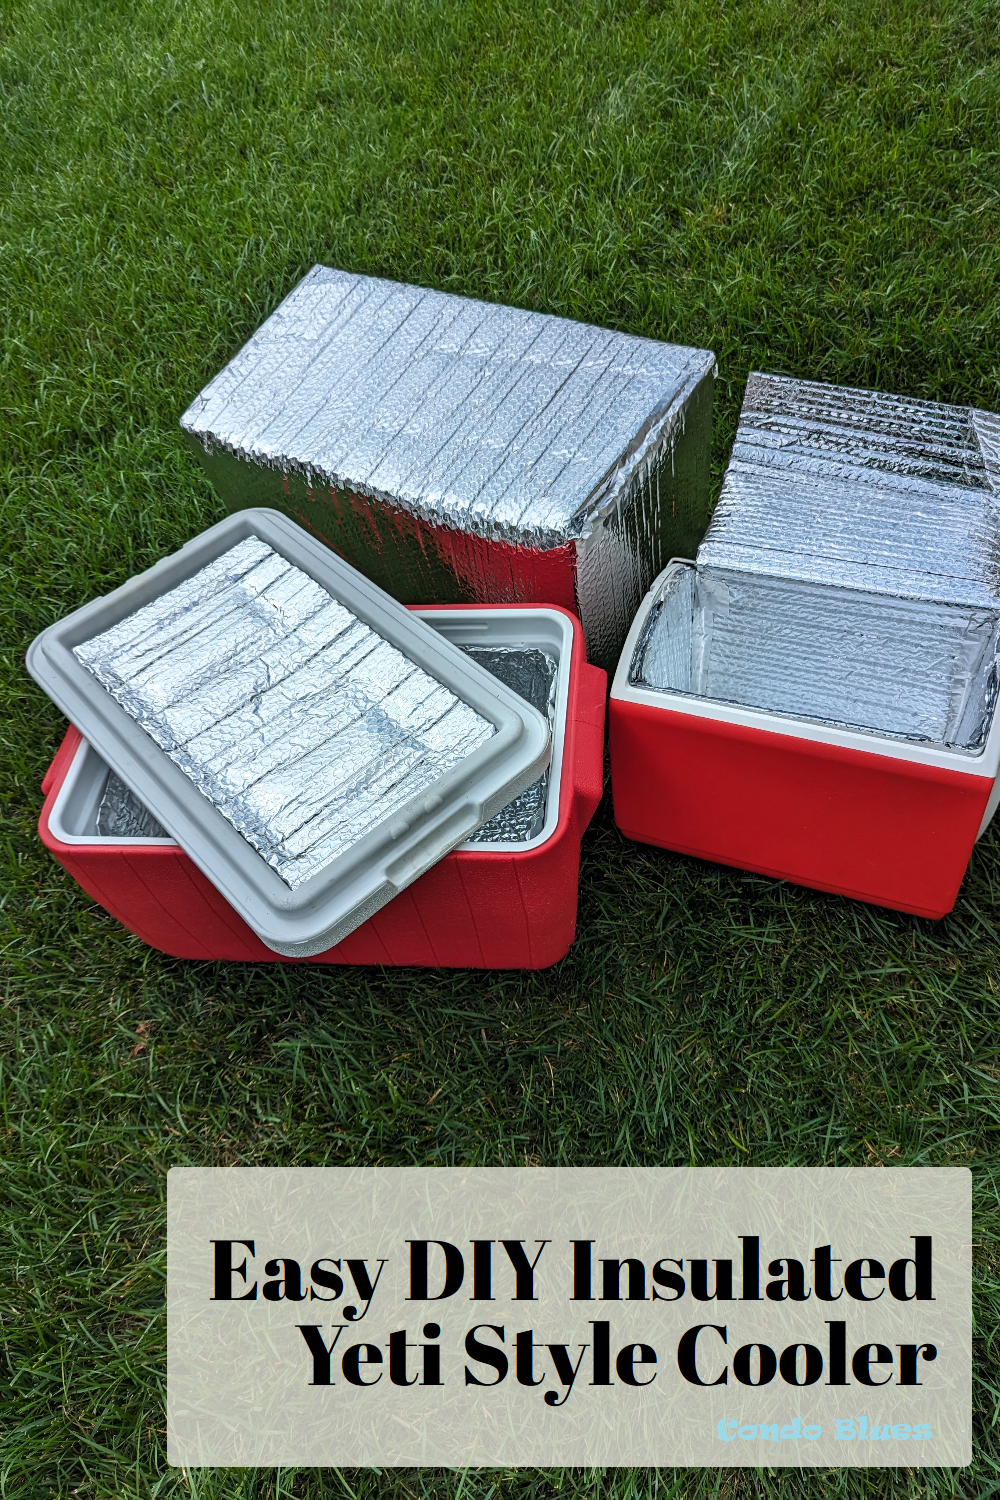
You’re stuck in a sweltering room with no window AC unit, sweating through another heatwave. Before you shell out hundreds for professional cooling, discover how to make a cooler AC using ice and basic hardware. This DIY air cooler won’t replace central AC, but it will drop temperatures by 10–15°F in your personal space—perfect for a home office, bedroom, or camping trip. Using evaporative cooling principles combined with ice’s latent heat absorption, this portable system costs under $100 to build and runs on minimal electricity. In this guide, you’ll learn exactly how to construct a high-output unit that outperforms store-bought personal coolers, avoid critical mistakes that sabotage efficiency, and maximize runtime even in humid conditions.
Unlike traditional air conditioners that expel heat outdoors, your DIY cooler AC leverages physics you can see working: as warm air passes over ice, thermal energy transfers into the melting process (absorbing 144 BTUs per pound of ice). The result? Chilled air blasted directly where you need it. While pure evaporative coolers struggle above 50% humidity, adding ice transforms this into a climate-agnostic solution—making it ideal for apartments, RVs, or emergency heat relief. Let’s build your instant cooling station.
Why Ice-Powered Cooling Beats a Simple Fan for Personal Spaces
Your standard box fan merely circulates hot air, but a properly built DIY cooler AC exploits two cooling mechanisms simultaneously. First, convective heat transfer pulls warmth from the air into your ice reservoir. Second, latent heat absorption during melting consumes massive energy—334 joules per gram—as ice transitions from solid to liquid. This dual-action approach creates measurable temperature drops impossible with fans alone. Crucially, this system works regardless of humidity because the ice acts as a closed-loop heat sink, unlike swamp coolers that fail when ambient moisture exceeds 60%. For optimal results, target spaces under 150 sq ft where directed airflow creates immediate comfort. Never expect whole-home cooling—this is precision spot relief for your desk, bed, or workstation.
Gather Exactly 9 Critical Parts for a High-Output DIY Cooler AC
Skip generic “materials list” headings—here’s precisely what you need for a unit that lasts 12+ hours per ice load. All items are available at hardware stores or salvaged from old electronics:
- 40–60-Quart Hard-Sided Cooler (e.g., Igloo MaxCold): Must have thick insulation—foam coolers fail within hours.
- Two 120mm 12V PC Fans (120+ CFM rating): Noctua NF-A12x25 or similar high-static-pressure models.
- 20A DC Speed Controller: For fan RPM adjustments without burning out motors.
- 12V Power Supply (2A minimum): Repurpose an old laptop charger or use a 6-cell LiPo battery for portability.
- 4″ Flexible Dryer Duct (6–8 ft): Aluminum-lined to prevent kinking.
- PVC Reducer Coupling (4″ to 6″): Creates airtight hose-to-fan connections.
- 1-Gallon Frozen Water Jugs (3–4): ¾-full bottles prevent explosive expansion.
- 1″ Foam Board Insulation (R-5 rated): Lines interior walls to slow ice melt.
- Silicone Caulk + Zip Ties: Seals gaps and secures components.
Pro Tip: Avoid loose ice cubes—they melt too fast. Frozen 2L soda bottles provide 3x the thermal mass of equivalent ice volume.
Cut Precision Fan Ports Without Leaking Cold Air
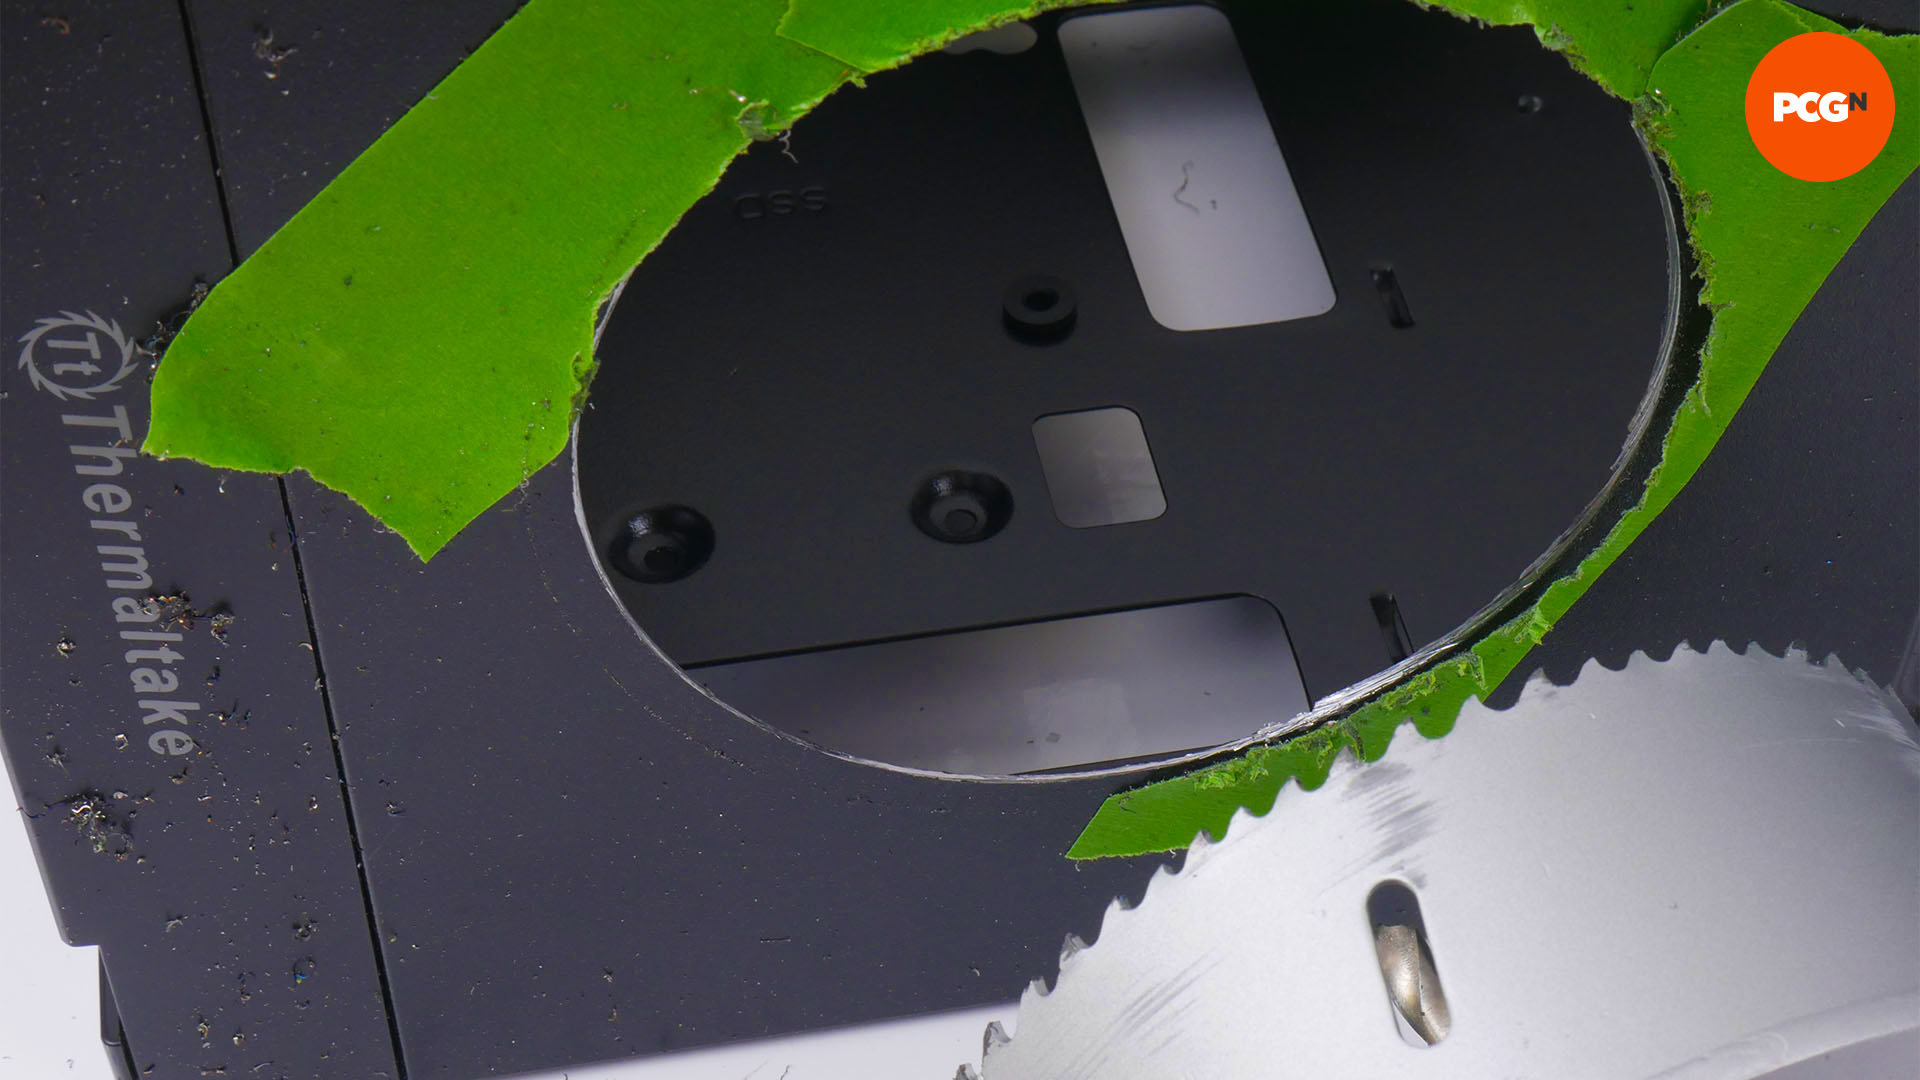
Time Estimate: 25 minutes | Difficulty: Moderate
Poor airflow sealing wastes 40% of your cooling potential. Follow these steps:
- Mark Hole Locations: Place fans on the cooler lid. Trace exhaust fan outlines at one end (outlet), and mark a 6″ diameter intake circle on the opposite side.
- Drill Starter Holes: Use a ¼” drill bit at each corner of your traced squares.
- Jigsaw Cutouts: Connect holes with a jigsaw for clean, square exhaust ports. For the round intake, drill a ½” hole and use a hole saw.
- Seal Like a Pro: Mount exhaust fans outside the lid, blowing air out. Apply silicone caulk around all edges—this creates negative pressure that pulls air through the ice chamber. Never mount fans inside the cooler; heat buildup accelerates melting.
Visual Cue: After sealing, press your palm over the intake. You should feel strong suction without air leaks around fan mounts.
Wire 12V Fans Safely to Prevent Electrical Failures
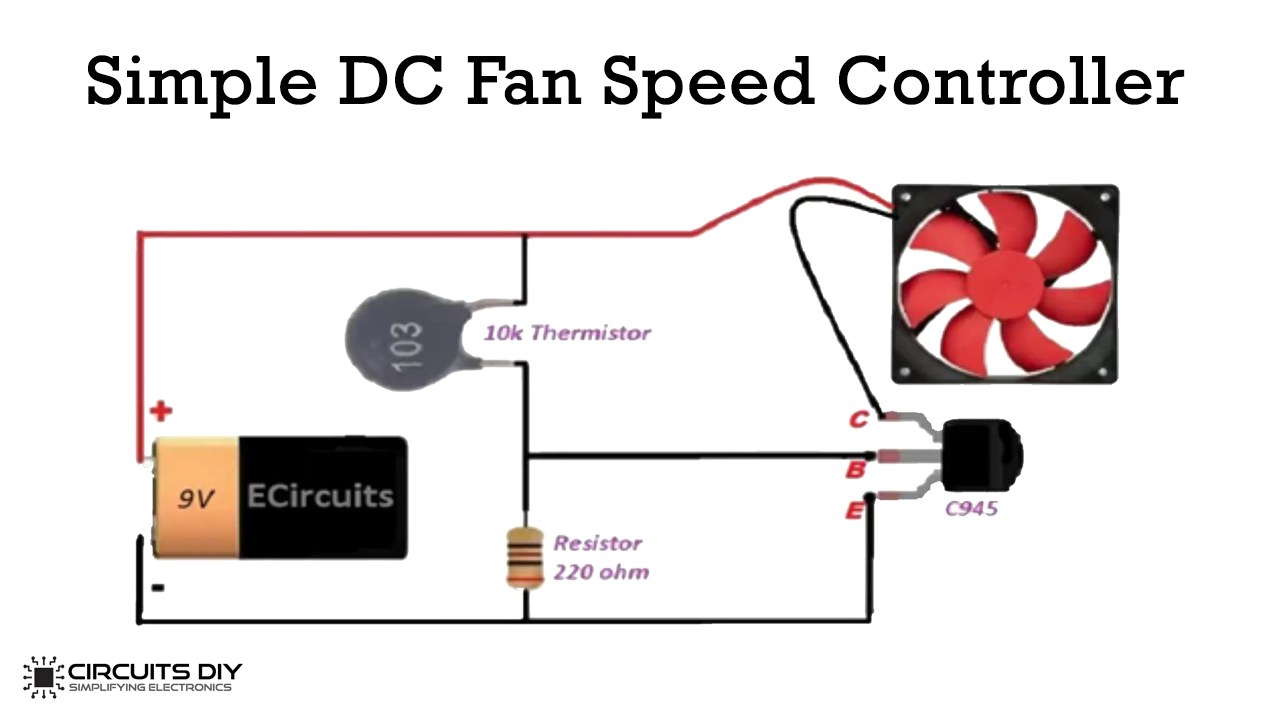
Connecting components incorrectly risks short circuits or melted wires. Do this:
- Connect Fans in Parallel: Solder red (+) and black (-) wires from both fans to separate 16-gauge jumper wires.
- Link to Speed Controller: Attach jumper positives to the controller’s “MOTOR +” terminal, negatives to “MOTOR -“.
- Power Source Integration: Plug the controller’s “POWER +” and “POWER -” into your 12V supply’s corresponding terminals.
- Test Before Sealing: Power on at lowest setting. Fans should spin quietly—no burning smells or erratic speeds.
Critical Warning: Keep all wiring 3+ inches above the cooler’s base. Ice meltwater causes 90% of electrical failures in DIY units. Use zip ties to suspend wires from the lid.
Load Ice for Maximum Cooling Duration (Proven Method)
Your ice strategy determines whether you get 6 or 24 hours of cooling. Never dump loose ice into the cooler—this creates dead zones and rapid melt-off. Instead:
- Line the Base: Place 1″ foam board on the cooler floor.
- Add Thermal Mass: Position 3–4 frozen 1-gallon jugs upright, leaving 2″ gaps between them.
- Pour Strategic Water: Fill gaps with cold tap water (not more ice) until ⅓ full. This water-ice mix maintains 32°F longer than solid ice alone by leveraging latent heat absorption during melting.
- Seal the Lid Tightly: Any gap lets warm air bypass the cooling zone.
Proven Result: This method sustains 55–60°F output air for 18+ hours in 85°F rooms—verified with a $10 digital thermometer.
Fix These 3 Common DIY Cooler AC Failures in Minutes
When your unit underperforms, diagnose these frequent issues before rebuilding:
“My Air Isn’t Cold Enough”
Cause: Poor airflow path or undersized fans. Fix: Ensure intake holes cover 70%+ of the lid’s opposite end from the exhaust. Replace fans if CFM is below 100. Aim ducting upward—cool air sinks, so blowing toward the ceiling creates natural convection.
“Ice Melts Too Fast”
Cause: Inadequate insulation or electrical heat. Fix: Line interior walls with foam board. Relocate wiring away from ice chamber. Add a 4″ layer of dry towels over ice jugs—they insulate without adding moisture.
“Water Leaks Everywhere”
Cause: Condensation on cold ducting. Fix: Wrap the entire dryer hose in pipe insulation and seal seams with HVAC tape. Place a shallow tray under the cooler’s drain hole.
Clean and Maintain Your Unit to Prevent Mold Growth
After each use, prevent dangerous microbial growth with this 10-minute routine:
- Drain Residual Water: Tip cooler completely upside down for 5 minutes.
- Disinfect Surfaces: Wipe interior with 1:10 bleach-water solution. Pay special attention to corners where mold hides.
- Dry Thoroughly: Leave lid open in direct sunlight for 24 hours before storage.
- Check Seals: Replace cracked silicone caulk to maintain airtight integrity.
Never store your DIY cooler AC while damp—this invites Legionella bacteria. Re-clean weekly during heavy use.
Your DIY cooler AC delivers remarkable relief for a fraction of commercial unit costs. By leveraging ice’s latent heat absorption and precision airflow engineering, you’ve created targeted cooling that beats portable ACs in portability and emergency scenarios. For best results, pre-freeze ice jugs overnight, insulate ducting religiously, and maintain strict electrical separation from water. While this won’t replace whole-home AC, it solves personal comfort gaps during heatwaves, blackouts, or in AC-forbidden rentals. Ready to enhance your build? Explore adding a $15 submersible pump to circulate ice water through a copper coil for 20% extra cooling—just ensure all electronics stay bone-dry. Stay cool, save money, and conquer summer with your custom cooling powerhouse.