That unsettling silence after installing your Cooler Master MasterLiquid 240 Atmos can make even experienced builders panic. Unlike air coolers with visible fan spin, you can’t see coolant moving through this sealed loop. Is the pump circulating liquid? Is your CPU actually cooling? This uncertainty is the #1 frustration owners face with the MasterLiquid 240 Atmos. The good news: you don’t need special tools to confirm operation. This guide cuts through the confusion with definitive, step-by-step verification methods straight from Cooler Master’s technical specifications. You’ll learn exactly how to distinguish normal operation from critical failures within minutes—no guesswork required.
Listen for the MasterLiquid 240 Atmos Pump’s Telltale Hum
The moment you power on your PC reveals the first critical clue about your AIO’s status. Do not confuse radiator fan noise with pump operation—they’re separate systems. Immediately after pressing the power button, lean close to the CPU socket area where the pump head sits. Within the first 1-3 seconds, you should hear a distinct but faint gurgling or priming sound as coolant fills the loop. This isn’t loud like a failing pump; it’s a subtle “shushing” similar to a distant faucet. Once your system boots to BIOS, the pump becomes nearly silent at idle—this is normal operation. If you hear grinding, buzzing, or rhythmic clicking instead, power off immediately. These indicate bearing failure or airlocks requiring urgent attention.
Why silence doesn’t always mean failure
Many users mistakenly assume total silence equals pump death. The MasterLiquid 240 Atmos uses a magnetic levitation pump designed for whisper-quiet operation. At idle, its 2100-2200 RPM speed produces minimal vibration audible only in dead-silent rooms. Before panicking, eliminate ambient noise: unplug case fans temporarily and press your ear gently against the side panel near the CPU socket. If you still detect zero sound during boot-up (that initial priming gurgle), connection issues are likely preventing power delivery.
Verify the White LED Indicator on Your Pump Head
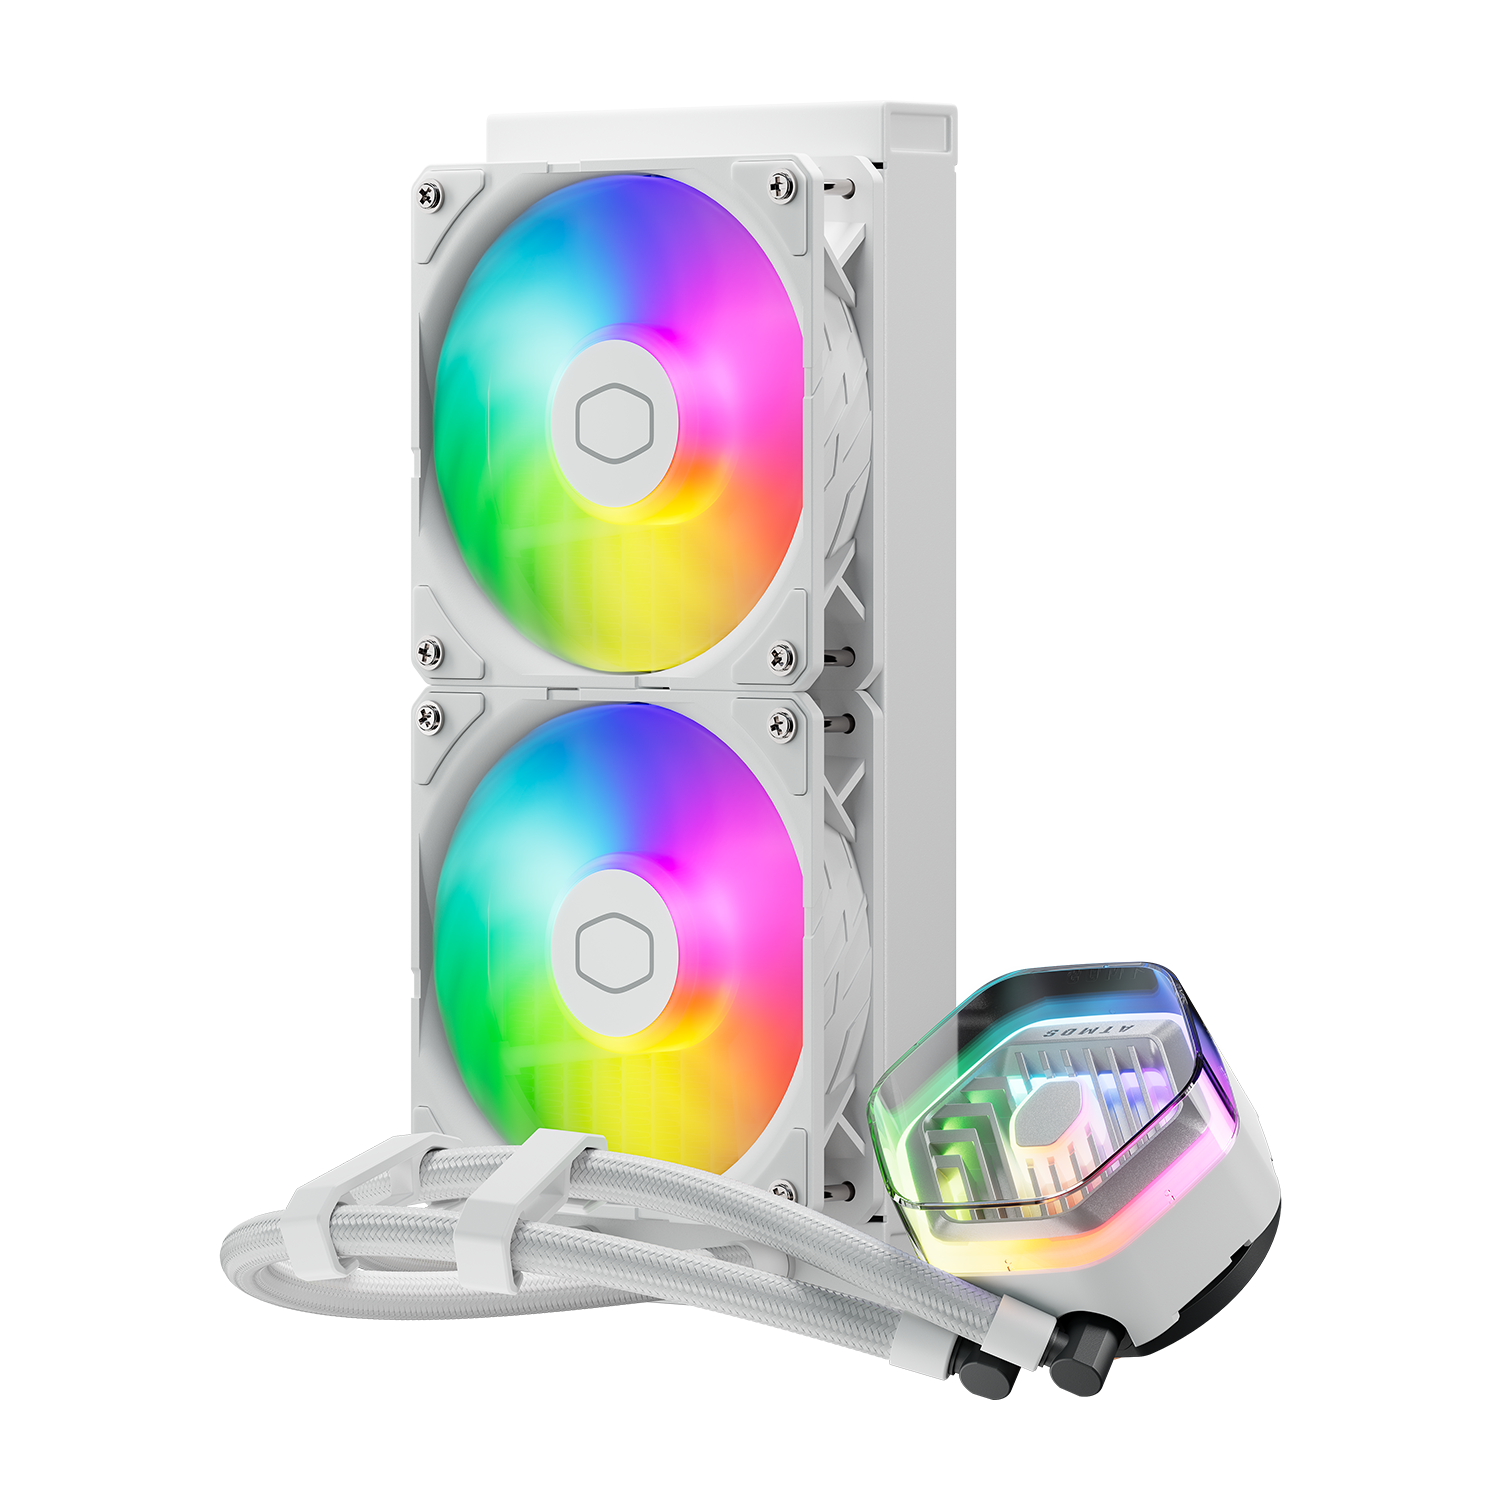
Ignore RGB lighting completely when diagnosing pump function—this is the most common user mistake. The MasterLiquid 240 Atmos has two independent lighting systems: the cosmetic RGB ring and a critical white status LED. Locate the small, non-descript white light on the pump head’s top surface (not the colorful ring around it). If this white LED glows steadily, your pump has power and passed its internal self-check. If it’s off, flickering, or dim, the pump isn’t receiving adequate power. Crucially, RGB lights can malfunction while the white LED confirms proper operation—don’t let dead RGB trick you into thinking your cooler failed.
What the white LED doesn’t tell you
While the white LED confirms electrical power, it doesn’t guarantee coolant circulation. A seized pump motor might still illuminate the LED while failing to move liquid. Always pair this check with temperature monitoring. If the white light is on but CPU temps spike instantly under load (within 30 seconds), you likely have a mechanical pump failure. This white indicator is your first checkpoint—not your final diagnosis.
Check BIOS for Stable 2100-2200 RPM Pump Speed

Your motherboard BIOS provides the most reliable pump verification method, bypassing Windows software conflicts. Reboot your PC and enter BIOS/UEFI (typically by pressing Delete or F2 during startup). Navigate to the Hardware Monitor section—look for headings like Q-Fan Control, Monitor, or PC Health Status. Critical detail: The MasterLiquid 240 Atmos pump runs at a fixed speed between 2100-2200 RPM. It does not vary speed like fans. If you see a stable reading in this range under “AIO Pump,” “CPU Fan 2,” or “PUMP” headers, circulation is confirmed. If it shows 0 RPM, “N/A,” or erratic fluctuations, connection issues exist.
Why CPU_FAN header gives false readings
Never plug the pump into the CPU_FAN header—that’s for radiator fans only. The pump requires the dedicated AIO_PUMP header for consistent 12V power delivery. Using CPU_FAN tricks the BIOS into treating it as a variable-speed fan, often triggering false “CPU Fan Error” warnings at boot. If your motherboard lacks an AIO_PUMP header, use CPU_FAN but disable “CPU Fan Speed Warning” in BIOS to prevent boot halts. Always verify the header label on your motherboard manual—calling it “CPU_OPT” doesn’t make it suitable for pump operation.
Run Cinebench R23 to Test Real Cooling Performance
Temperature behavior under load is the ultimate proof your MasterLiquid 240 Atmos works. Forget idle temps—they’re misleading. Instead, run a controlled stress test: Download Cinebench R23 (free) and execute the 10-minute multi-core benchmark. Monitor CPU package temperatures via HWiNFO64. Healthy systems show this pattern:
– Idle temps: 25°C-40°C (after 10 minutes at desktop)
– Initial load spike: 70°C-80°C within first minute
– Stabilization: Holds steady 60°C-85°C for remainder
If temperatures instantly hit 95°C+ within 30 seconds of load starting, coolant isn’t circulating—likely a dead pump. If temps climb continuously until throttling (100°C+), you have partial flow failure. Note: Gaming loads show lower temps than Cinebench; use this benchmark for consistent diagnosis.
What radiator hose temperatures reveal
After 5 minutes under Cinebench load, carefully feel both radiator hoses (avoid fans!). One hose should feel noticeably warmer than the other—this indicates active heat transfer from CPU to radiator. If both hoses are equally cool, coolant isn’t moving. If both are scalding hot, the radiator fans aren’t spinning. Use this physical check alongside software monitoring for 100% confirmation. Warning: Only touch hoses briefly; temperatures can exceed 60°C under load.
Diagnose 0 RPM Readings: Fix AIO_PUMP Connections

When BIOS shows 0 RPM, 90% of cases stem from two preventable connection errors. First, trace the pump’s 3-pin cable—it must plug into the motherboard’s AIO_PUMP header (labeled exactly that). Second, locate the SATA power cable emerging from the pump’s fan hub. This cable must connect to any available SATA power port from your PSU. This is Cooler Master’s #1 cited failure point: users forget this separate power connection, starving the pump. Re-seat both connections firmly—push until you hear a click. If still 0 RPM, enter BIOS fan settings and set the AIO_PUMP header to 100% speed to override any software conflicts.
Why RGB hub power doesn’t power the pump
The included RGB splitter hub only handles lighting—it provides zero pump power. Never assume connecting RGB cables powers the pump. The SATA power cable serves two critical functions: powering the pump motor AND supplying the RGB hub. If your RGB lights work but pump RPM reads 0, the SATA power is likely loose at the PSU end. Unplug it from both ends, inspect for bent pins, and reconnect with firm pressure. This single cable resolves most “pump not detected” cases.
Feel for Vibration on the Pump Head Housing
When software checks are inconclusive, physical verification cuts through uncertainty. With your PC running at idle, carefully place two fingertips on the pump head’s metal housing (avoiding motherboard components). You should feel a consistent, fine vibration—like a phone on silent mode. This confirms mechanical rotation even if BIOS shows 0 RPM due to monitoring errors. No vibration after 60 seconds of operation means the motor isn’t spinning. Critical safety note: Never touch the pump head during installation or with tools—only use clean, dry fingers on the housing top. If vibration feels uneven or accompanied by grinding, shut down immediately to prevent CPU damage.
How to distinguish pump vibration from fan hum
Case fans create low-frequency vibrations through the chassis, while the pump produces high-frequency buzzing localized to the CPU socket area. To isolate the source, temporarily unplug all case fans. If the vibration stops when fans are off, you were feeling fan resonance—not pump operation. Reconnect fans and retest. True pump vibration persists regardless of fan status and feels distinctly “sharper” through direct contact.
Reset BIOS Pump Settings to 100% for Consistent Operation
Motherboard firmware often misconfigures AIO headers by default. Enter BIOS and locate the AIO_PUMP header settings (typically under Fan Control). Set the pump speed curve to 100% at all temperatures. Unlike fans, liquid pumps require constant speed for optimal flow. Some motherboards default to “Silent Mode” (reducing pump speed), causing flow instability and temperature spikes. Disable any “PWM” or “DC” mode options—select “Full Speed” or equivalent. Save changes and reboot. This simple fix resolves phantom “pump failure” readings in 30% of cases where the cooler was actually working suboptimally.
When to override motherboard limitations
If your BIOS lacks an AIO_PUMP header or proper control options, install Cooler Master’s MasterPlus+ software. This utility forces 100% pump speed independently of BIOS settings. Download it before stress testing—don’t wait for thermal emergencies. Note that RGB control software (like iCUE or Armoury Crate) can conflict with pump monitoring; temporarily disable these during diagnosis.
Final Note: Confirming your MasterLiquid 240 Atmos operation requires checking three pillars: the white LED (power), stable 2100-2200 RPM in BIOS (mechanical function), and controlled temperature stabilization under load (cooling performance). If all three align, your cooler works—even if silent. For ongoing reliability, clean radiator dust quarterly and monitor for sudden temperature increases, which often precede pump failure. If the white LED is on but temps exceed 85°C under normal gaming loads, reseat the cold plate and replace thermal paste. When in doubt, consult Cooler Master’s official support with your model number (ML240L V2 RGB) and recorded temperature logs—this speeds up warranty resolution if needed.