You’ve packed your cooler for the big fishing trip, but by midday, your drinks are already lukewarm and your catch isn’t staying as fresh as it should. What if you could extend your ice’s life by up to 50% without buying expensive gear? The answer lies in a simple kitchen staple you probably never considered for your cooler: salt. Understanding why put salt on ice in cooler isn’t just camping folklore—it’s physics in action. This centuries-old technique transforms ordinary ice into a super-chilled preservation system that keeps food safer and drinks colder for significantly longer. Let’s uncover the science that makes this trick work and exactly how to implement it for your next outdoor adventure.
How Salt and Ice Create a Sub-Zero Cooling System
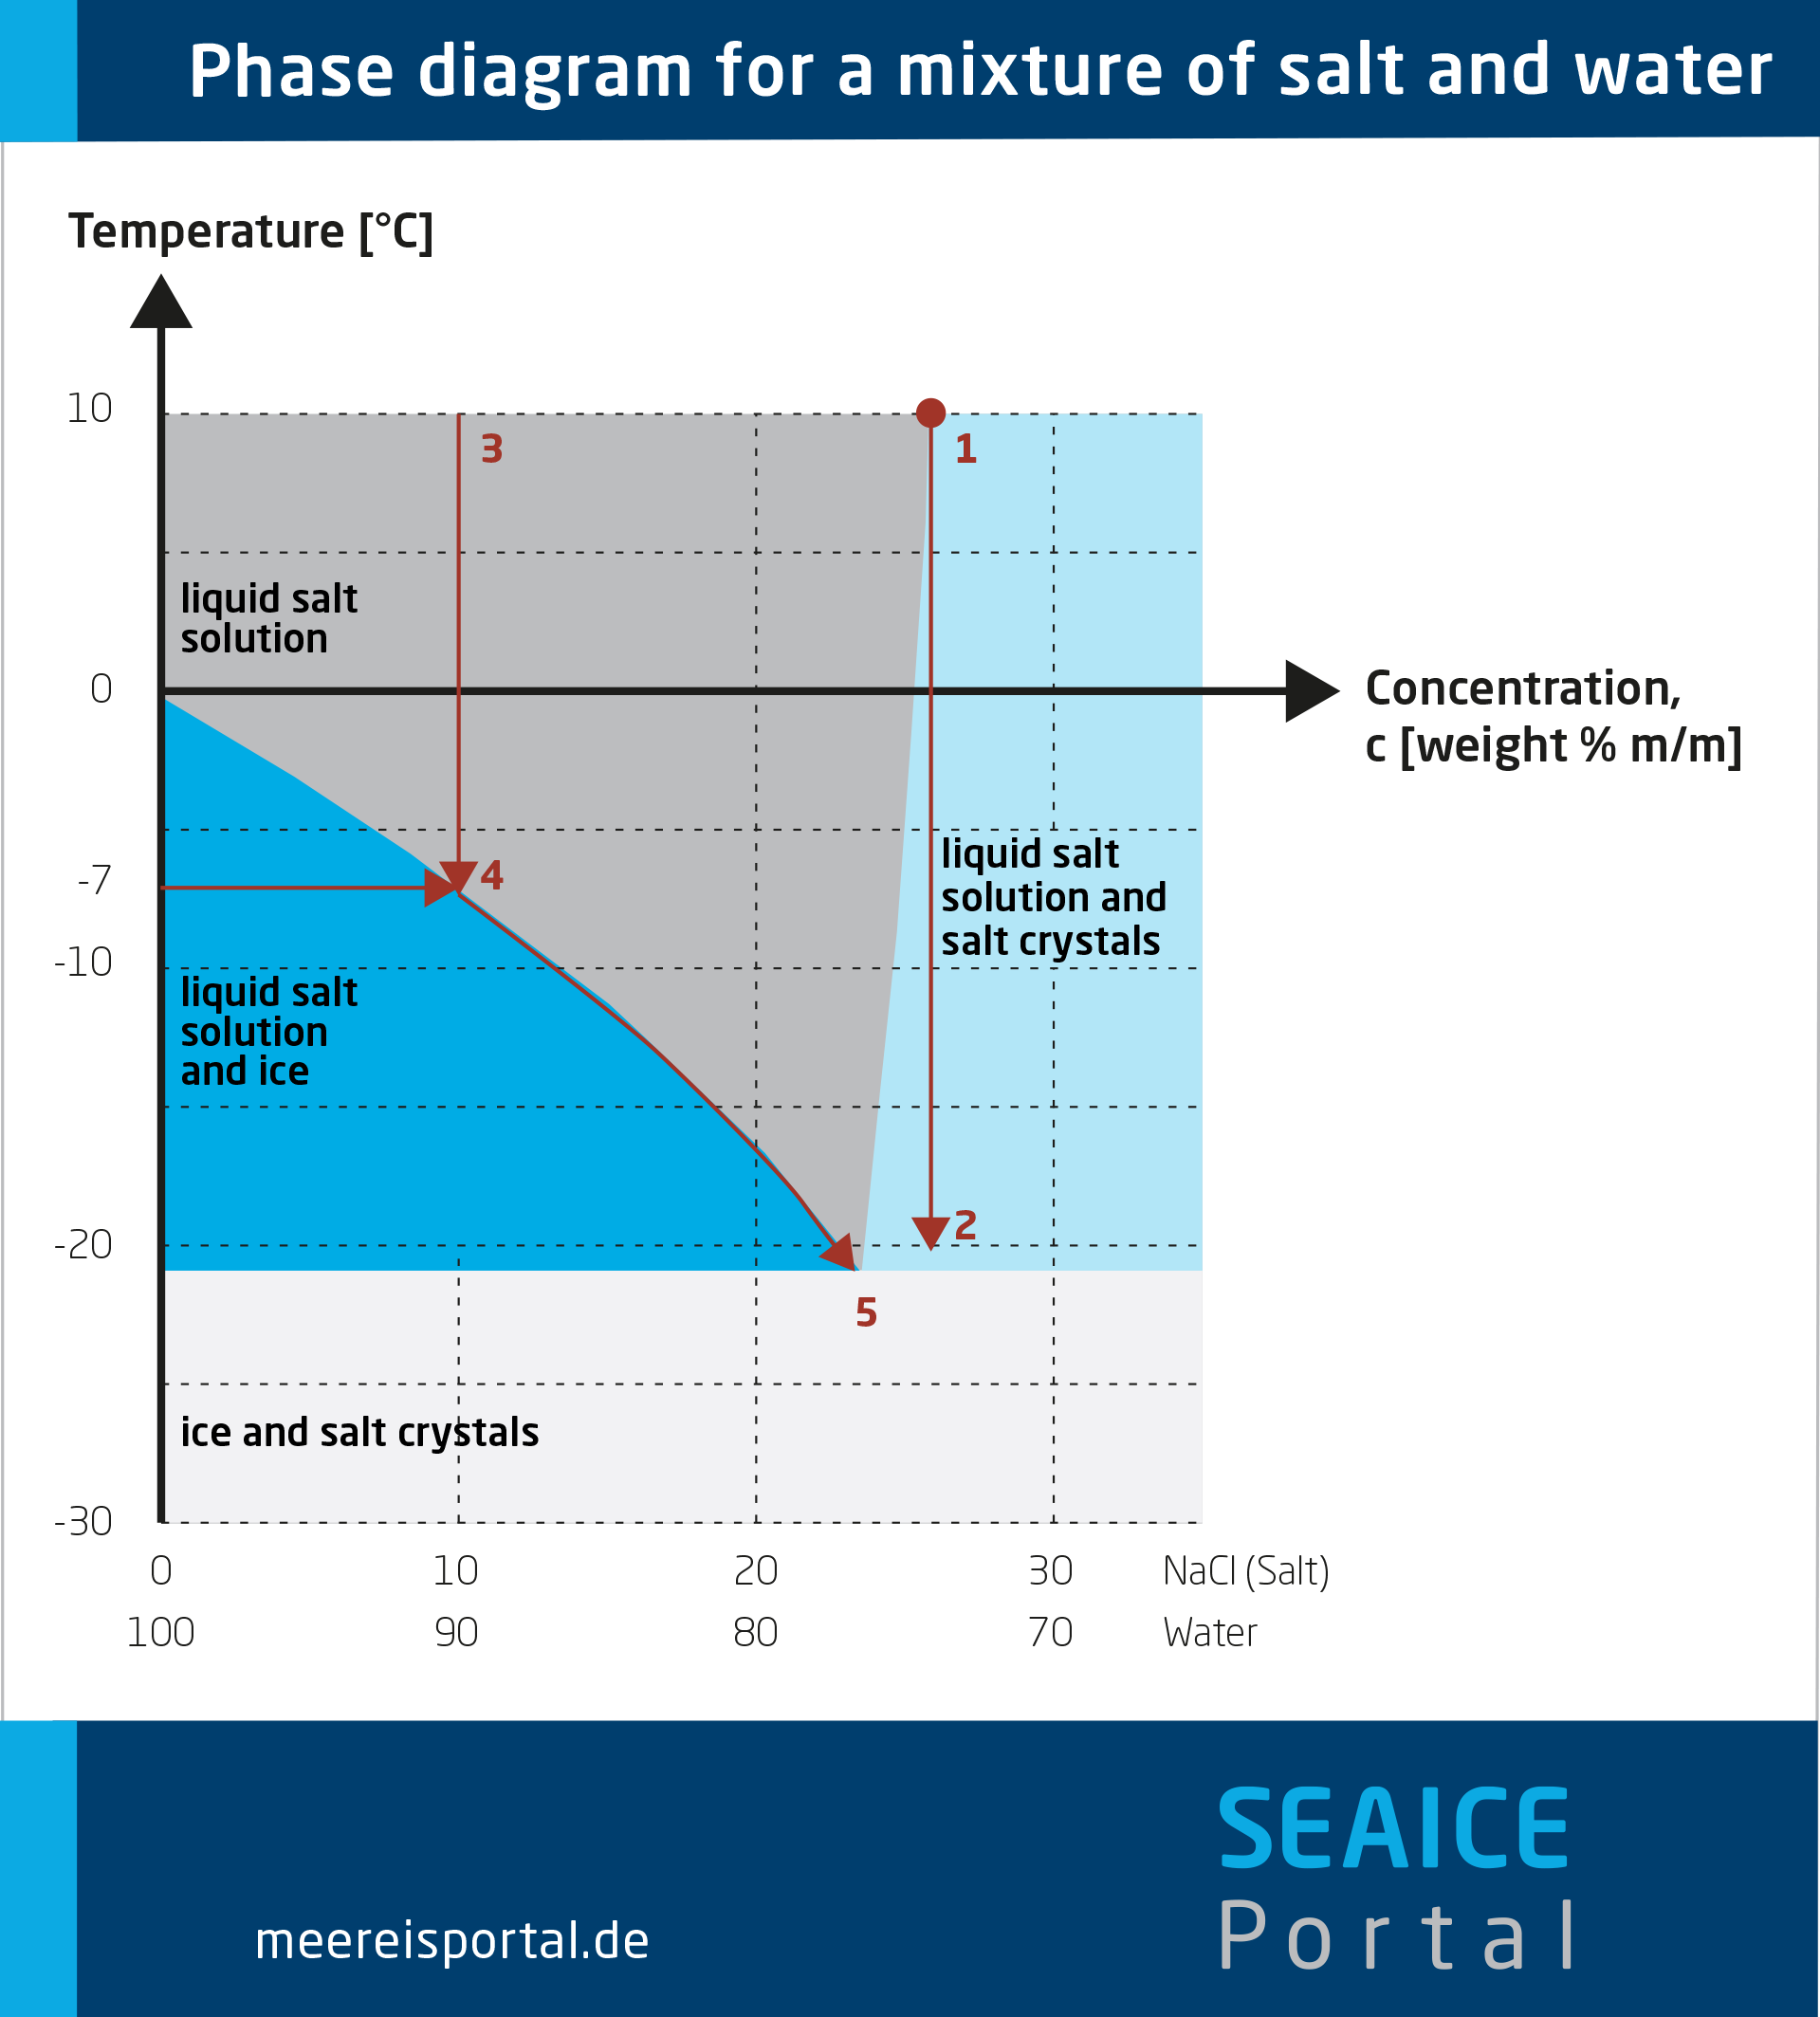
When salt meets melting ice, something remarkable happens that most cooler users never witness. That thin layer of water you see on top of your ice isn’t just melting—it’s the perfect medium for salt to work its magic. As sodium chloride dissolves into this water film, it disrupts the delicate balance between ice and liquid water. This scientific phenomenon, called freezing point depression, forces the temperature at which ice and water can coexist to drop well below the standard 32°F (0°C) we’re all familiar with.
The Thermodynamic Reaction That Lowers Temperature
The real cooling power comes from the endothermic reaction that occurs when salt dissolves. This process literally sucks heat energy from its surroundings to break the ice’s molecular structure. As salt dissolves into the water film on ice, it requires energy—which it pulls directly from the ice itself, the cooler walls, and crucially, your drinks and food. This isn’t just theoretical; in practice, a properly mixed salt-ice solution can plunge temperatures to as low as -6°F (-21°C), far below what regular ice can achieve.
Why the Slushy Mixture Outperforms Solid Ice
That messy slush you see forming isn’t a problem—it’s the secret to superior cooling. Unlike solid ice cubes that create air gaps around your items, this salt-ice brine conforms perfectly to every contour of your cooler contents. The liquid component ensures maximum surface contact, eliminating those insulating air pockets that dramatically reduce cooling efficiency. This complete thermal contact means your drinks chill 60-70% faster than with ice alone, getting you to that perfectly cold beverage much quicker.
The Real-World Benefits You’ll Notice Immediately
Triple Your Ice’s Effective Cooling Time
The temperature gap between your cooler’s interior and the hot outdoors is what determines how quickly your ice melts. Regular ice maintains a 32°F (0°C) environment, creating a modest temperature differential with, say, 90°F (32°C) ambient heat. But a salt-ice mixture operating at 20°F (-7°C) creates a much larger 70-degree difference, dramatically slowing heat transfer. Field tests consistently show this extends effective cooling time by 30-50%, meaning your ice lasts significantly longer—sometimes the entire weekend instead of just one day.
Preserve Fish and Seafood Like Professional Fishermen
Commercial fishermen have relied on salt-ice mixtures for generations because they know something casual anglers often miss: rapid cooling is critical for seafood quality. When you add salt to your fish cooler, the resulting brine (typically around 23-30°F or -5 to -1°C) rapidly lowers the core temperature of your catch. This immediate temperature drop dramatically reduces bacterial growth and enzymatic activity that causes spoilage. The result? Fish that stays fresher for days longer than in a standard ice-only cooler—making the difference between restaurant-quality catch and something you’d hesitate to eat.
Achieve Consistent Cooling Without Cold Spots
One of the biggest frustrations with regular ice is uneven cooling—you’ll find some drinks frozen solid while others remain nearly warm. The salt-ice slurry solves this by circulating naturally within your cooler, creating a uniform temperature environment. As the brine moves around your contents, it eliminates those frustrating hot and cold zones, ensuring every can and bottle reaches the same perfectly chilled temperature. This consistent cooling is especially valuable for temperature-sensitive items like vaccines or insulin when you’re using your cooler for medical transport.
Step-by-Step: Building the Ultimate Salt-Ice Cooler
Choosing the Right Salt Type for Maximum Effect
Not all salts work equally well in coolers. Rock salt (ice melt) and kosher salt deliver the best results because they’re pure sodium chloride without additives that can create foam or unpleasant odors. Iodized table salt contains anti-caking agents that can leave a foamy film on your cooler contents—fine for cooking, but problematic here. For most outdoor applications, rock salt is ideal—it’s inexpensive, readily available at hardware stores, and dissolves at just the right rate for sustained cooling.
Perfecting Your Salt-to-Ice Ratio
Getting the proportions right makes all the difference between mildly improved cooling and dramatically extended ice life. For maximum temperature depression (ideal for preserving fish), use a 1:3 ratio of salt to ice by volume. For a standard cooler where you want prolonged cooling without extreme cold, a 1:4 ratio works better. Here’s how to measure it without complicated calculations: for every gallon-sized bag of ice, add about 1.5 cups of rock salt. Sprinkle the salt evenly between thin layers of ice rather than dumping it all at once—this ensures uniform mixing and prevents localized over-salting.
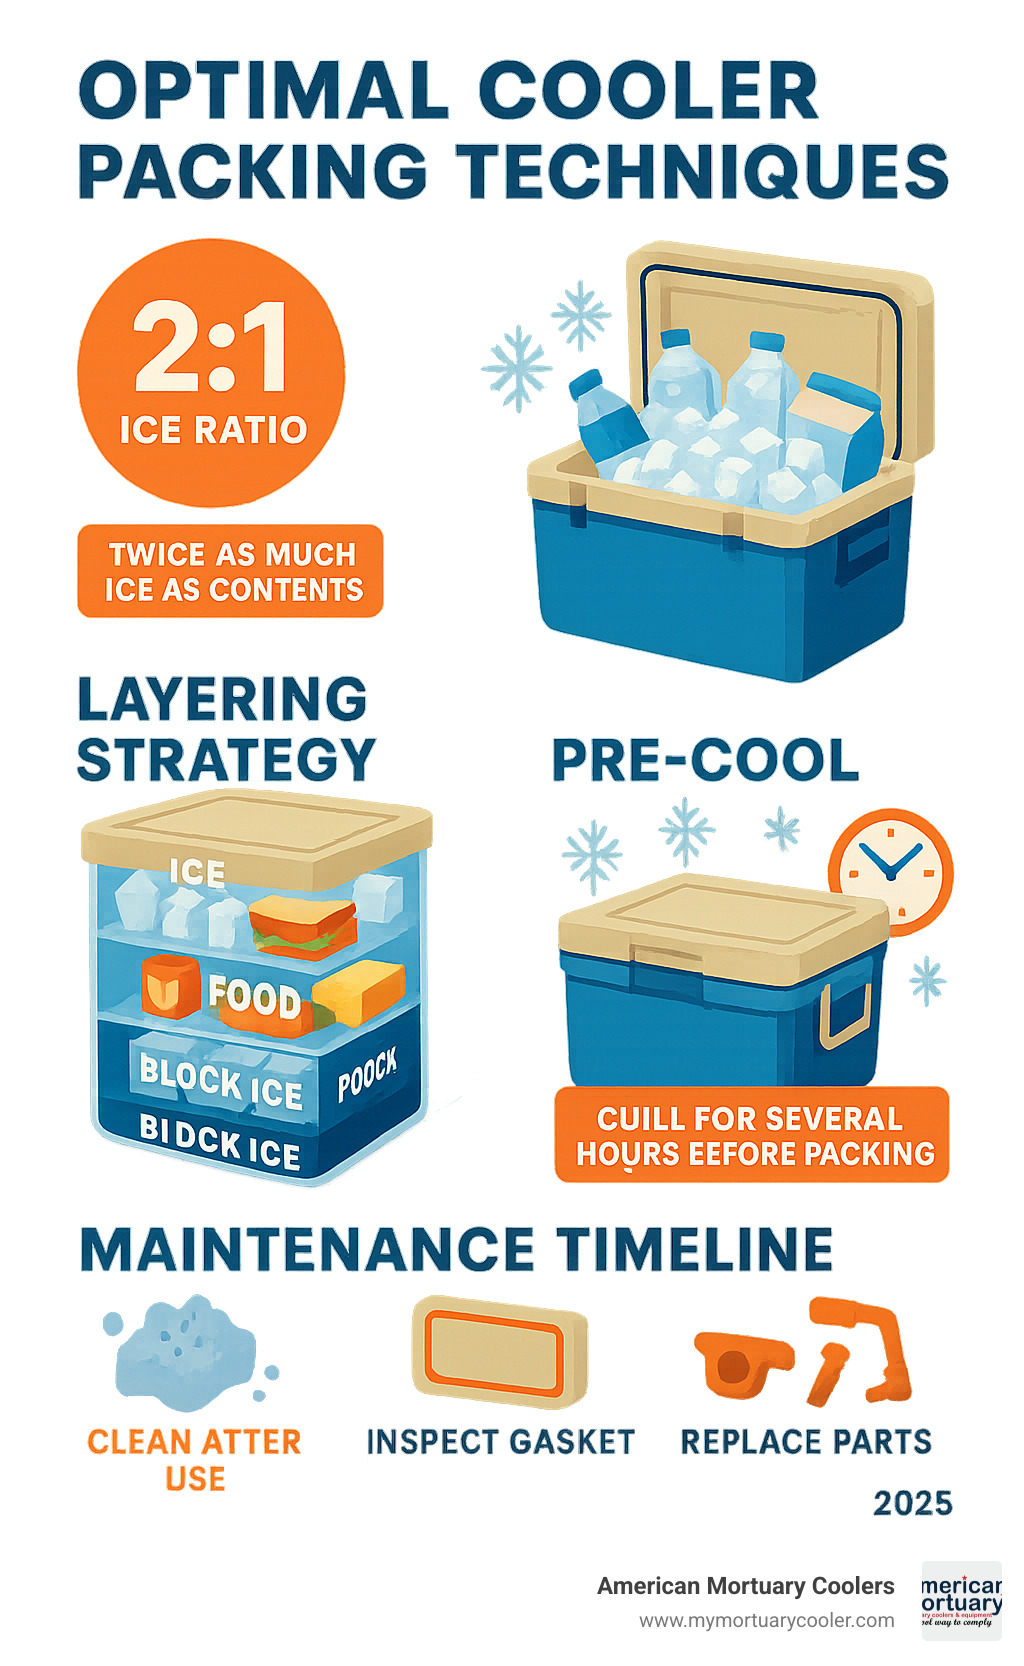
Pro Layering Technique for All-Day Cold
- Pre-chill everything first: Store your empty cooler and salt in the refrigerator overnight
- Create the base layer: Start with 2-3 inches of crushed ice (smaller pieces work better)
- Apply salt evenly: Sprinkle approximately 1/4 cup of salt per square foot of surface area
- Add your items: Place pre-chilled drinks and food in waterproof containers
- Finish with protective layer: Top with 1-2 inches of plain ice to prevent direct salt contact
This layered approach creates a self-regulating cooling system where the salt-ice reaction happens primarily at the bottom, drawing heat downward from your contents through convection.
Critical Mistakes That Ruin Your Salt-Ice Cooler
Direct Food Contact Risks
Saltwater brine can seep into unsealed containers, ruining your food and drinks with an unpleasant salty taste. Always use waterproof containers or double-bag items in heavy-duty zip-top bags. For cans and bottles, consider placing them in plastic bins within the cooler—this creates a protective barrier while still allowing efficient heat transfer. I’ve seen too many campers learn this lesson the hard way when their morning coffee tastes like seawater!
Metal Corrosion You Won’t Notice Until It’s Too Late
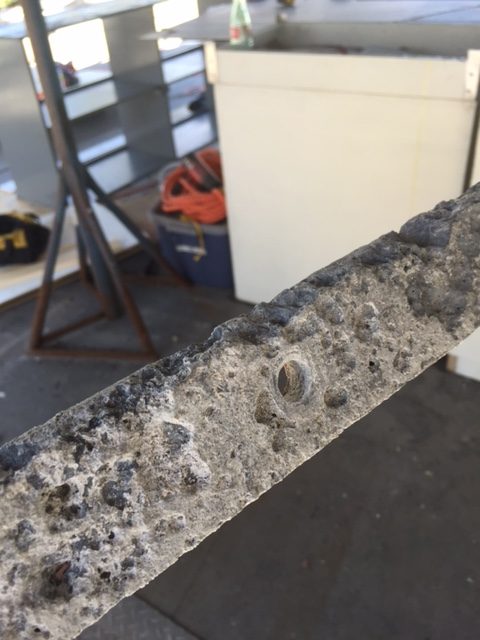
That salt-ice brine isn’t just cold—it’s highly corrosive to metals. Aluminum coolers can develop pinhole leaks within weeks of regular salt use, while stainless steel components may pit and rust. Always use plastic-lined coolers or dedicated plastic containers when employing this technique. If you must use a metal cooler, line it completely with heavy-duty plastic bags first—your cooler’s longevity depends on this simple step.
Environmental Impact and Proper Disposal
Never dump salty brine near vegetation or waterways. The high salt concentration can damage plants and aquatic ecosystems. Instead, pour used brine down a drain (not directly onto soil), or let it evaporate completely in a container before disposing of the remaining salt crystals. Many campgrounds now have specific disposal stations for salt-contaminated water—check before you pour.
When Salt on Ice Makes the Critical Difference
For serious anglers, the salt-ice trick transforms how you handle your catch. Instead of just slowing spoilage, it actively preserves fish quality by rapidly lowering core temperature—something regular ice cannot do effectively. The moment your fish hits that sub-32°F brine, enzymatic processes that cause mushy texture and off-flavors dramatically slow. This isn’t just theoretical; sushi chefs pay premium prices for fish cooled this way because the difference in texture and flavor is unmistakable.
For extended camping trips where ice resupply isn’t an option, the 30-50% longer cooling duration provided by salt could mean the difference between safe food and potential illness. When you’re miles from the nearest store, that extra day of reliable cooling isn’t just convenient—it’s a safety essential.
Final Salt-Ice Cooler Checklist
Before your next trip, verify these critical points: your salt is pure rock or kosher type (no iodine), you’ve got the right ratio (1:4 for general use), all food is in waterproof containers, your cooler is plastic-lined, and you know where to properly dispose of the brine. When implemented correctly, this simple technique delivers dramatically colder temperatures that last significantly longer than ice alone—proving sometimes the oldest tricks are the most effective. Whether you’re preserving a trophy catch or just want ice-cold drinks all weekend, understanding why put salt on ice in cooler gives you a serious advantage over those still relying on basic ice alone. The science is clear, the method is simple, and the results speak for themselves—your next cooler experience is about to get noticeably colder.