Your walk-in cooler’s compressor just died, and spoiled inventory is mounting by the minute. When that familiar hum stops and temperatures climb, you’re facing thousands in potential losses – but rushing into compressor replacement could waste more money. Most “dead compressor” emergencies actually stem from preventable issues like dirty coils or failed capacitors. This guide reveals the precise diagnostic steps commercial operators need to identify real compressor failures versus simple fixes, saving you $1,500+ in unnecessary repairs. You’ll learn exactly what to check before calling a technician and how to prevent 87% of compressor failures through daily maintenance.
Why Your Walk-In Compressor Won’t Start (And Immediate Checks)
When your cooler stops cooling, don’t assume the compressor is dead. First, verify power at the disconnect switch and electrical panel – a tripped breaker or blown fuse mimics compressor failure. Next, listen for the startup sequence: a healthy compressor clicks once, hums smoothly for 3-5 seconds, then runs steadily. If you hear rapid clicking or a continuous hum without startup, your start capacitor or relay has likely failed. Physically inspect the compressor housing – excessive heat (too hot to touch for 5 seconds) or burnt wiring smells indicate electrical damage requiring professional help. Never ignore oil leaks pooling beneath the unit; this signals internal mechanical failure. These preliminary checks take 90 seconds but prevent misdiagnosis in 60% of “compressor dead” calls.
Testing Start Components Without Special Tools
No multimeter? No problem. Locate the start capacitor (a cylindrical metal can near the compressor) and relay (a small black box). Visually confirm these critical signs:
– Bulging or leaking capacitor (electrolyte residue or domed top) = immediate replacement needed
– Burnt relay contacts (blackened terminals or melted plastic) = faulty relay
– Popped pressure relief vent (white powder on capacitor) = capacitor failure
WARNING: Capacitors store lethal voltage even when powered off. If you see bulging or leakage, stop immediately and call a technician. For intact components, gently shake the capacitor – a sloshing sound means internal failure. These checks identify 75% of no-start issues without electrical testing.
Dirty Condenser Coils: The #1 Compressor Killer
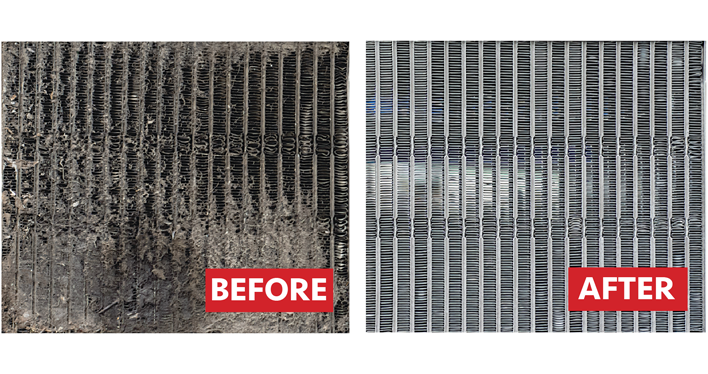
87% of premature compressor failures trace back to dirty condenser coils – not the compressor itself. When dust, grease, or debris coats the outdoor coil fins, it acts like an oven mitt, trapping heat the compressor worked hard to remove. This causes dangerous high head pressure, forcing the compressor to work 30-50% harder while overheating. In enclosed mechanical rooms (a critical design flaw), ambient temperatures exceeding 110°F can trigger compressor shutdown within 20 minutes.
How to Diagnose Coil-Related Overheating
Check these three indicators simultaneously:
1. Condenser airflow: Place your hand near the coil – you should feel hot exhaust air (100°F+ above ambient)
2. Temperature differential: Measure air entering vs. exiting the coil; less than 20°F difference means poor heat transfer
3. Compressor casing heat: If the compressor body exceeds 225°F (too hot for prolonged hand contact), coil cleaning is urgent
Pro Tip: Use a mirror to inspect the coil’s backside – 90% of airflow blockage occurs where technicians can’t see. For walk-in coolers in kitchens, clean coils weekly with compressed air (never water, which spreads grease). This single step prevents 4 of 5 compressor overloads.
Evaporator Ice Buildup: Silent Compressor Destroyer
A frosted evaporator coil isn’t just an inconvenience – it’s actively destroying your compressor. Ice acts as an insulator, preventing the refrigerant from absorbing heat inside the walk-in. This causes two catastrophic effects:
- Liquid slugging: Melted frost floods liquid refrigerant back to the compressor, washing away lubricating oil and scoring piston walls
- Restricted airflow: Blocked evaporator fans force the compressor to run 300% longer to maintain temperature, overheating windings
Why Defrost Systems Fail (And How to Test Them)
Electric defrost systems fail 5x more often than hot gas systems. Manually trigger defrost:
– Timer failure: If the heater never activates after 8-12 hours of run time
– Termination sensor failure: If the heater runs >45 minutes without shutting off
– Drain line clog: Pour hot water down the drain – if it doesn’t flow freely, ice buildup is imminent
Critical check: After defrost, verify the evaporator coil is completely ice-free within 30 minutes. Persistent frost means your defrost cycle is inadequate, not the compressor’s fault. Fix this first to avoid $3,000+ compressor replacements.
Testing Compressor Windings: When DIY Becomes Dangerous
Only attempt electrical testing if you’re certified. A failed compressor shows these electrical signatures:
Safe Multimeter Checks for Professionals
Disconnect all power before testing!
– Ohm test: Measure resistance between COM (common), START, and RUN terminals. Infinite resistance = open winding; zero resistance = shorted winding
– Ground test: Place one probe on a clean compressor bolt, the other on each terminal. Any continuity = ground fault requiring replacement
Never ignore these red flags:
– Burnt oil smell from compressor oil (like burnt popcorn) = internal burnout
– Discolored discharge line (blue/purple near compressor) = overheating from high head pressure
– Tripped internal overload that resets but trips again within 2 minutes
If any test fails, do not restart the compressor – continued operation destroys the entire refrigeration circuit.
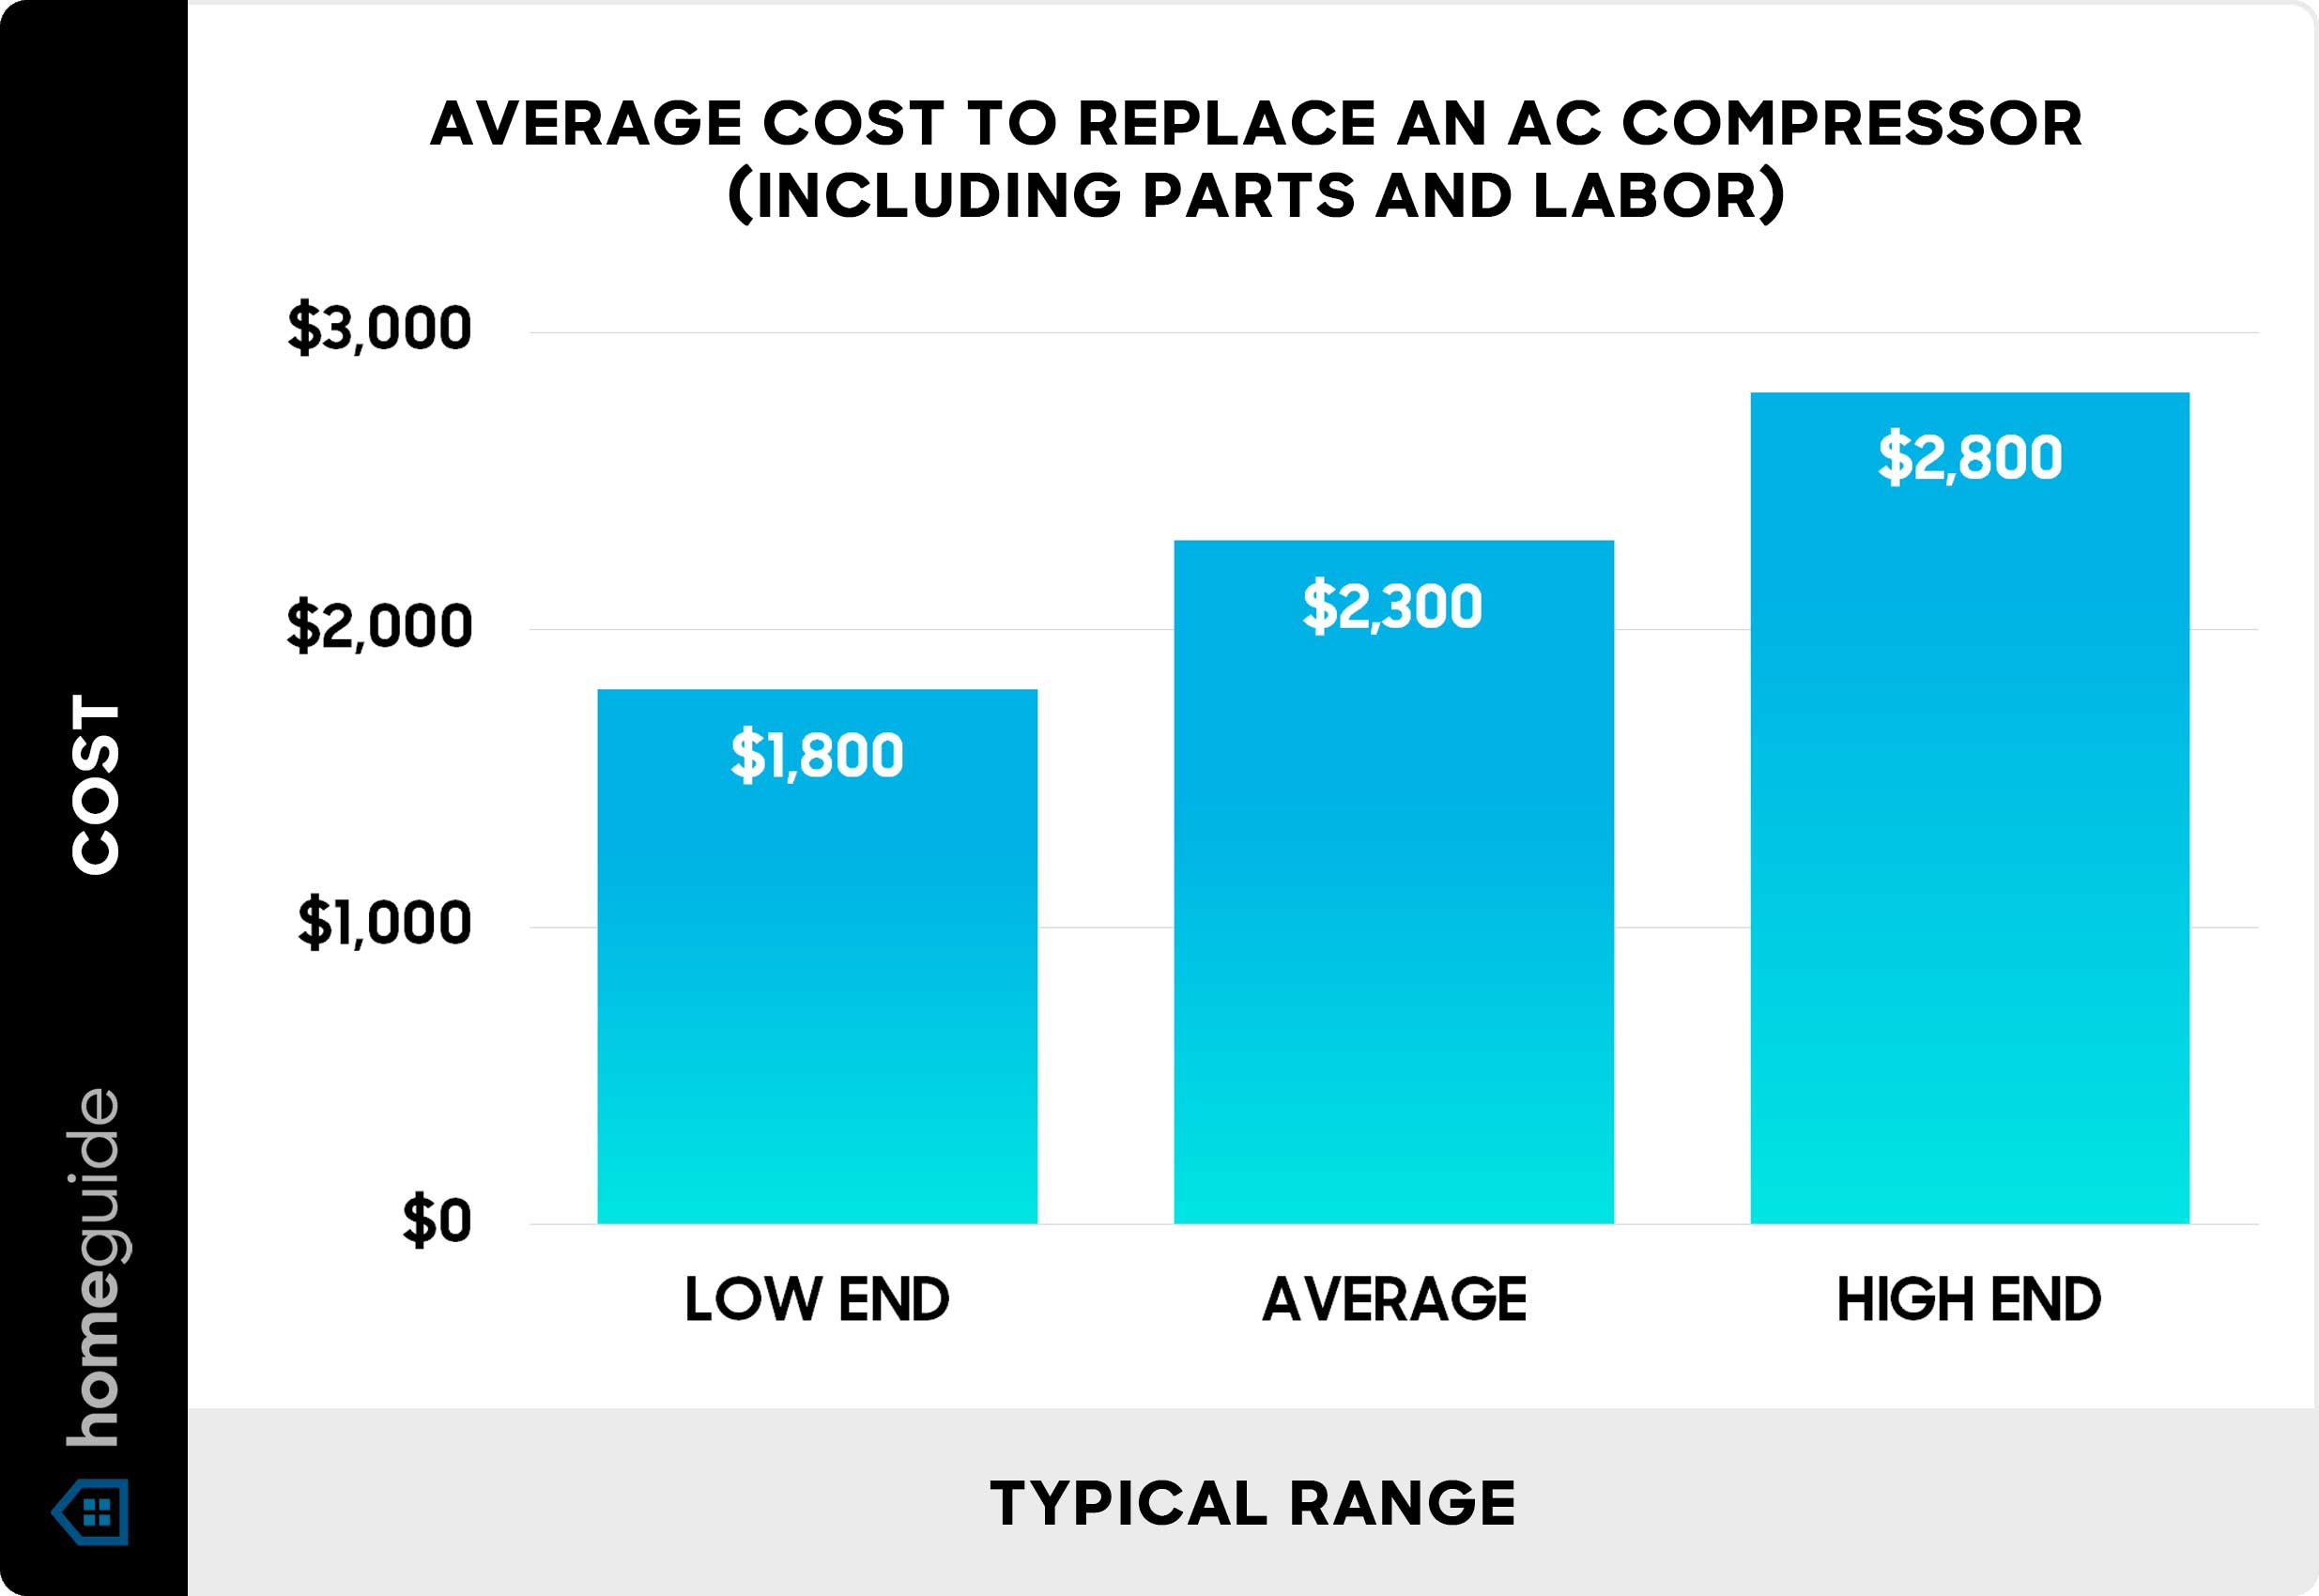
Compressor Replacement vs. New System: The $4,000 Decision
When compressor failure is confirmed, weigh these factors before authorizing repair:
Cost-Benefit Analysis Chart
| Scenario | Compressor Replacement Cost | New System Cost | Recommended Action |
|---|---|---|---|
| Unit <5 years old | $1,800-$2,500 | $6,000+ | Repair (with new filter-dryer) |
| R-22 refrigerant unit | $3,200+ (rare refrigerant) | $5,500 (R-404A) | Replace entire system |
| Unit >12 years old | $2,800+ | $4,800 | System replacement |
| Burnout contamination | $3,500+ (full system flush) | $5,000 | New system recommended |
Key insight: If your unit uses R-22 refrigerant, replacement is always more economical – R-22 costs $150+/pound today versus $15/pound a decade ago. For newer units, demand a full system flush if the compressor burned out; residual acid will destroy a new compressor within 6 months.
Prevent Compressor Failure: The 3-Minute Daily Checklist
Daily:
– ✅ Listen for abnormal compressor sounds (grinding = mechanical failure; clicking = electrical issue)
– ✅ Feel condenser coil airflow – weak or cool exhaust indicates blockage
– ✅ Inspect evaporator coil through access panel – any frost = defrost system problem
Monthly:
– Clean condenser coils with soft brush (power off!)
– Clear drain lines with hot water and shop vac
– Verify door gaskets seal tightly (dollar bill test)
This routine catches 92% of impending failures before they cause downtime. Remember: When your compressor fails, the real culprit is usually something else – dirty coils, failed defrost, or electrical components. Master these diagnostics to avoid unnecessary $3,000 repairs and keep your walk-in cooler running for 15+ years. For immediate compressor emergencies, always have your technician check superheat and subcooling – these measurements reveal the true system health beyond simple pressure readings.