You’ve packed your cooler with ice, loaded it into the car, and by the time you reach your campsite, half the ice has melted. By day two, everything’s lukewarm and potentially unsafe. This frustrating scenario happens to 8 out of 10 campers who don’t know how to use cooler properly. The problem isn’t your cooler—it’s your packing technique. A cooler isn’t just an icebox; it’s a temporary refrigeration system that requires strategic preparation. When you master the science of thermal management, you can transform a standard cooler into a reliable cold storage solution that keeps food safe for 5+ days. This guide reveals the exact methods professional campers use to maximize ice retention and keep food perfectly chilled throughout their adventures.
Why Standard Packing Methods Fail Within 24 Hours
Most campers make the same critical mistake: they treat coolers like refrigerators that magically stay cold. In reality, your cooler’s performance depends entirely on how you prepare and pack it. When you load room-temperature food into a warm cooler, the ice must work overtime to cool both the contents and the cooler itself. This creates an immediate heat debt that depletes your ice supply before your trip even begins. The solution isn’t more ice—it’s smarter ice management combined with proper pre-chilling techniques that create a stable thermal environment from the start.
The Heat Debt Principle That Melts Your Ice
Every degree of warmth in your cooler or contents represents energy that must be removed by your ice. A cooler taken from a hot garage starts with significant heat debt. Similarly, each warm soda or room-temperature steak you add introduces additional heat that actively melts your ice. Professional campers understand that successful cooling begins 24 hours before departure with strategic pre-chilling of both the cooler and all contents. This fundamental principle transforms your cooler from an ice-melting machine into an efficient cold storage system.
Rotomolded vs. Standard Coolers: Which Is Right for Your Trip?

Your cooler type directly impacts how long you can keep food cold, but expensive doesn’t always mean better for your specific needs. Rotomolded coolers like Yeti, RTIC, and Orca feature thicker insulation and superior construction that can maintain ice for 5-7 days—perfect for extended backcountry trips. These premium models function as long-term investments for serious outdoor enthusiasts but come with significant weight and cost (often $300+).
Standard Coolers That Still Deliver Solid Performance
For weekend trips or car camping, standard insulated coolers provide excellent value. These models use foam insulation within a plastic shell and can maintain cold temperatures for 2-5 days with proper ice management. While they’re more affordable and widely available, they require more strategic packing to maximize ice retention. The key isn’t necessarily spending more—it’s understanding how to use cooler properly regardless of the model you own. A well-packed $50 cooler will outperform a poorly packed $300 model every time.
The Critical Pre-Chill Step 90% of Campers Skip
Pre-chilling isn’t optional—it’s the foundation of successful cooler performance. Your cooler itself acts as a heat sponge that must be cooled before it can effectively preserve your ice. Simply storing your cooler in a cool place for 12-24 hours helps, but the professional method involves filling it with “sacrificial ice” (typically two bags of crushed ice) and closing the lid for at least 12 hours before your trip. This chills both the insulation and the plastic walls, eliminating the initial heat debt.
Pre-Chill All Contents Like a Pro
Your food and drinks need pre-chilling just as much as the cooler itself. Meats, dairy, and other perishables should spend the night in the refrigerator or freezer. Beverages should be refrigerated beforehand—never load room-temperature drinks. Freeze water bottles or other beverages that can withstand freezing; they’ll serve dual purposes as both cooling agents and drinking water as they melt. This preparation ensures your ice focuses on maintaining cold temperatures rather than cooling warm items, extending ice life by up to 50%.
Block Ice vs. Cubes: The 50% Longer Ice Retention Secret
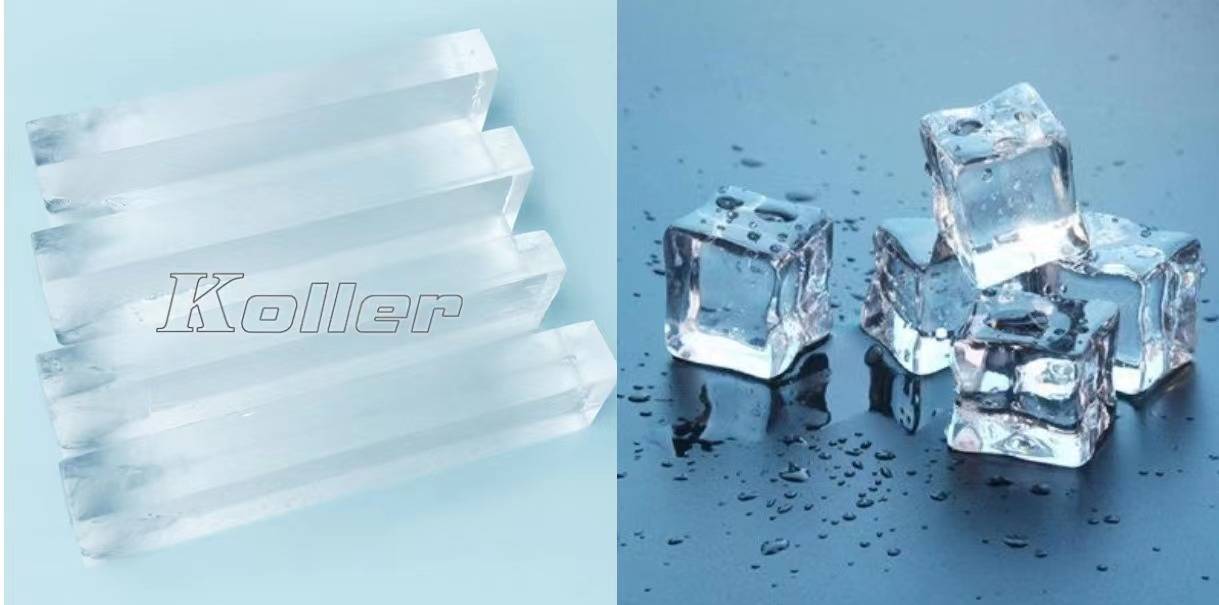
The type of ice you use dramatically impacts how long your cooler stays cold. Cubed or crushed ice has high surface area, which chills items quickly but melts significantly faster. Block ice, with its smaller surface-area-to-volume ratio, melts up to 50% slower than cubed ice. Smart campers make their own block ice by freezing water in takeout containers or 2-liter soda bottles—a simple technique that transforms cooler performance.
Strategic Ice Layering for Maximum Efficiency
Start with a bottom layer of block ice or frozen water bottles to create a “cold sink.” This foundation provides stable, long-lasting cooling. Pack your heaviest, most perishable items (like raw meats) directly on this cold base. Then fill all remaining spaces with cubed or crushed ice to eliminate air pockets. The cubes fill gaps better while the blocks provide sustained cooling—this layered approach creates thermal mass that maintains cold temperatures far longer than using either ice type alone.
Dry Ice Safety: How to Use -109°F Cooling Without Frostbite
For extreme cold retention (keeping items frozen for days), dry ice can be incredibly effective—but it requires careful handling. Dry ice operates at -109°F, which can cause severe frostbite on contact with skin. Always handle it with thick gloves and place a towel over it before adding food. Crucially, never seal dry ice in an airtight container or enclosed space, as it releases carbon dioxide gas that can build up to dangerous levels.
Dry Ice Placement Strategy
Place dry ice at the bottom of your cooler beneath a protective layer (like a towel or cardboard). This creates intense cold at the base where cold air naturally settles. Use only a small amount (2-5 pounds for a standard cooler)—too much can freeze your food solid. Monitor internal temperatures with a thermometer to ensure food stays safely cold without freezing. This technique is ideal for extended trips where maximum ice retention is critical.
The Strategic Packing Method That Keeps Food Cold for 5 Days
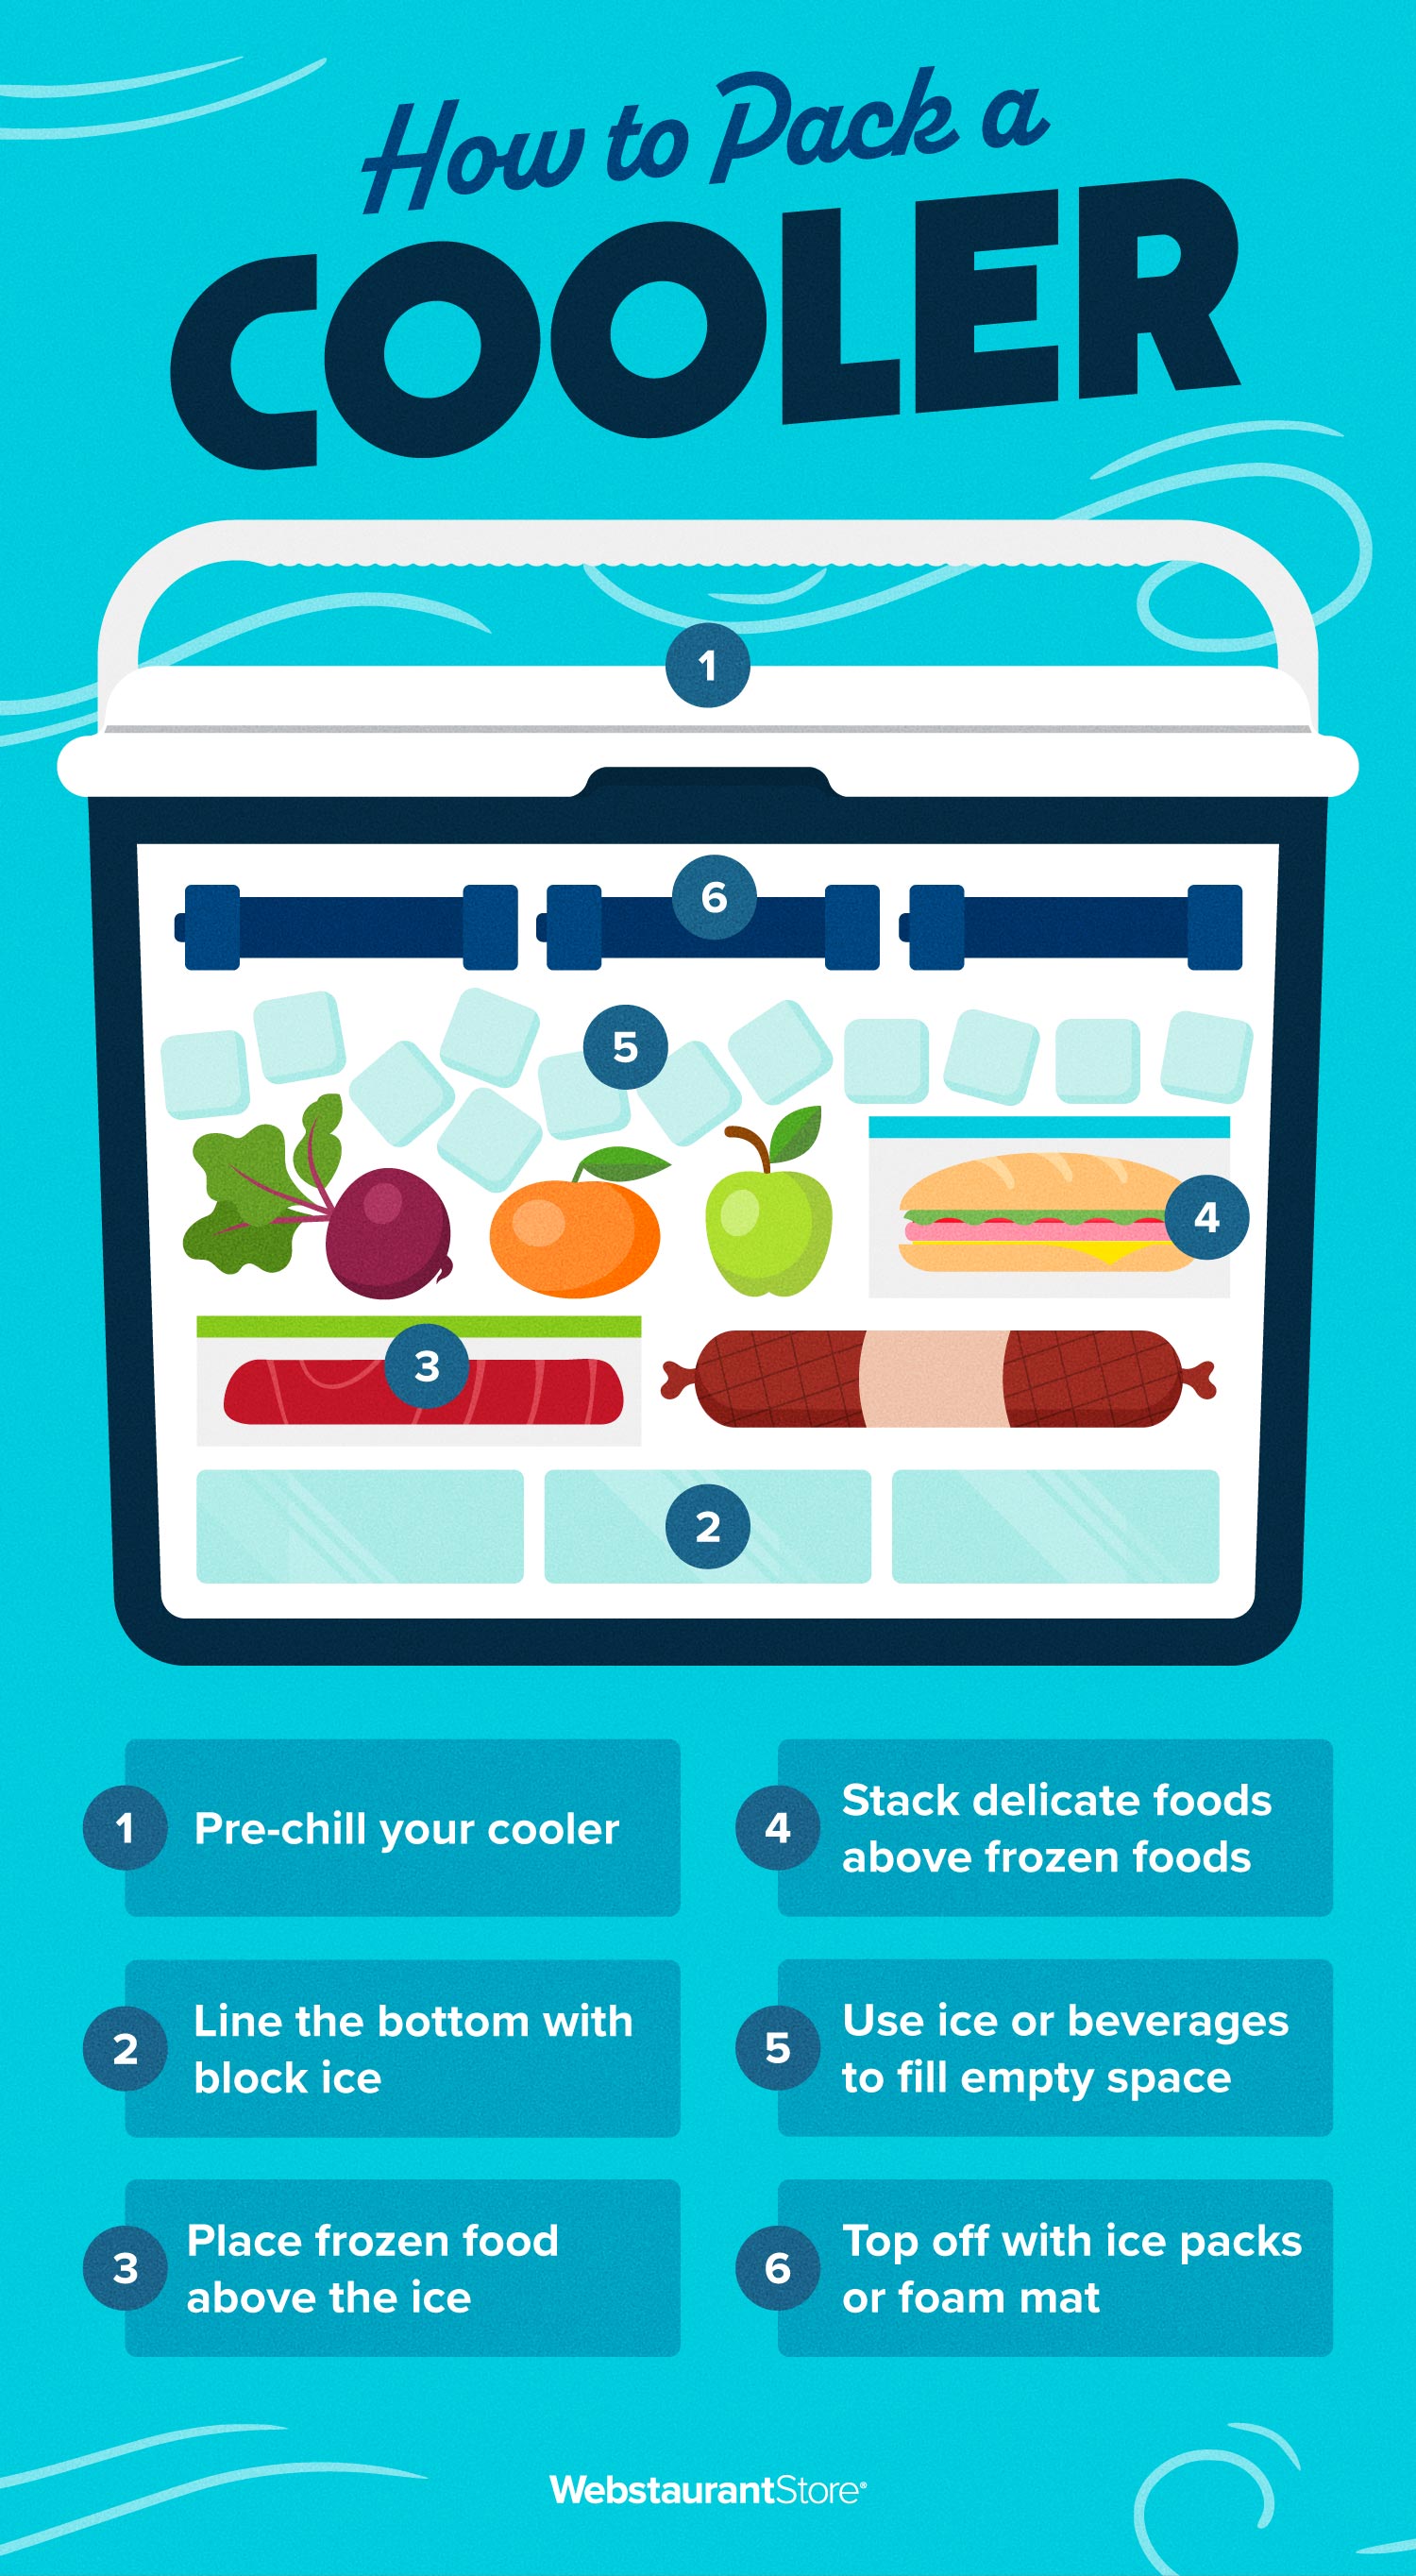
Packing a cooler properly is a science, not an art. Start with your pre-chilled block ice foundation. Place the heaviest, most perishable items (raw meats, fish, dairy) directly on the ice layer—cold air sinks, so these items benefit most from direct contact with the coldest surface. Next, add less perishable items like cheeses and vegetables. Fill every remaining space with cubed ice to eliminate air pockets, which accelerate melting by allowing warm air circulation.
The 2-Cooler Rule for Multi-Day Trips
For trips lasting more than 24 hours, use a separate small “day cooler” for frequently accessed items like drinks and lunch supplies. This prevents you from opening your main food cooler multiple times per day—the #1 cause of rapid ice melt. Limit main cooler openings to 2-3 times daily, retrieving everything you need in one go. This simple strategy can double your ice retention time by preventing warm, humid air from repeatedly entering the main cooler.
Meltwater Management: Drain or Keep? The Science-Backed Answer
Cold water conducts heat better than air, so a small amount of meltwater can actually help maintain consistent temperatures. However, excessive water submerges food and creates safety concerns. The solution depends on your trip length: for short trips (1-2 days), keep the water as it helps maintain thermal mass. For longer trips, use your cooler’s drain plug to remove excess water periodically, preventing food saturation while maintaining some thermal benefits.
The Evaporative Cooling Hack for Extreme Heat
On scorching days, cover your cooler with a wet towel or blanket. As the water evaporates, it draws heat away from the cooler surface through evaporative cooling—a natural process that can lower surface temperatures by 10-15°F. Keep the cooler in complete shade, away from direct sunlight and heat sources like car engines. These simple environmental adjustments significantly reduce the thermal load on your cooler, extending ice life without additional ice.
Post-Trip Cooler Care: Prevent Mold and Musty Smells
Proper cleanup ensures your cooler performs well on future trips. Immediately after your adventure, drain all remaining water and clean the interior with a mild bleach solution (1 tablespoon bleach per gallon of water). This prevents mold and mildew growth in the moist environment. Rinse thoroughly and dry completely with the lid open before storage. Leaving the drain plug open during storage prevents musty odors by allowing air circulation.
By implementing these science-backed techniques for how to use cooler properly, you’ll transform your cooling experience. The difference between a failed cooler and one that keeps food safe for 5+ days comes down to preparation, strategic packing, and understanding thermal principles. Start applying these methods on your next trip, and you’ll never struggle with melted ice again.