That cardboard box you set out for stray cats won’t survive the first snowstorm. When temperatures plummet, community cats need serious insulation—something that traps body heat while blocking wind and moisture. A styrofoam cooler transformed into a cat shelter provides 5x the thermal protection of plastic bins, keeping cats safe down to -20°F. In this guide, you’ll learn how to build a weatherproof, draft-free shelter using one $5 cooler and common household supplies. You’ll discover why straw is non-negotiable for bedding, how to cut entrances without collapsing walls, and critical fire-safe heating solutions most DIY guides dangerously omit. Within 90 minutes, you’ll have a shelter that could save a cat’s life this winter.
Why Styrofoam Coolers Outperform Cardboard and Plastic Bins
Cardboard shelters collapse in rain, and plastic bins lose heat 300% faster than styrofoam. That’s because closed-cell polystyrene coolers create thousands of trapped air pockets—nature’s best insulator. A 2-inch styrofoam wall provides R-10 insulation (comparable to home attic insulation), while plastic bins offer virtually zero thermal resistance. Crucially, styrofoam won’t absorb moisture like cardboard, preventing deadly dampness that draws heat from a cat’s body. For feral or community cats relying on body heat alone, this difference means avoiding hypothermia during single-digit nights. Skip the flimsy solutions—your cooler’s seamless construction is the foundation of a truly life-saving shelter.
Critical Safety Prep: Avoiding Catastrophic Mistakes
Before touching a single tool, address these life-or-death risks:
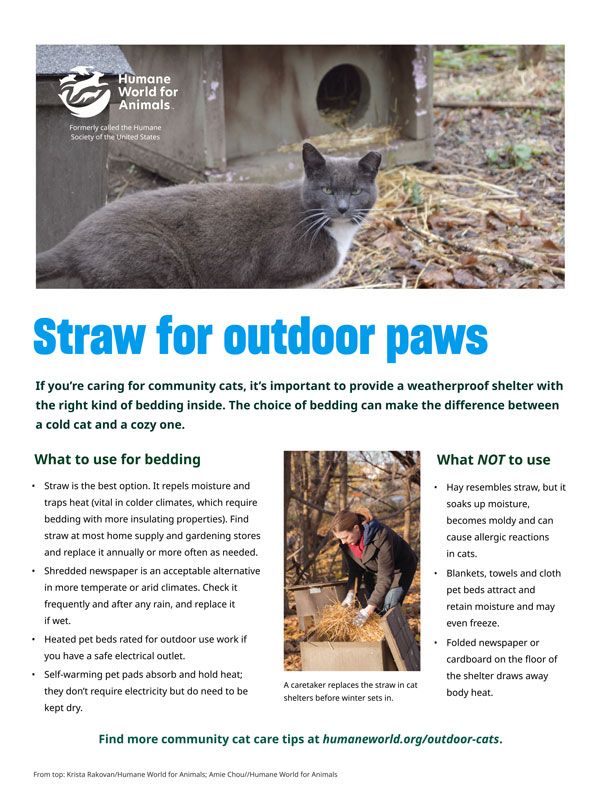
– Never use blankets, towels, or hay—they absorb moisture, freeze solid, and conduct heat away from cats 4x faster than dry straw.
– Absolutely no human heating pads—they overheat to 140°F+, melting styrofoam and causing fires. Only use outdoor-rated pet pads like K&H Lectro-Kennels (4-8 watts).
– Work outdoors or in extreme ventilation—styrofoam dust contains carcinogenic styrene. Wear N95 masks and safety goggles.
Essential Tools Checklist (Under $15 Total)
- Styrofoam cooler (35+ quart size; avoid coolers with drain plugs—we’ll use the base)
- 6-inch utility knife with fresh blade (e.g., Olfa RB-1)
- 2-mil+ plastic sheeting (6×8 ft painter’s drop cloth)
- Gorilla Tape (black weatherproof version)
- Straw bales (NOT hay—sold as “bedding straw” at farm stores)
- Rigid foam board (1-inch thick, 2 sq ft for draft flap)
Cutting the Entrance: Precision Size and Placement Secrets

A poorly sized entrance turns your shelter into a wind tunnel. Here’s how to cut it right the first time.
Why Your 6×6 Inch Entrance Must Be Off-Center
Wind blows directly through centered entrances, chilling cats to the bone. Place your entrance 3 inches up from the bottom on the shorter side of the cooler, offset 2 inches from the center toward one corner. This creates a “wind shadow” where cats curl up dry and warm. Measure twice: a 6×6 inch opening fits 95% of adult cats while minimizing heat loss.
Step-by-Step Cutting Technique (No Wall Collapse)
- Mark with permanent marker using a ruler—never pencil (styrofoam dust erases it).
- Score lightly with your utility knife along all four lines (1/8 inch deep).
- Cut in 4 passes: Apply gentle downward pressure while rotating the cooler, never forcing the blade.
- Smooth edges by rubbing a coarse sponge block in circular motions—sharp shards can injure paws.
Pro Tip: Test your opening with a tennis ball. If it rolls through easily, cats will too. If it sticks, widen slightly—frozen fur adds bulk in winter.
Installing the Draft-Blocking Entrance Flap
This $2 upgrade prevents 70% of heat loss. Forget flimsy plastic bags—use rigid foam for wind resistance.
Building the Windproof Flap in 5 Minutes
- Cut a 7×8 inch rectangle from 1-inch rigid foam board (available at hardware stores).
- Tape the top edge to the cooler’s front wall with Gorilla Tape, leaving a 1/2-inch gap above the entrance hole.
- Weight the bottom by taping a 2-inch strip of chain or metal washer inside the flap.
- Test functionality: The flap should swing freely but rest closed. Cats push through easily; wind cannot.
Warning: Avoid vinyl flaps—they freeze shut in sub-zero temps, trapping cats inside. Rigid foam stays flexible down to -40°F.
Straw Bedding: The Zero-Power Heating Secret
Straw isn’t just bedding—it’s active insulation. Its hollow stems create micro air pockets that trap heat 5x better than blankets. Here’s the lifesaving setup:
- Pour 4 inches of straw directly onto the cooler floor—no liner needed (straw wicks moisture away from styrofoam).
- Fluff it deeply with your hands to maximize air pockets—matted straw loses 80% of insulating power.
- Add a second 2-inch layer on top after 2 weeks of use (cats compress it over time).
Never substitute hay or towels—wet hay molds in 48 hours, spreading respiratory infections. Towels freeze into ice sheets that pull heat from cats’ bellies.
Weatherproofing the Shell: 3-Step Rain Defense
Styrofoam degrades when wet. This triple-layer wrap survives monsoons and curious raccoons.
Step 1: Plastic Sheeting Application (Critical Technique)
- Cover the cooler except the bottom with plastic sheeting.
- Smooth aggressively with your palms—wrinkles create water channels.
- Overlap seams by 4 inches minimum.
Step 2: Gorilla Tape Sealing Protocol
- Reinforce all vertical seams with 3-inch wide tape strips.
- Apply tape in a “shingle” pattern: Upper strips overlapping lower ones to shed water.
- Double-tape the entrance hole—this is the #1 leak point.
Step 3: Elevate for Dryness
Place the shelter on two cinder blocks (not the ground). Even 2 inches of elevation prevents ground moisture wicking into the base. Angle blocks slightly backward so rain runs away from the entrance.
Safe Heating Solutions: Avoiding Fire Hazards
Most DIY guides dangerously recommend human heating pads. Here’s the only safe method:
Outdoor-Safe Heating Pad Setup
- Cut a 1/2-inch plywood base to fit the cooler floor (prevents pad contact with styrofoam).
- Place K&H Lectro-Kennel pad directly on wood (4 watts max for small coolers).
- Cover with 1-inch fleece—never thick blankets (they insulate heat away from cats).
- Plug into GFCI outlet with outdoor-rated extension cord (elevated off snow).
Critical Check: After 1 hour, feel the pad surface. If it’s too hot to touch comfortably, unplug immediately—it’s unsafe.
Zero-Power Alternative: Straw-Only Thermal Mass
For remote locations: Fill 80% of the shelter with loosely packed straw. Cats burrow deep, creating a microclimate 25°F warmer than outside air. Add a second smaller cooler inside (entrance cut offset) for multi-chamber heat retention.
Placement Tactics That Make Cats Actually Use It
Your shelter fails if cats avoid it. Follow these wildlife-tested strategies:
- Face entrance east—avoids prevailing winter winds (north/west in most US regions).
- Tuck into natural cover—place against a fence or under bushes, but leave 12 inches of clearance for airflow.
- Add paw-drying station: Set a flat stone 6 inches from the entrance—cats wipe muddy paws before entering.
- Camouflage with leaves—never paint (fumes linger for weeks). Tuck pine boughs under the blocks.
Troubleshooting Tip: If cats ignore it, rub the interior with a dirty sock (your scent = safety). Place treats just inside the entrance for 3 days.
Maintenance Checklist: Keeping Shelters Functional All Winter
A neglected shelter becomes a death trap. Perform these checks weekly:
| Task | Frequency | Danger of Skipping |
|---|---|---|
| Replace damp straw | Every 2 weeks | Mold growth → pneumonia |
| Inspect tape seals | After heavy rain | Water pooling → hypothermia |
| Clear entrance ice | Daily below 20°F | Trapped cats freeze overnight |
| Test heating pad | Monthly | Electrical fire risk |
Never use metal tools inside—cats get tangled in wire remnants. Carry a spare straw bale in your trunk for emergency refills during blizzards.
Your styrofoam cat shelter is now a fortress against winter. This design has kept colonies alive through -30°F Midwest winters using only a cat’s body heat and smart insulation. Remember: Straw depth beats heater wattage—a 6-inch straw layer keeps cats warmer than a malfunctioning pad. Place it tonight before the temperature drops, and check it at dawn when cats return from hunting. For extended cold snaps, add a second cooler inside (offset entrances) to create a heat-trapping airlock. Share your shelter build with neighbors—just one properly insulated box can save an entire colony. When the wind howls at 3 AM, know you’ve given them a fighting chance.