Your high-performance gaming rig is pushing frames, but suddenly your CPU throttles performance and your system slows to a crawl. The culprit? Overheating. While traditional air coolers struggle with modern processors generating 100+ watts of heat, fluid coolers silently whisk that thermal energy away. Understanding how does a fluid cooler work reveals why liquid cooling has become essential for serious gamers, content creators, and data centers worldwide. This guide breaks down the exact mechanics of fluid cooling systems so you can make informed decisions about your thermal management needs.
Unlike what many assume, fluid coolers aren’t just fancy plumbing—they’re precision-engineered heat transfer systems that outperform air cooling through fundamental physics. By the time you finish this article, you’ll understand exactly how liquid moves heat from your CPU to the outside air, why this method beats traditional cooling, and what components actually matter when choosing a system. Whether you’re troubleshooting cooling issues or considering your first liquid cooler upgrade, this knowledge will help you maximize performance and prevent thermal shutdowns.
Why Liquid Cooling Outperforms Air Cooling for Modern CPUs
The fundamental limitation of air cooling becomes obvious when you push modern processors to their limits. Air coolers rely on a heat sink mounted directly on the CPU, where thermal paste transfers heat to metal fins, and a fan blows air across those fins. This method works adequately for standard workloads but hits physical limits when heat density exceeds what air can efficiently carry away.
How CPU Water Blocks Instantly Transfer Heat to Coolant
The water block is where the magic begins—this precisely machined copper or nickel-plated component sits directly on your CPU’s integrated heat spreader. Unlike air coolers with limited surface contact, the water block’s micro-fins create massive surface area within a compact space. When coolant flows over these microscopic channels, heat transfers from the CPU to the liquid 30 times more efficiently than to air due to water’s superior thermal conductivity. You’ll notice the difference immediately: while air-cooled systems might see 85°C under load, a properly configured fluid cooler keeps temperatures 15-20°C lower.
3 Performance Benefits of Fluid Cooling Over Air Cooling
Fluid cooling systems separate heat absorption from dissipation, creating three distinct advantages:
- Superior heat transfer capability: Water absorbs heat 4-5 times more effectively than air due to its higher specific heat capacity
- Strategic heat relocation: Move thermal load away from confined spaces to optimal radiator locations with better airflow
- Reduced noise levels: Larger radiators with slower-spinning fans generate less noise than high-RPM air cooler fans fighting thermal constraints
This separation of duties explains why liquid cooling has become standard in data centers and high-performance workstations where thermal throttling isn’t an option.
5 Critical Fluid Cooler Components That Transfer Heat Efficiently
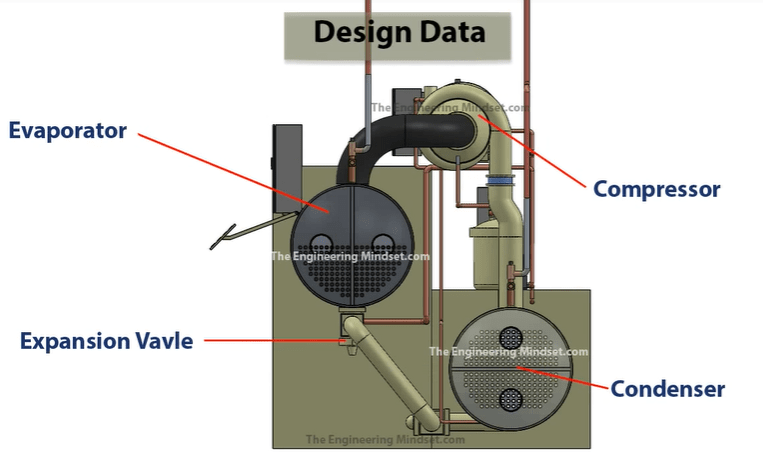
Every fluid cooler operates as a closed-loop system where each component plays a non-negotiable role in heat transfer. Understanding these parts helps diagnose cooling issues and select appropriate hardware for your needs.
How Coolant Temperature Rises Within Seconds of Contact
Specialized coolant (typically distilled water with anti-corrosion and biocide additives) flows through the water block at rates between 0.5-1.5 liters per minute. When this fluid contacts the heated copper base, its temperature rises within seconds—sometimes by 10-15°C in high-load scenarios. The exact temperature delta depends on your system’s heat output and flow rate. Critical warning: Never use tap water, as minerals cause scaling that clogs micro-channels and reduces cooling efficiency by up to 40%.
Pump Power Requirements for Optimal Fluid Cooler Performance
The pump creates continuous circulation through the system, with most AIO (All-In-One) coolers using centrifugal pumps rated between 10-30 dBA of noise. For custom loops handling multiple GPUs and CPUs, dual pumps may be necessary. Pro tip: Position your pump at the lowest point in the loop to prevent air pockets, which cause “pump cavitation”—that distinctive gurgling sound indicating reduced cooling performance. A failing pump shows symptoms within minutes: rapidly climbing temperatures despite normal fan operation.
Radiator Design: How Aluminum Fins Maximize Heat Transfer
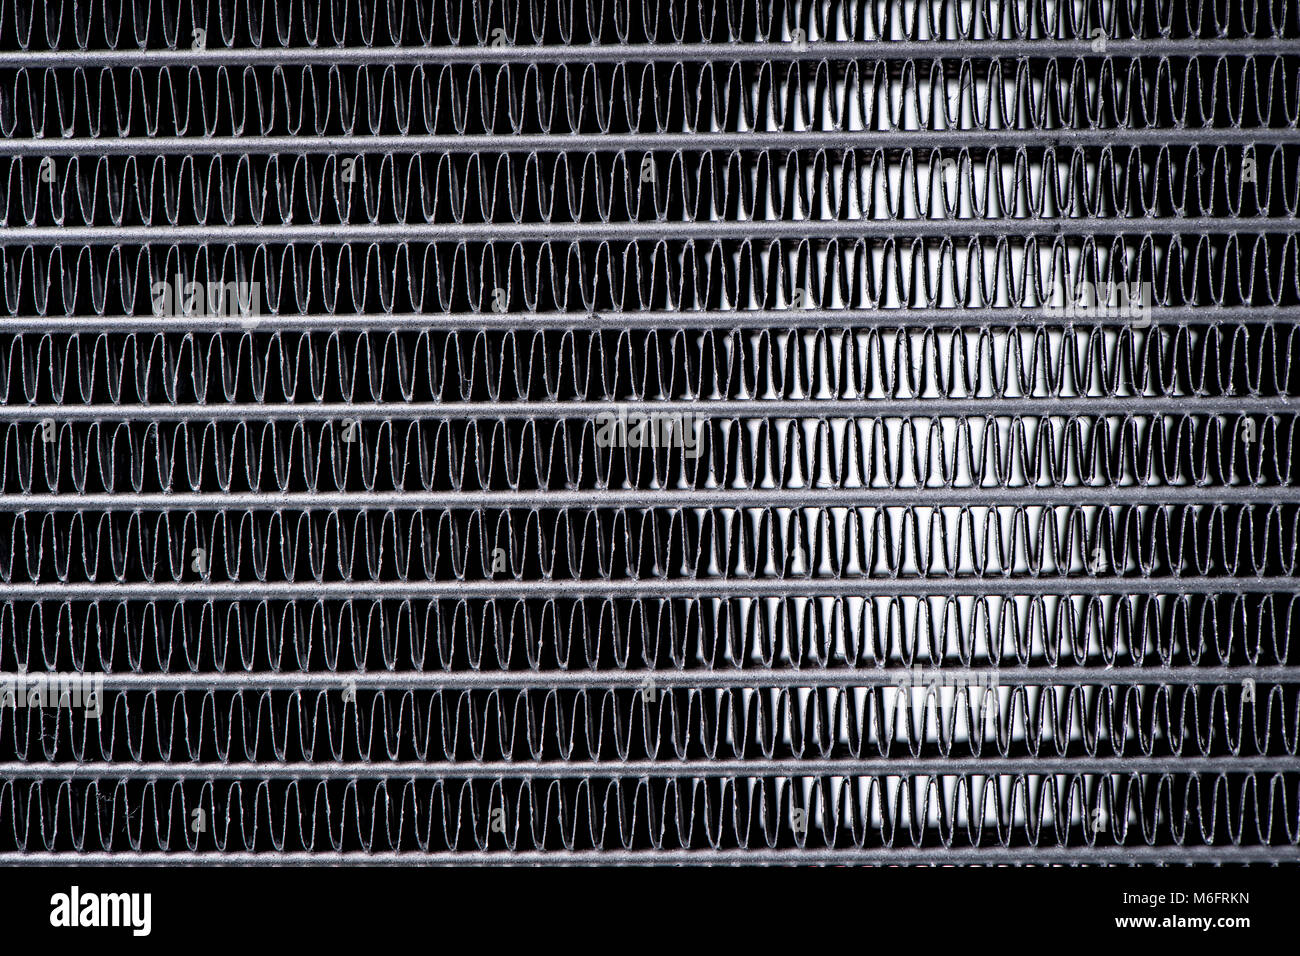
After absorbing heat, the warm coolant travels through tubing to the radiator, where thermal energy transfers to the surrounding air. Radiators use aluminum fins (sometimes copper for premium models) with thicknesses between 0.1-0.2mm, spaced 1-2mm apart. The science is simple: thinner fins with tighter spacing increase surface area but require more fan pressure to push air through. 240mm, 280mm, and 360mm denote radiator dimensions in millimeters—larger sizes handle more heat but require compatible case space. Visual cue: When examining your radiator, look for uniform coloring—hot spots indicate poor coolant flow or air blockage.
Fan Configuration Secrets for Maximum Heat Dissipation
Radiator fans operate differently than case fans—they’re optimized for static pressure to push air through dense radiator fins. Most AIO coolers ship with 120mm or 140mm fans configured in a push-pull setup (one fan pushing air into the radiator, another pulling from behind). This configuration improves heat dissipation by 15-20% compared to single-fan setups. Troubleshooting tip: If your CPU temperatures spike during sustained loads but recover during idle periods, your fan curve may be too conservative—adjust BIOS settings to increase fan speed at lower temperature thresholds.
Why Modern AIO Coolers Never Need Refilling
The closed-loop design of contemporary fluid coolers represents a massive improvement over early liquid cooling systems that required regular maintenance. Modern AIO units use welded seams and hermetically sealed reservoirs containing a precise coolant mixture that won’t evaporate or degrade under normal operating conditions.
How Thermal Paste Quality Affects Fluid Cooler Performance
Many users overlook thermal interface material when installing liquid coolers, but this thin layer between CPU and water block significantly impacts performance. High-quality thermal paste (like Arctic MX-4 or Thermal Grizzly Kryonaut) fills microscopic imperfections, reducing thermal resistance by up to 30% compared to stock thermal pads. Common mistake: Applying too much paste creates insulation rather than conduction—use a pea-sized drop centered on the CPU for optimal spread under mounting pressure.
How to Diagnose Fluid Cooler Performance Issues in 5 Minutes
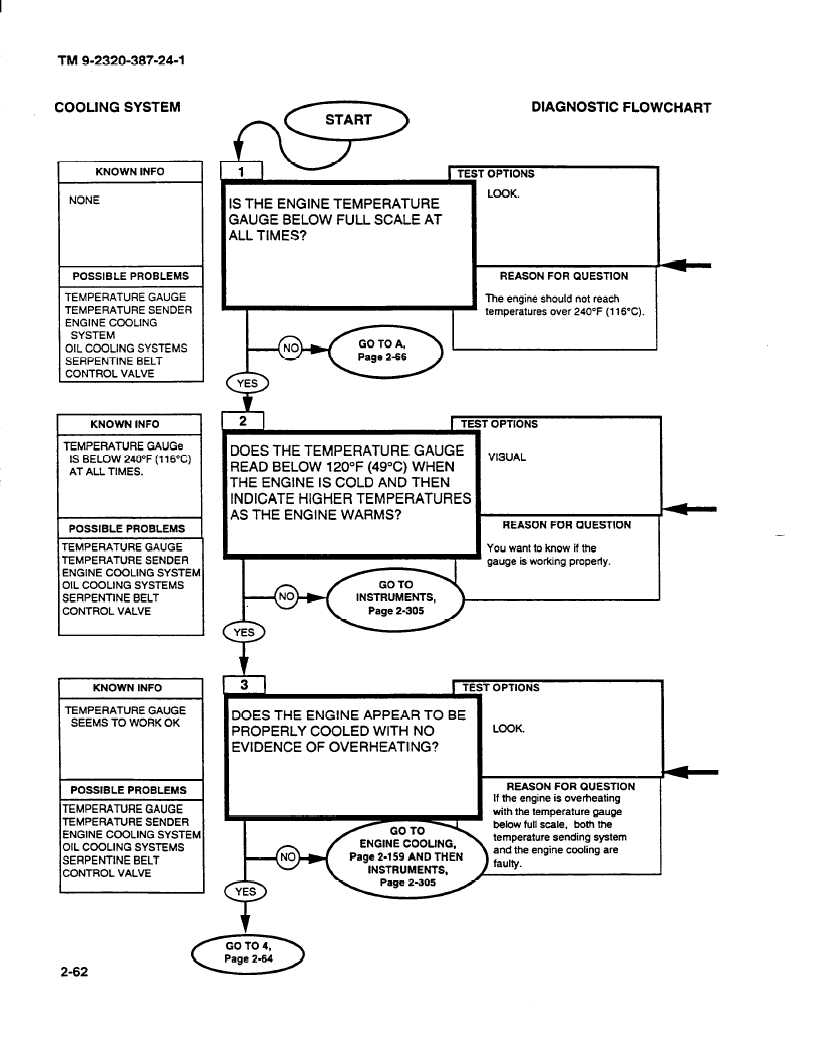
When temperatures rise unexpectedly, follow this diagnostic sequence before assuming component failure:
- Check pump operation: Place your finger on the pump housing—consistent vibration indicates operation
- Inspect radiator fins: Dust buildup reduces efficiency by up to 25%—clean with compressed air monthly
- Verify fan connections: Dislodged fan headers are surprisingly common after case modifications
- Monitor coolant flow: Some AIO coolers have flow indicators showing proper circulation
- Test thermal paste: Reapplication solves 15% of unexplained temperature increases
Time-saving shortcut: Use monitoring software like HWInfo to track coolant temperature delta (difference between inlet and outlet)—a narrowing gap indicates declining cooling performance.
How to Choose the Right Fluid Cooler for Your Performance Needs
Selecting the proper cooler requires matching its thermal capacity to your system’s heat output. Manufacturers specify Thermal Design Power (TDP) ratings—this indicates maximum heat dissipation capability. Critical rule: Your cooler’s TDP rating should exceed your CPU’s maximum heat output by at least 20%. For example, a Ryzen 9 7950X (170W TDP) requires a 240mm radiator minimum, but a 360mm unit provides headroom for overclocking.
Calculating Your Perfect Radiator Size for Maximum Cooling
Use this simple formula to determine adequate radiator capacity:
– 120mm radiator: Handles up to 150W heat load
– 240mm radiator: Handles up to 250W heat load
– 280mm radiator: Handles up to 300W heat load
– 360mm radiator: Handles up to 400W heat load
For dual-GPU workstations or heavily overclocked systems, add 20% to your calculated heat load. Pro insight: In hot climates, increase radiator size by one tier—ambient temperature directly impacts cooling efficiency.
Fluid Cooler Maintenance Schedule for Long-Term Reliability
While modern AIO coolers require minimal maintenance, periodic checks prevent catastrophic failures:
- Monthly: Visually inspect tubing for discoloration or cloudiness
- Quarterly: Clean radiator fins with compressed air (power off)
- Annually: Check mounting hardware tension (loose blocks cause thermal spikes)
- Every 3-5 years: Consider replacement (pump bearings wear out gradually)
Expert warning: Never disassemble sealed AIO units—the factory vacuum seal prevents air bubbles that cause pump cavitation and corrosion.
Understanding how does a fluid cooler work transforms you from a passive user to an informed operator who can maximize system performance and longevity. By leveraging liquid’s superior heat transfer properties through strategically designed components, fluid cooling solves thermal challenges that air cooling simply cannot address. Whether you’re building your first custom PC or troubleshooting an existing setup, this knowledge ensures you’ll maintain optimal temperatures even under extreme workloads. Remember that proper component selection, installation, and minimal maintenance make fluid cooling not just viable but superior for demanding computing tasks—turning thermal management from a limitation into a performance advantage.