Dry ice can transform your cooler into a deep-freeze powerhouse, keeping food frozen for days during camping trips, long road trips, or moving perishables across state lines. But with its extreme temperature of -109.3°F (-78.5°C) and carbon dioxide emissions, improper handling turns this cooling solution into a serious hazard. Each year, emergency rooms treat dozens of cases from dry ice mishaps—frostbite injuries from bare skin contact and dangerous carbon dioxide buildup in enclosed spaces. This guide delivers the exact procedures you need to safely harness dry ice’s cooling power in your cooler while avoiding preventable accidents. You’ll learn professional packing techniques, critical safety measures, and troubleshooting solutions that ensure your food stays frozen without risking your safety.
Why Dry Ice Sublimates Instead of Melting Like Regular Ice
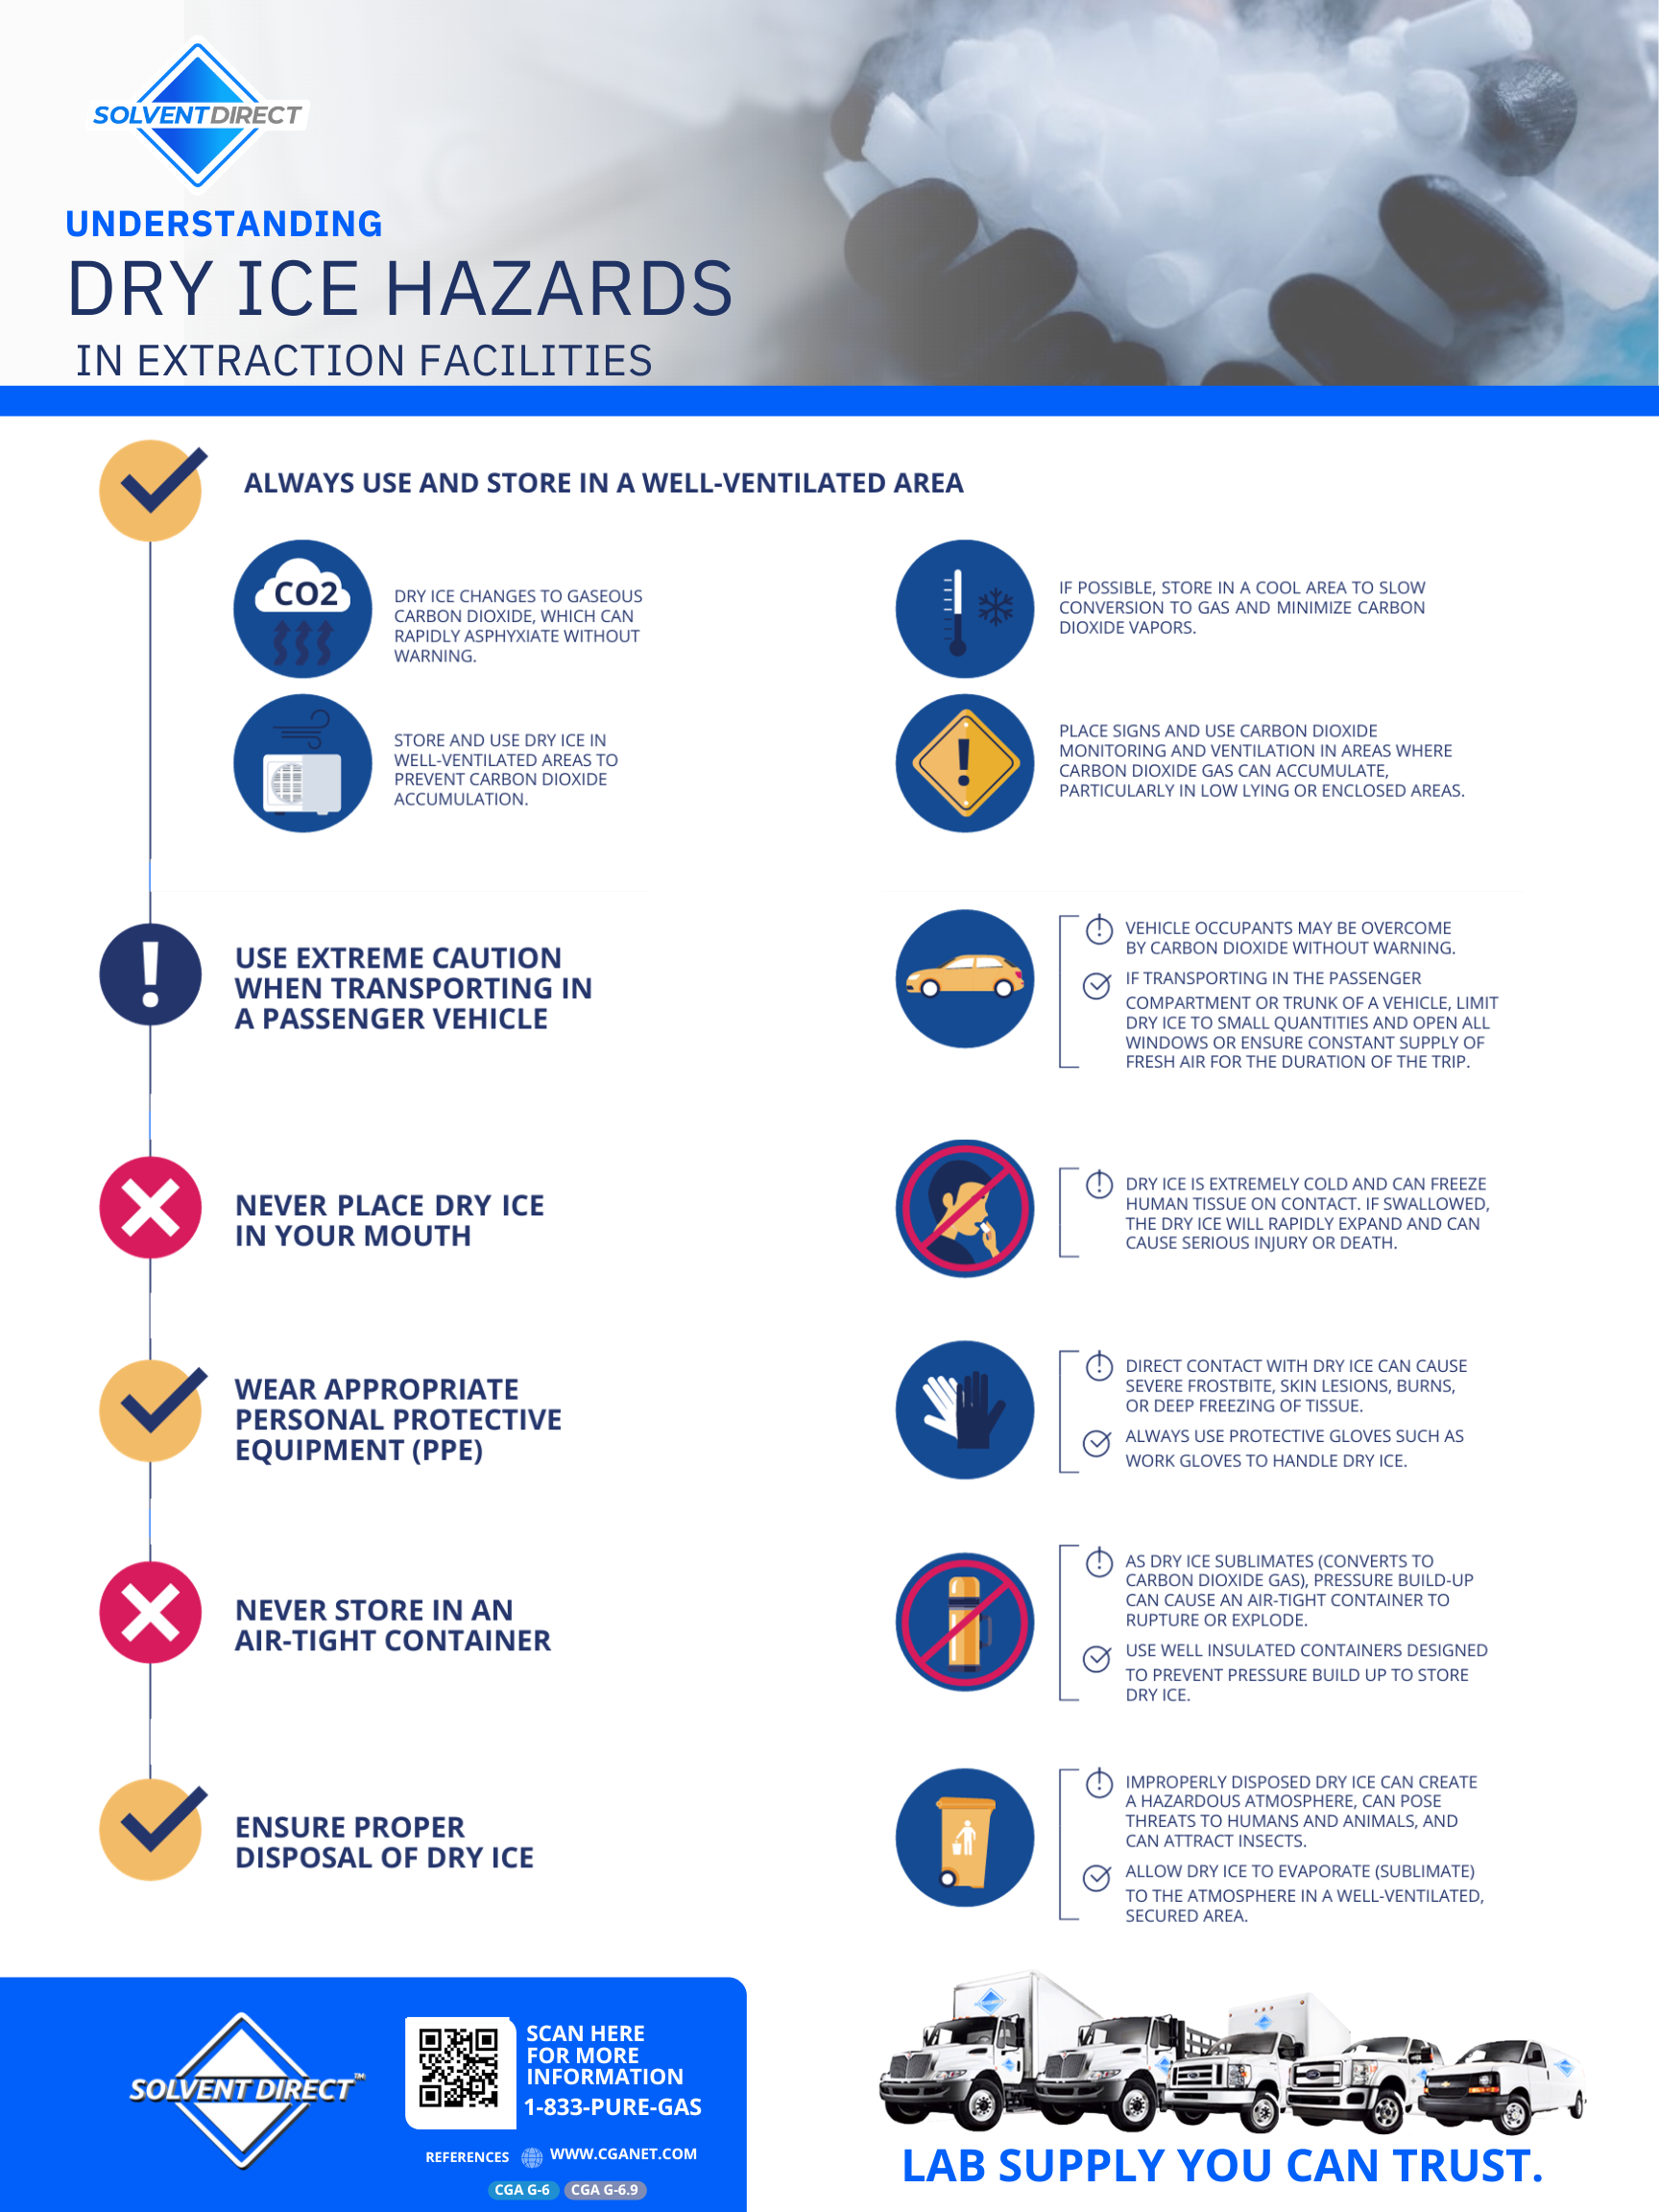
Dry ice isn’t frozen water—it’s solid carbon dioxide that transforms directly from solid to gas through sublimation, skipping the liquid phase entirely. This unique property makes it 50% more effective at cooling than regular ice but creates specific handling requirements you must understand before use. As dry ice sublimates, it releases carbon dioxide gas that’s heavier than air and can displace oxygen in poorly ventilated areas. The rapid temperature change also causes intense thermal shock to materials it contacts directly. Recognizing these fundamental properties explains why standard ice handling practices won’t work and why specific safety protocols are non-negotiable when using dry ice in coolers.
How Sublimation Affects Your Cooler’s Performance
The sublimation rate determines how long your dry ice will last, directly impacting your cooler’s effectiveness. In a standard 50-quart cooler, 10 pounds of dry ice typically lasts 18-24 hours, but several factors accelerate this process. Opening the cooler frequently introduces warm air that speeds sublimation, while packing warm items with dry ice wastes its cooling capacity on initial temperature reduction rather than maintaining cold temperatures. Understanding these dynamics helps you calculate the precise amount needed for your specific trip duration and avoid the common mistake of underestimating required quantities.
Critical Safety Gear Needed for Dry Ice Handling
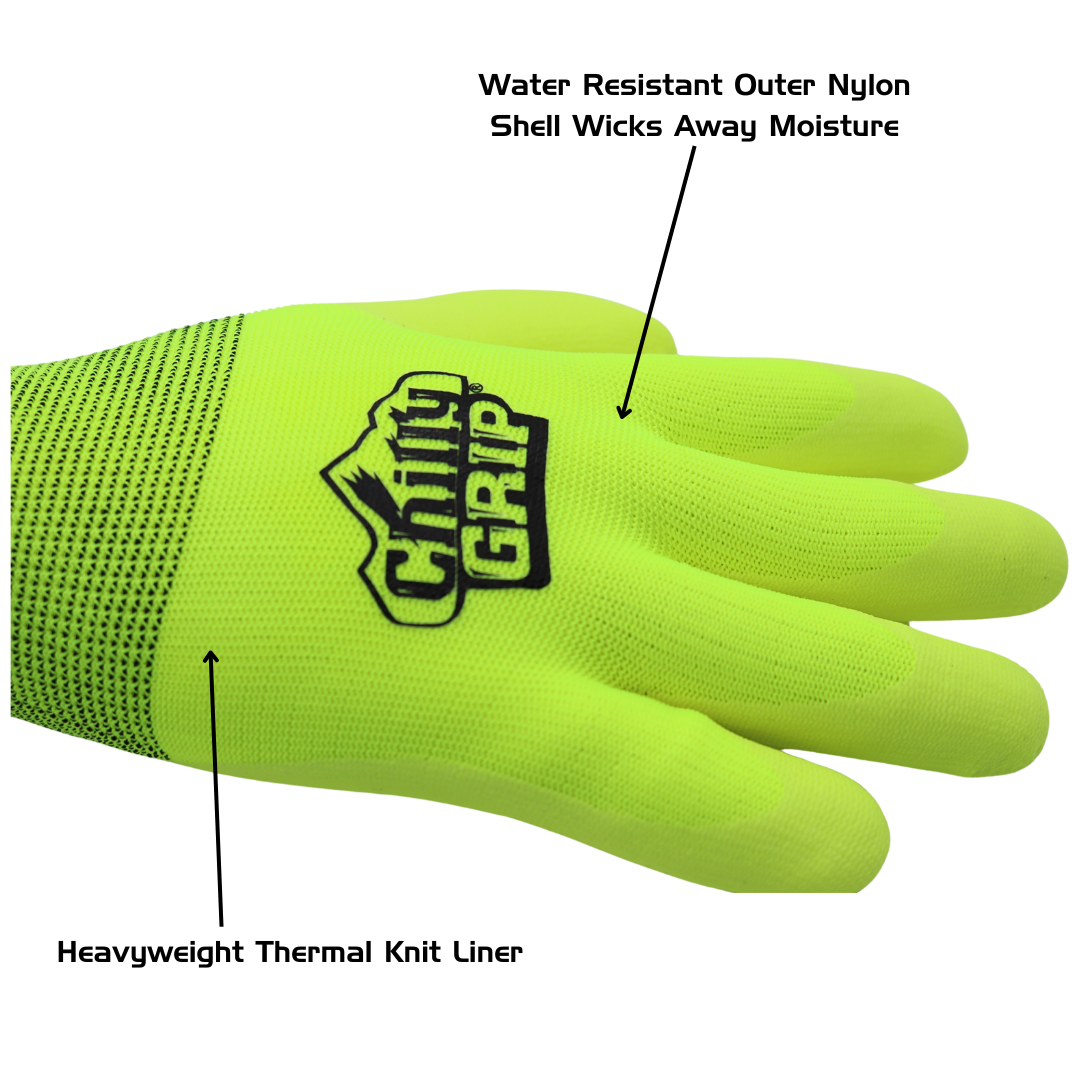
Skipping proper protection when handling dry ice guarantees injury—period. The extreme cold causes instant frostbite on contact with bare skin, similar to touching a freezing metal pole in winter but significantly more dangerous. You need specific equipment that creates an effective thermal barrier between you and the dry ice.
Must-Have Protective Equipment Checklist
- Heavy-Duty Insulated Gloves: Standard kitchen gloves won’t cut it—use thick, insulated work gloves or oven mitts specifically designed for extreme temperatures
- Safety Goggles: Protect your eyes from accidental CO₂ gas exposure or flying fragments when breaking dry ice
- Long-Sleeved Clothing: Cover all exposed skin to prevent accidental contact during handling
- Well-Ventilated Workspace: Always handle dry ice outdoors or in a large, open garage where CO₂ gas can disperse safely
Where to Buy Dry Ice and Transport It Safely to Your Cooler
Finding reliable dry ice sources and transporting it properly prevents dangerous situations before your trip even begins. Many campers make critical errors at this stage that compromise safety throughout their journey.
Trusted Dry Ice Suppliers and Transport Protocols
Grocery stores like Kroger and Walmart often sell small quantities (5-10 pound blocks), while industrial gas suppliers like Airgas provide larger quantities at better prices for extended trips. When purchasing, request pellet or sliced forms rather than solid blocks—they’re easier to handle and distribute cooling more evenly in coolers.
For transport, never place dry ice inside your vehicle cabin—even with windows cracked. The heavier-than-air CO₂ gas can accumulate to dangerous levels in minutes. Instead, use a well-ventilated truck bed or cargo area with the tailgate down. Secure the dry ice in an open, insulated cooler to prevent shifting during transit, but never seal it completely. Remember: ventilation isn’t optional—it’s essential for safe transport.
6-Step Process for Packing Dry Ice in Your Cooler Without Damaging Food
Packing dry ice correctly makes the difference between perfectly preserved food and ruined meals or dangerous cooler conditions. Follow this exact sequence to maximize cooling efficiency while protecting your contents.
Step 1: Pre-Chill Everything Before Adding Dry Ice
Chill your cooler and all items overnight in a freezer—this critical step reduces the initial thermal load on your dry ice. Warm items force the dry ice to work harder to lower temperatures, wasting its limited sublimation time on initial cooling rather than maintaining frozen conditions.
Step 2: Create Effective Insulation Barriers
Place a thick layer of crumpled newspaper or closed-cell foam at the cooler bottom before adding anything else. This prevents direct contact between food containers and the extreme cold, which could cause containers to crack or contents to freeze solid.
Step 3: Position Dry Ice for Optimal Cooling Patterns
Wrap dry ice blocks in several layers of newspaper or place them inside a cardboard box before adding to the cooler. For short trips (under 24 hours), position wrapped dry ice on top of contents—cold CO₂ gas sinks, creating downward cooling. For longer excursions, place dry ice at the bottom with a solid barrier (like a cutting board) between it and food to prevent freezing.
Proper Dry Ice Storage and Safe Disposal Methods to Prevent Accidents
Many dry ice accidents occur during storage and disposal—stages often overlooked until it’s too late. Understanding proper protocols for these phases prevents dangerous situations after your trip ends.
Why Airtight Containers Cause Explosions
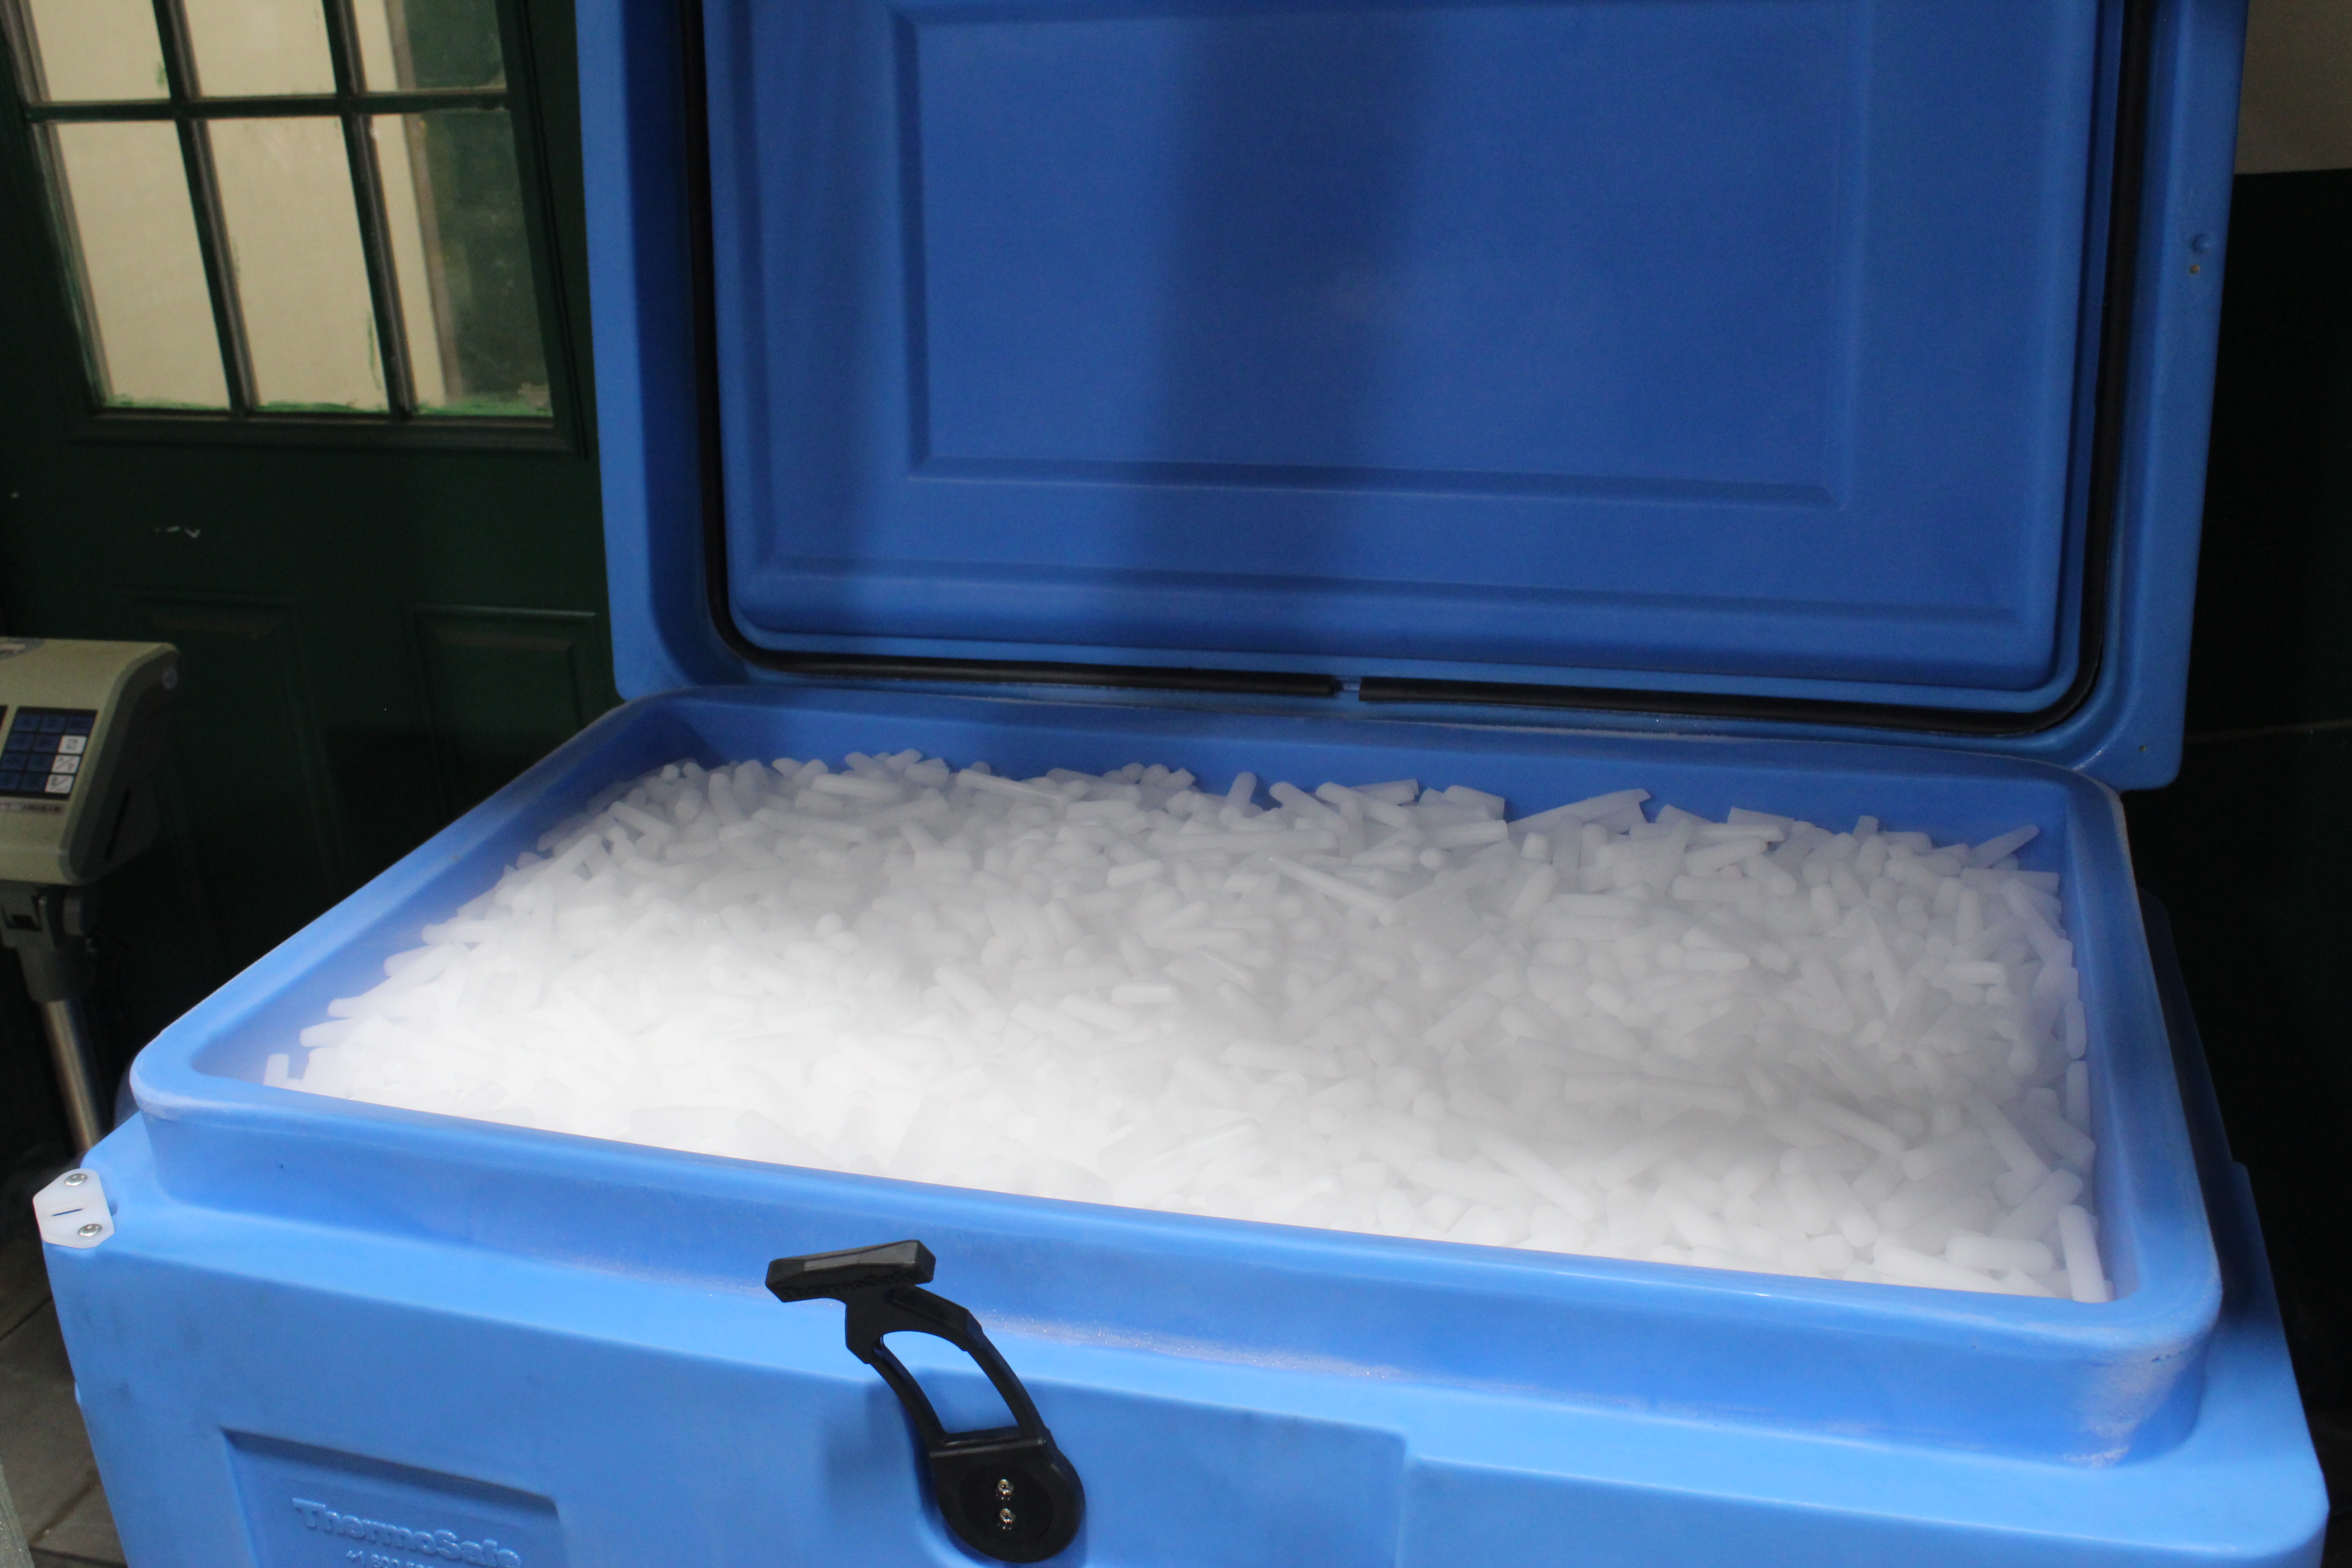
Never store dry ice in sealed containers, including your cooler’s latched position. As it sublimates, one pound of dry ice generates 8.3 cubic feet of gas—pressure builds rapidly in enclosed spaces. The safest storage method is an open, insulated cooler placed in a well-ventilated garage or shed, clearly labeled “DRY ICE—DO NOT SEAL.”
Correct Disposal Techniques That Won’t Damage Property
Leaving dry ice to sublimate outdoors is the only safe disposal method. Place it in an open cooler in a secure outdoor area away from children and pets—never in sinks, toilets, or trash compactors. The sublimation process for 5 pounds typically takes 12-24 hours depending on ambient temperature. Never attempt to speed up sublimation with water—that creates rapid gas expansion that can cause dangerous pressure buildup.
Fixing 3 Common Dry Ice Cooler Problems: Frozen Food and More
Even careful planners encounter issues with dry ice coolers. Knowing how to diagnose and resolve these problems prevents food waste and maintains safety throughout your trip.
Problem: Food Freezing Solid Despite Proper Packing
When food freezes harder than intended, it indicates dry ice is too close to temperature-sensitive items. Immediately create additional separation using insulating materials like foam board or extra newspaper layers between the dry ice and affected food. For future trips, increase the insulation barrier thickness—quarter-inch foam board works better than cardboard for temperature-sensitive items like dairy products.
Problem: Excessive Gas Buildup Causing Lid Pressure
As dry ice sublimates, gas pressure naturally builds inside the cooler. Never latch or seal the lid—this is normal and necessary for safe operation. If pressure concerns you, drill a small ¼-inch vent hole near the cooler’s top to allow controlled gas release while maintaining cold temperatures.
5 Non-Negotiable Safety Rules for Dry Ice Cooler Handling
These critical rules prevent life-threatening situations that many campers ignore until it’s too late. Violating any of these protocols risks serious injury or worse.
Rule 1: Never Transport Dry Ice in a Sealed Vehicle Cabin
Carbon dioxide accumulation in enclosed spaces causes oxygen displacement, leading to dizziness, unconsciousness, and potentially fatal asphyxiation. Always keep dry ice in a well-ventilated cargo area, and never leave children, pets, or vulnerable individuals in a vehicle with dry ice—even with windows partially open.
Rule 2: Always Use Thermal Barriers Between Dry Ice and Food
Direct contact between dry ice and food containers causes extreme thermal shock that cracks containers and freezes contents solid. Always wrap dry ice in multiple newspaper layers or place it inside a secondary container before adding to your cooler.
10-Point Pre-Trip Checklist for Safe Dry Ice Cooler Use
Before departure, verify these critical safety measures to prevent accidents and ensure optimal performance:
- [ ] Heavy-duty insulated gloves are packed and accessible
- [ ] All cooler contents are pre-chilled to maximum cold
- [ ] Dry ice is properly wrapped in newspaper or cardboard
- [ ] Insulating barrier separates dry ice from food containers
- [ ] Cooler lid remains unlatched during transport and use
- [ ] Emergency contact information is stored with the cooler
- [ ] Disposal plan is established for trip conclusion
- [ ] Carbon dioxide detector is available for enclosed transport
- [ ] First aid supplies include burn/frostbite treatment
- [ ] All passengers understand dry ice safety protocols
By following these precise handling methods, you transform dry ice from a potential hazard into the most effective cooling solution for extended trips. Properly managed, dry ice keeps food frozen for days longer than regular ice while maintaining consistent temperatures that prevent spoilage. Remember that safety isn’t an option with dry ice—it’s the foundation of successful use. Implement these protocols on your next adventure, and you’ll experience the superior cooling power of dry ice without compromising safety for you or your traveling companions.