That sticky, sweltering afternoon when your swamp cooler just isn’t cutting it? You’re not alone. Millions of homeowners in dry climates rely on evaporative coolers for affordable, eco-friendly cooling—but too many treat them like “set and forget” appliances. The truth is, how to maximize swamp cooler performance hinges on physics, not luck. When properly optimized, these units can slash energy bills by up to 80% compared to traditional AC while keeping your home comfortably cool. Yet a single misstep—like placing the unit in direct sunlight or neglecting pad maintenance—can cripple efficiency by 30% or more. This guide cuts through the guesswork with battle-tested strategies to transform your swamp cooler into a precision cooling machine, whether you’re prepping for summer or troubleshooting mid-season struggles.
Why Your Swamp Cooler Fails in Humid Conditions
Swamp coolers don’t magically create cold air—they harness evaporation physics to cool existing air. As hot, dry air passes through water-saturated pads, evaporation absorbs heat energy, dropping the air temperature. But this only works when ambient humidity stays below 60% relative humidity. Exceed that threshold (common during monsoons or early mornings), and evaporation slows dramatically. Your hygrometer isn’t optional—it’s your secret weapon. Monitor indoor humidity religiously; the ideal comfort zone sits between 40-60%. Crucially, swamp coolers raise indoor humidity as they run, so pairing them with a dehumidifier on muggy days isn’t just smart—it’s essential for maintaining cooling capacity. Skip this, and you’ll waste water, energy, and comfort when humidity spikes.
Critical Spring Tune-Up Before First Use
Waiting until the first heatwave to fire up your unit guarantees disappointment. A thorough pre-season checklist prevents 90% of startup failures and unlocks peak efficiency from day one.
Drain and Deep-Scrub the Reservoir
Stagnant water breeds bacteria and algae that clog systems and create foul odors. Remove all mineral scale and organic gunk with a stiff brush—never skip this even if last season’s shutdown seemed perfect. Residual deposits insulate the water, reducing cooling potential by forcing the pump to work harder.
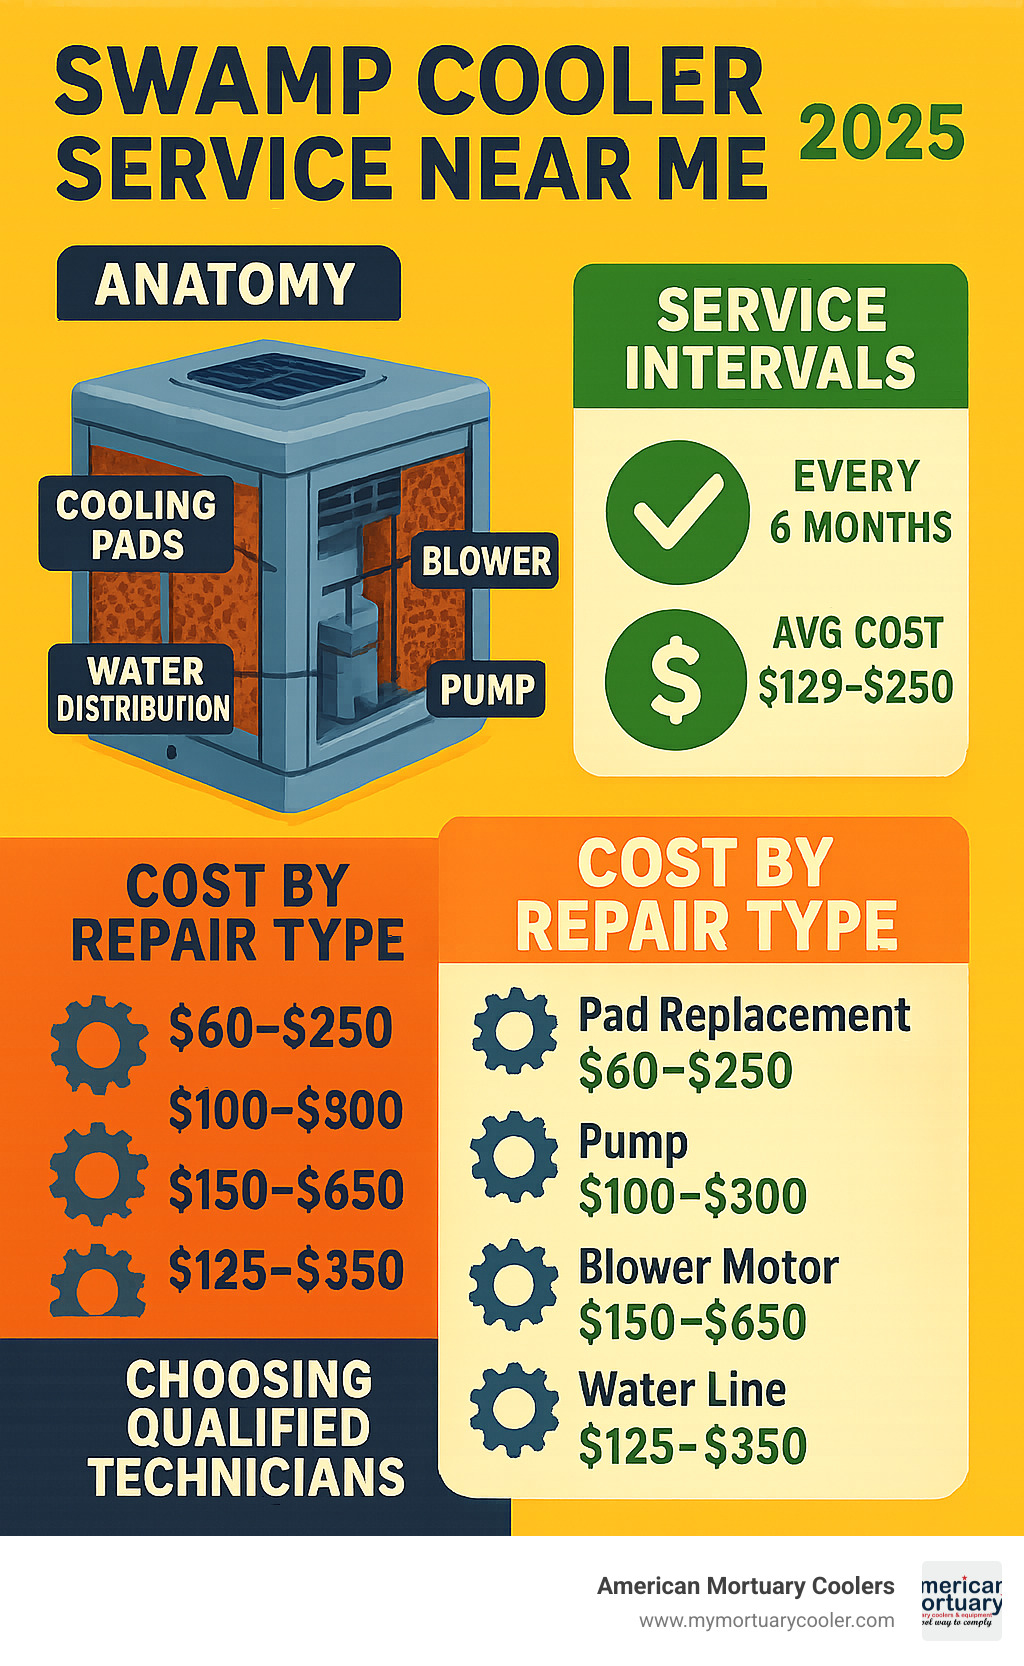
Replace or Revive Cooling Pads
These pads are your cooler’s heart. Inspect for:
– White mineral crust (indicates hard water damage)
– Stiff, brittle texture (reduced water absorption)
– Mold spots (health hazard)
Soak reusable pads in vinegar solution to dissolve scale, but replace them if they feel crunchy or show discoloration. New pads boost airflow by 25% and prevent the “not cooling enough” panic.
Test Water Distribution Under Pressure
With the fan off, run the pump for 5 minutes. Watch for:
– Dry patches on pads (blocked nozzles)
– Uneven water flow (kinked lines)
– Gurgling sounds (air in lines)
A single clogged nozzle starves 20% of your pad surface, turning your cooler into a space heater. Use a toothpick to clear debris from spray heads before summer hits.
Strategic Placement That Doubles Cooling Output

Your cooler’s location isn’t just convenient—it’s physics in action. Get this wrong, and no amount of maintenance will save you.
Shade or Suffer Reduced Efficiency
Direct sunlight heats the water reservoir, sabotaging evaporation. A unit baking in 95°F sun might as well be pumping lukewarm water. Install it under an awning, porch overhang, or build a vented wooden shade box. This simple move can lower output temperature by 8-10°F instantly.
Master the Ventilation Equation
Swamp coolers require air exchange like lungs need oxygen. Forget the “open one window” myth—calculate your needs:
For every 1,000 cubic feet of space, open 1-2 square feet of window area
(Example: A 1,500 sq ft home with 8-ft ceilings = 12,000 cu ft → needs 12-24 sq ft of open windows)
Place exhaust openings opposite the cooler’s airflow. If cool air blows east, open west-side windows. No cross-breeze? Your unit battles back-pressure, straining the motor and cutting airflow by up to 40%.
The Maintenance Schedule That Prevents Breakdowns
Hard water and neglect are your cooler’s kryptonite. Follow this timeline religiously:
Daily/Weekly Non-Negotiables
- Check water clarity: Cloudy water? Drain and refill immediately—stagnant water breeds bacteria.
- Verify pad saturation: Pads should feel uniformly damp, not dripping wet. Dry spots mean clogged lines.
- Clear debris from intake: Dust and pollen block airflow; wipe grilles with a damp cloth.
Bi-Weekly Hard Water Defense
If your water leaves white crust on faucets:
1. Open the bleed-off valve for 3 minutes to flush mineral-rich water
2. Rinse the pump filter screen under running water
3. Add a water treatment tablet (prevents scale and kills bacteria)
This reduces descaling frequency by 70% and extends pad life.
Seasonal Shutdown: Avoid Winter Catastrophes
Fall shutdown isn’t optional—it prevents cracked reservoirs from frozen water. Critical steps:
1. Drain every drop from reservoir, pump, and lines (use a wet/dry vac)
2. Remove pads and store indoors completely dry
3. Submerge the pump in a bucket of water to preserve seals
4. Cover the unit with a breathable tarp (never plastic—it traps moisture)
Skip step 1, and a single freeze-thaw cycle can cost you $300 in repairs.
Pro Upgrades for Next-Level Performance

Install a Humidity-Sensing Thermostat
Basic on/off switches waste energy by overcooling. A smart thermostat like the Honeywell Y8088A:
– Shuts off when indoor humidity hits 60%
– Prevents “wet air” discomfort
– Cuts water usage by 35%
Pair it with rigid cellulose pads (not aspen) for 20% better evaporation and easier cleaning.
Hybrid Cooling for Monsoon Season
When humidity exceeds 60%, switch tactics:
1. Run the swamp cooler on “vent only” mode (no water)
2. Activate a portable dehumidifier in your main living area
3. Use a small window AC unit only for final temperature tweaking
This two-stage approach maintains comfort while using 60% less energy than full AC.
Fix These 4 Failures Before Calling a Pro
“My Cooler Isn’t Blowing Cold Air!”
Diagnose in 60 seconds:
✅ Open windows? (Most common fix—add exhaust vents)
✅ Pads fully saturated? (Check for dry patches)
✅ Water flowing evenly? (Clear clogged nozzles)
✅ Pads clean? (Mineral scale blocks evaporation)
Leaking Water Pooling Under Unit
90% of leaks come from:
– Stuck float valve (jiggle it to free debris)
– Cracked reservoir (patch with PVC-safe epoxy)
– Overfilled tank (adjust float arm height)
Musty Odors from Vents
This signals bacterial growth. Emergency fix:
1. Drain reservoir completely
2. Scrub with 1:10 bleach-water solution
3. Rinse thoroughly before reuse
4. Add water treatment tablets moving forward
Mineral Scale Clogging the Pump
Prevent it: Use distilled water or install an inline water softener. Fix it: Soak parts in vinegar for 2 hours, then flush lines with fresh water.
Maximizing your swamp cooler isn’t about complexity—it’s about working with physics, not against it. By implementing these precise steps, you’ll consistently achieve 15-25°F temperature drops on dry days while slashing energy costs. Remember: shade placement, aggressive ventilation, and hard-water management are your non-negotiables. When monsoons hit, switch to hybrid mode instead of surrendering to AC bills. Most importantly, treat seasonal shutdown like a sacred ritual—draining that last drop of water saves you from springtime disasters. In dry climates, a perfectly tuned swamp cooler remains the ultimate cooling hack: eco-friendly, affordable, and power-grid friendly. Now go enjoy that desert breeze, knowing you’ve squeezed every drop of performance from your system.