Nothing beats the relief of a properly functioning swamp cooler on a scorching summer day in the desert. These energy-efficient systems can lower indoor temperatures by 15-40 degrees Fahrenheit below outside temperatures while using just a fraction of the electricity of traditional AC. But to get that refreshing cool air, you must set up your evaporative cooler correctly—especially if you’re bringing it out of winter storage or installing a new unit. This guide shows you exactly how to set up a swamp cooler for optimal performance, avoiding common mistakes that reduce efficiency and shorten your unit’s lifespan.
Many homeowners make the critical error of skipping pre-season preparation, only to discover leaks, dry rot, or electrical issues when they need cooling most. Proper setup transforms your swamp cooler from a dusty relic into a reliable cooling machine that delivers maximum evaporative efficiency from day one.
Clean Your Swamp Cooler Thoroughly Before First Use
Before connecting any water lines or electrical components, you must eliminate all debris accumulated during storage. Start by removing side panels—typically secured with latches or screws—and vacuum out every corner of the unit. Pay special attention to the water reservoir where mineral deposits and sediment collect over time.
Remove All Debris From Last Season
Use a wet-dry vacuum to extract leaves, twigs, and dust from the cooling pad frames, reservoir, and fan assembly. Check for and remove any rodent nests or wasp nests that may have formed during storage. These not only restrict airflow but can introduce health hazards when the unit first starts up.
Vacuum Mineral Deposits From Water Reservoir
Hard water leaves behind significant mineral buildup that affects performance. Scrub the reservoir with a stiff brush and vinegar solution to dissolve calcium deposits. Rinse thoroughly until the water runs clear. This prevents clogs in your water distribution system and extends your pump’s life.
Check for Rodent Nests in Critical Components
Rodents love nesting in the warm, dark interior of stored coolers. Inspect behind electrical panels and around motor housings for signs of nesting materials. Remove all debris carefully—disturbing nests can release harmful pathogens into your air supply when the unit first operates.
Install the Right Cooling Pads for Your Climate and Unit

Cooling pads are where the magic happens in evaporative cooling. Choosing and installing the correct pads makes or breaks your swamp cooler’s performance. Aspen wood pads offer excellent cooling but require annual replacement, while rigid media pads last 2-3 seasons with proper maintenance.
Choose Between Aspen Wood and Rigid Media Pads
Aspen pads provide higher initial cooling efficiency but deteriorate faster in hard water conditions. Rigid cellulose or PVC pads maintain consistent performance longer but cost more upfront. For dry climates like Arizona or Nevada, rigid media often provides better long-term value despite the higher initial investment.
Properly Align New Pads to Prevent Air Bypass
Slide new pads into frames ensuring snug contact at all edges—any gaps allow hot air to bypass the cooling process. The pads should fit tightly enough that you need slight pressure to insert them but not so tight they compress and restrict water flow. Incorrect alignment can reduce cooling efficiency by up to 30%.
Connect Water Supply Lines Without Leaks
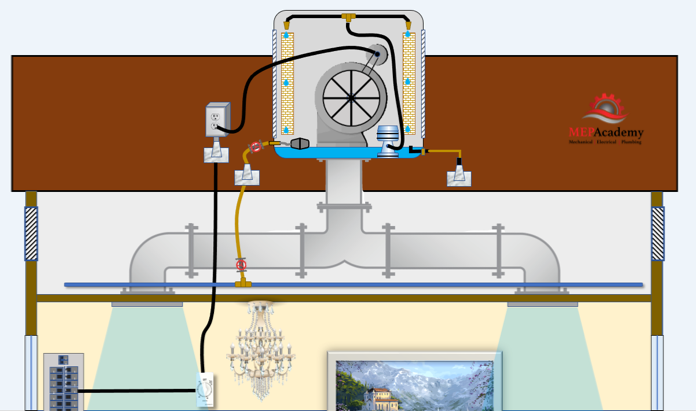
Water system integrity determines whether your swamp cooler functions or floods your home. The right connections prevent leaks while ensuring consistent water flow across cooling pads. Always use a 1/4-turn ball valve in your supply line—it’s the single most important component for easy maintenance.
Install a 1/4-Turn Shutoff Valve for Easy Maintenance
Position the shutoff valve within easy reach near your water connection point. This allows you to isolate the cooler without affecting your home’s main water supply during winterization or repairs. Never skip this component—it turns a 5-minute repair into a plumbing emergency when something goes wrong.
Test All Connections With Paper Towel Leak Detection
After connecting supply and drain lines, turn water on slowly while checking connections with dry paper towels. Even slow drips show clearly on the paper. Pay special attention to pump housing connections, float valve assembly, and drain plug gaskets—these are the three most common failure points in swamp cooler water systems.
Adjust Belt Tension for Optimal Fan Performance
Your swamp cooler’s belt drives the fan that circulates cooled air through your home. Proper tension prevents slippage while avoiding unnecessary strain on motor bearings. The sweet spot is typically 1/2 inch of deflection when pressing the belt midway between pulleys.
Identify Signs of Worn or Damaged Belts
Replace belts showing cracks, glazing, or excessive dust around the pulleys. A failing belt squeals on startup and reduces airflow by up to 40%. Measure your old belt or check your unit’s manual for the correct replacement size—using the wrong length creates immediate tension problems.
Align Pulleys to Prevent Premature Wear
Misaligned pulleys wear belts 3-5 times faster than properly aligned ones. Use a straight edge against both pulley faces to verify they’re in the same plane. Even 3 degrees of misalignment creates excessive vibration that damages bearings and reduces cooling capacity over time.
Test Electrical Connections Safely Before Startup

Electrical safety must come first when setting up a swamp cooler. Always disconnect power at the main breaker before working on any components, and verify the circuit is dead with a non-contact voltage tester. Most residential units operate on standard 120V, but rooftop installations often require 240V service.
Verify Power Disconnect Before Working on Components
Never assume the wall switch cuts all power—many swamp coolers have separate circuits for the fan and pump. Locate and flip the correct breaker, then test all terminals with your voltage tester before touching any wires. One moment of carelessness can result in serious electrical injury.
Fill and Test Your Swamp Cooler Before Season Begins
Now comes the moment of truth—testing your setup before extreme heat arrives. Start with the water system to verify proper operation before introducing electricity. The float valve should maintain approximately 1 inch of water in the reservoir, with excess draining freely through your connected drain line.
Confirm Even Water Distribution Across Cooling Pads
Run the pump without the fan to check pad saturation. Water should flow evenly across all pads from top to bottom—dry spots indicate clogged distribution tubes. The “spider” pipe system must deliver consistent water flow; blocked holes create uneven cooling and premature pad deterioration.
Check Pump Performance With Flow Rate Test
Verify your pump delivers 0.5-2 gallons per minute depending on unit size. Low flow suggests a clogged strainer or failing impeller, while excessive flow often indicates a worn pump seal. A properly functioning pump creates a steady waterfall effect across all cooling media without splashing or dry areas.
Prevent Mineral Buildup With Proper Water Management
Hard water is the enemy of swamp coolers, causing scale that reduces efficiency and damages components. The bleed-off system flushes mineral-laden water from your reservoir, but it must be adjusted correctly for your specific water conditions.
Adjust Bleed-Off Valve for Optimal Water Flushing
Set the bleed-off to maintain a small, steady stream of water to the drain while the pump runs. This continuous flushing prevents mineral concentration that leads to scaling. In hard water areas, you may need to increase bleed-off until you see clear water draining consistently.
Optimize Airflow for Maximum Cooling Efficiency
Your swamp cooler needs proper airflow to work effectively. Unlike traditional AC, evaporative coolers require some windows or vents open to allow hot air to escape. The ideal setup creates a cross-breeze effect that pulls cooled air through your living space.
Position Vents for Cross-Breeze Effect Indoors
Open windows on the opposite side of your home from the cooler to create airflow. Start with windows 1/3 open and adjust based on comfort—too much opening reduces cooling effect, while too little restricts airflow. The goal is a gentle breeze moving through your space, not stagnant or overly drafty conditions.
Troubleshoot Common Setup Problems Immediately
Address issues during initial startup rather than hoping they’ll resolve themselves. Most swamp cooler problems stem from improper setup rather than component failure, making early troubleshooting critical for season-long reliability.
Fix Insufficient Cooling With Pad Saturation Check
If air isn’t cooling sufficiently, verify pad saturation—dry spots indicate water distribution problems. Check for clogged distribution tubes and ensure your pump delivers adequate flow. Properly saturated pads feel consistently damp across their entire surface, not just at the top or bottom edges.
Resolve Squealing Noise From Belt or Bearing Issues
Squealing on startup almost always means belt problems—either misalignment or improper tension. First check alignment, then adjust tension to the 1/2 inch deflection point. If noise persists after these adjustments, inspect motor bearings for wear—they may need lubrication or replacement before full operation.
By following these precise setup steps, your swamp cooler will deliver maximum cooling efficiency from the first hot day of summer. Remember that proper seasonal startup prevents 90% of common swamp cooler problems—don’t rush through these critical steps when temperatures rise. A well-prepared evaporative cooler provides exceptional comfort while using 75% less energy than traditional air conditioning, making the effort well worth your time.