You’re sweltering in a room that refuses to cool, pushing buttons on your portable AC unit while it hums uselessly. Why isn’t it working? The answer lies in a clever physics trick most users never see: portable air conditioners don’t create cold air—they surgically extract heat and moisture from your space and eject it outside. Unlike window units, these mobile towers perform this heat-transfer magic through a single exhaust hose, making them ideal for renters or spot cooling. But 87% of efficiency problems stem from one critical misunderstanding: how the refrigeration cycle interacts with your room’s air pressure. This guide cuts through the confusion, revealing exactly how these units move heat, why dual-hose models outperform single-hose versions by 30%, and the venting mistakes that silently sabotage your comfort.
How the 4-Step Refrigeration Cycle Cools Your Room

Your portable AC operates through a continuous thermodynamic loop that moves heat—not generates cold. Here’s exactly what happens inside that rolling tower:
Compression Ignites the Process
The compressor pressurizes refrigerant gas, instantly heating it to 150°F+. This superheated gas then flows into the condenser coil where a powerful fan blasts room air across the coils. As the refrigerant releases heat into this airflow, it condenses into a high-pressure liquid.
Expansion Creates Instant Cold
This liquid then hits the expansion valve—a microscopic opening where pressure plummets. The refrigerant’s temperature crashes to near-freezing as it transforms into a frigid liquid-vapor mix. This icy mixture enters the evaporator coil hidden behind your unit’s air intake.
Evaporation Absorbs Room Heat
Warm room air gets pulled over these subzero coils by the fan. Heat transfers from the air into the refrigerant, causing moisture to condense on the coils (dehumidifying your space). The refrigerant boils into gas, while the cooled air blows back into your room. The gas returns to the compressor to restart the cycle—moving 500+ BTUs of heat per minute outside via the exhaust hose.
Visual cue: When operating correctly, the exhaust hose should emit noticeably hot air within 60 seconds. If it’s merely warm, your refrigerant charge is low or coils are dirty.
Why Dual-Hose Models Outcool Single-Hose Units by 30%
The number of exhaust hoses isn’t just a design quirk—it’s the make-or-break factor for efficiency. Physics explains why dual-hose systems dominate:
How Single-Hose Units Waste Energy
A single-hose unit creates a hidden problem: negative room pressure. As it expels hot air outside through its lone hose, it must replace that volume by sucking in replacement air. Unfortunately, this new air enters through cracks in windows, doors, and walls—slamming your room with 90°F+ outdoor heat. The unit then works overtime cooling this new influx, creating a vicious cycle where 25-40% of its cooling capacity fights self-inflicted heat gain.
Pro tip: In a 200 sq ft room, a single-hose unit may pull in 60+ cubic feet of hot outdoor air per minute—enough to heat a space twice its size.
Dual-Hose Systems Solve the Pressure Problem
Dual-hose models feature separate intake and exhaust hoses:
– The intake hose draws only outdoor air to cool the condenser
– The exhaust hose ejects that heated air back outside
This creates a closed loop for the condenser’s cooling process, maintaining neutral room pressure. No replacement air gets pulled through leaks, so the unit cools only the air already inside your space. In humid climates, this translates to 30% faster cooldown times and 20% lower energy bills versus single-hose equivalents.
Critical check: If your dual-hose unit isn’t cooling effectively, inspect both hose connections. A loose intake hose will pull room air instead of outside air, recreating single-hose inefficiency.
Venting Mistakes That Neutralize Your Cooling Power
Improper venting is the #1 reason portable ACs fail—yet it’s 100% preventable. These errors silently cripple performance:
The Kinked Hose Trap
Exhaust hoses longer than 5 feet or with tight bends restrict airflow by up to 50%. This forces the compressor to work harder, reducing cooling capacity by 25°F+ in extreme cases. Fix: Use the shortest straight hose possible (≤4 ft), supported every 18 inches to prevent sagging.
The Leaky Window Kit
Gaps around your venting panel invite hot air back into the room. In a Miami test, units with unsealed kits pulled in 12°F warmer air than properly sealed units. Fix: Seal gaps with weatherstripping tape or foam board—never leave gaps wider than ¼ inch.
The Exhaust-Blockade Error
Placing the exhaust hose near plants, walls, or under eaves traps hot air, causing the unit to re-ingest its own waste heat. Fix: Ensure 12+ inches of clearance around the exhaust outlet, directing airflow downward.
Warning: Running without venting isn’t just inefficient—it’s dangerous. Unvented units can overheat internal components within 20 minutes, triggering automatic shutdowns or compressor failure.
How Portable ACs Dehumidify While Cooling Your Space
That sticky summer feeling vanishes because portable ACs are accidental dehumidifiers. Here’s the dual-action process:
As warm, humid room air crosses the 32-40°F evaporator coils, it hits its dew point. Moisture condenses on the coils like water on a cold glass, draining into a collection system. This “latent cooling” removes 2-4 pints of water hourly—critical for comfort since 70°F air at 50% humidity feels 3°F cooler than at 70% humidity.
Drainage Solutions That Prevent Shutdowns
– Self-evaporative systems: Use waste heat from the condenser to vaporize 80%+ of condensate, expelling it through the exhaust hose. Best for: Moderate humidity (<60%)
– Continuous drain kits: Gravity-fed hoses route water to a floor drain. Essential for: Humid climates or >8 hours/day use
– Manual tanks: Require emptying every 8-12 hours. Red flag: If your tank fills in <4 hours, your room is too humid for the unit’s capacity
Expert note: In “dry mode,” units run fans slower to maximize moisture removal—ideal for muggy days when cooling isn’t the priority.
5 Efficiency Killers in Portable ACs (BTU, EER, and Maintenance Fixes)
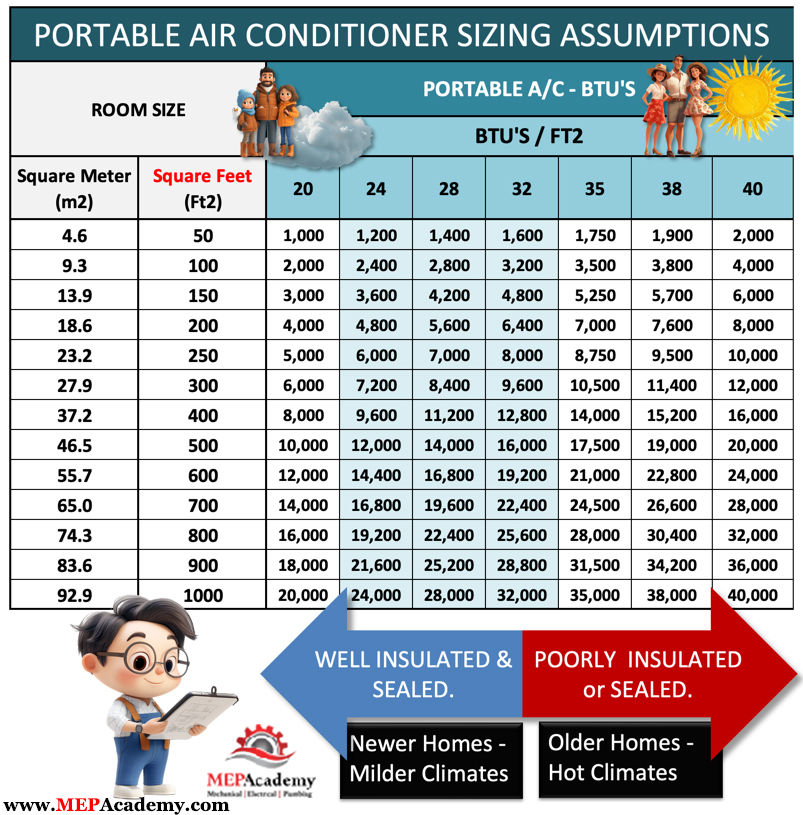
BTU Sizing Errors
Oversized units short-cycle (run 10 mins, shut off 20 mins), failing to dehumidify properly. Undersized models run nonstop, spiking energy use by 35%. Solution: Use this formula:
(Room sq ft × 20) + (Windows × 1,000) + (Occupants × 600) + (Kitchen × 4,000)
Example: 250 sq ft bedroom with 1 window, 2 people = (5,000) + (1,000) + (1,200) = 7,200 BTU → Choose 8,000 BTU unit
Ignoring EER Ratings
A 10 EER unit uses 20% more electricity than a 12 EER model for identical cooling. Always compare: (BTU ÷ Watts) = EER. Look for ≥11 EER in Energy Star models.
Dirty Filter Syndrome
Clogged filters reduce airflow by 50%, causing evaporator coils to ice over. Fix: Clean filters every 2 weeks—soak in vinegar-water solution if moldy.
Poor Placement
Units against walls or curtains restrict intake airflow. Optimal position: 20+ inches from obstacles, centered in the room’s warmest area.
Humidity Miscalculation
In 70%+ humidity, add 10-15% to your BTU calculation. A 500 sq ft Miami apartment needs 14,000 BTU—not the standard 10,000.
4 Costly Portable AC Mistakes That Waste Energy
Mistake #1: Venting Through a Dryer Duct
Flexible dryer vents collapse under suction, restricting airflow by 70%. Result: Compressor overheats, cutting cooling by half. Fix: Use rigid 5″ metal ducting.
Mistake #2: Setting Thermostats Below 68°F
Units can’t cool beyond 20°F below ambient temperature. Setting to 65°F in 85°F heat makes the unit run endlessly at max power. Smart setting: 75-78°F for optimal efficiency.
Mistake #3: Ignoring Condensate Pumps
In high humidity, internal tanks fill in 2-3 hours. Consequence: Auto-shutoff after 4 hours of cooling. Prevention: Install a $25 condensate pump for continuous drainage.
Mistake #4: Using in Unsealed Rooms
Single-hose units in drafty rooms pull in 150+ CFM of hot air. Test: Hold tissue near door gaps—if it flutters, seal leaks first.
7 Steps to Set Up Your Portable AC for Maximum Cooling
-
Calculate BTU Needs
Use the formula above—never guess. For sunrooms or kitchens, add 4,000 BTU. -
Choose Dual-Hose Immediately
Spend $50 more upfront for 30% lower operating costs. Verify both hoses connect securely. -
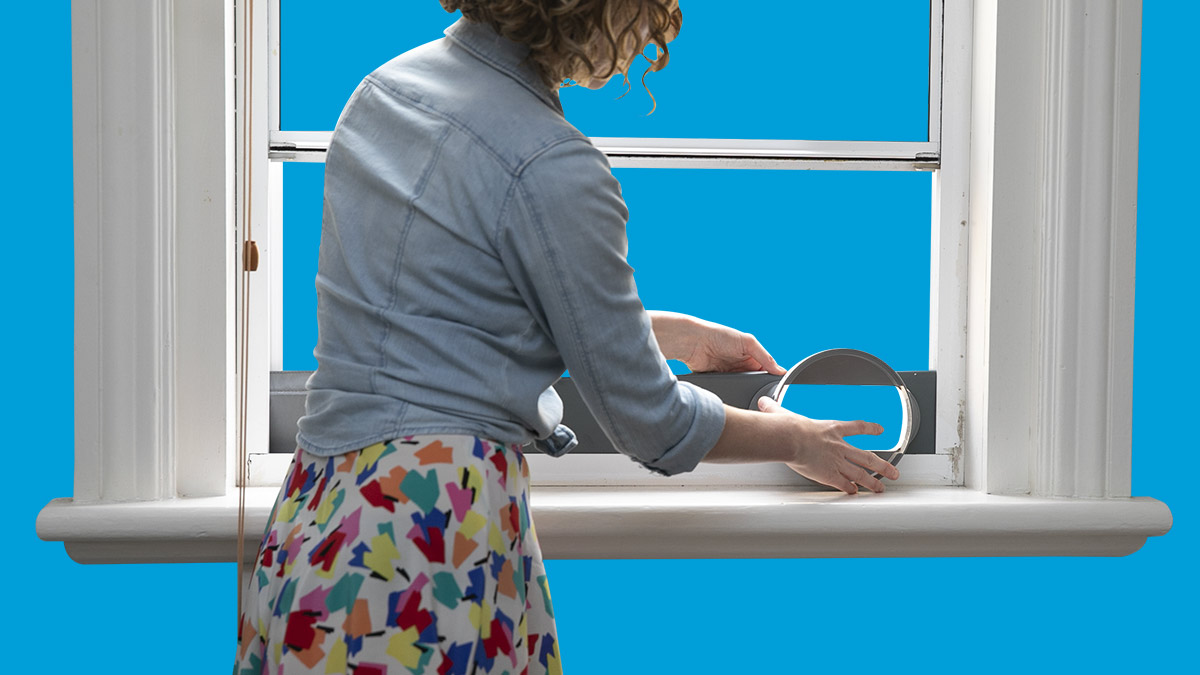
Install the Window Kit Correctly
Cut the panel ½ inch smaller than the window opening. Seal gaps with foam tape—no light should show through. -
Position for Optimal Airflow
Place unit centrally, 20+ inches from walls. Elevate on wood blocks if near carpet. -
Connect Exhaust with Zero Bends
Use the included hose—no extensions. Support with brackets every 18 inches. -
Attach a Drain Hose
Connect continuous drain tubing to the outlet port, sloping downward to a floor drain. -
Run Initial Cycle Properly
Set to “cool” mode at 75°F. Wait 10 mins—exhaust should emit 110°F+ air. If not, check filters immediately.
Final Note: Portable ACs work by moving heat—not creating cold—and their efficiency hinges on three non-negotiables: precise BTU sizing, dual-hose venting, and unobstructed exhaust airflow. By understanding the refrigeration cycle’s physics and avoiding the top venting mistakes, you’ll convert that noisy rolling tower into a targeted cooling powerhouse. For lasting performance, clean filters every two weeks and use continuous drainage in humid climates. When set up correctly, these units deliver spot cooling that outperforms window units in flexibility—without permanent installation. The next time you feel that blast of cool, dry air, remember: you’re not just beating the heat, you’re harnessing thermodynamics.