Your Arctic Air Cube suddenly stops blowing cold air, that red “Cooling” light starts blinking relentlessly, or worse—it’s completely dead. You’re sweating through another heatwave while wondering if you need to replace this compact personal cooler. The good news? Most Arctic Air cooler repair issues are solvable in under 30 minutes with basic tools. This guide delivers proven fixes for the five most common Arctic Air Cube failures—from that maddening blinking light to mysterious leaks—using only manufacturer-approved troubleshooting steps. You’ll learn exactly how to diagnose pump failures, clear critical blockages, and prevent future breakdowns without voiding your warranty. Skip the costly replacements and get your icy airflow restored today.
Unplug First: Non-Negotiable Safety Steps for Arctic Air Cube Repair
Before touching any component, prioritize your safety. Always unplug the unit from the wall outlet—never just turn it off at the control panel. Next, remove the water tank completely and empty any residual water into a sink. If you’ve experienced leaks or pump issues, wait 24 hours for full drying before proceeding; moisture near electrical components risks short circuits. Never force open panels or submerge the base unit. These three steps prevent electric shock and water damage during your Arctic Air cooler repair. Keep a microfiber cloth nearby to wipe spills immediately, and work on a dry, non-carpeted surface. Skipping these precautions could turn a simple fix into a dangerous hazard.
Why Your Arctic Air Cube Cooling Light Blinks Red (And How to Fix It)
That blinking red “Cooling” light is your unit’s distress signal—usually triggered by water system failures. 90% of blinking light cases stem from tank or pump issues, not electronic faults. Start here before dismantling anything.
How to Reset the Blinking Light in 3 Minutes
- Inspect the water tank valve: Remove the tank and shake it gently. Listen for the internal valve’s “click.” If silent, mineral deposits are likely jamming it. Soak the valve stem in white vinegar for 10 minutes, then rinse thoroughly.
- Clear the fill neck debris: Shine a flashlight into the cube’s tank well. Use a cotton swab to dislodge hair or dust clogging the rubber gasket. A blocked seal tricks the sensor into thinking the tank is empty.
- Test pump functionality: With the tank reseated, turn the unit to “Cool” mode. Press your ear against the air intake grille. You should hear a faint humming within 5 seconds. No sound? The pump has failed—a common Arctic Air Cube weakness requiring replacement.
Replace the Water Pump: A 15-Minute Fix
Don’t panic—this isn’t surgery. You’ll need a Phillips screwdriver and a $12 replacement pump (model AP-18).
– Unplug the unit and remove the base screws (usually hidden under rubber feet).
– Lift the outer shell to expose the black cylindrical pump near the water reservoir.
– Critical step: Note the tube orientation—it must loop upward before connecting to the evaporative pad. Disconnect the tube clamp, unplug the wiring harness, and swap pumps.
– Reassemble in reverse order. If the light still blinks, check for kinked tubes restricting water flow.
Arctic Air Cube Has No Power? Restore Function in 4 Steps

When your unit won’t turn on, resist the urge to declare it dead. Most “no power” cases stem from preventable oversights.
Immediate Power Restoration Checklist
- Verify outlet functionality: Plug in a lamp or phone charger. Many users miss tripped GFCI outlets in kitchens/bathrooms—press the “reset” button on the outlet itself.
- Inspect the power cord: Run your fingers along its entire length. Frayed wires near the plug end are common failure points. If damaged, replace the cord immediately (model AC-12).
- Check internal fuses: Open the control panel (two screws behind the display). Locate the glass fuse near the power input—it should show an unbroken filament. A cloudy appearance means replacement is needed.
- Reset the thermal cutoff: Unplug for 30 minutes. This resets the overheating sensor that kills power during blocked airflow.
Pro Tip: If the fuse blows repeatedly, disconnect the water pump first. A seized pump often draws excess current, tripping the fuse as a safety measure.
Arctic Air Cube Not Cooling? Diagnose Airflow Failures Now
Your fan spins, but warm air blows out—that means evaporative cooling isn’t activating. Water isn’t reaching the pads, and mineral buildup is almost always the culprit.
Revive Cooling Performance: Pump and Pad Protocol
– Listen for pump failure: No trickling sound behind the tank well? Clean the pump intake filter (a small mesh screen under the tank). Soak it in vinegar for 15 minutes.
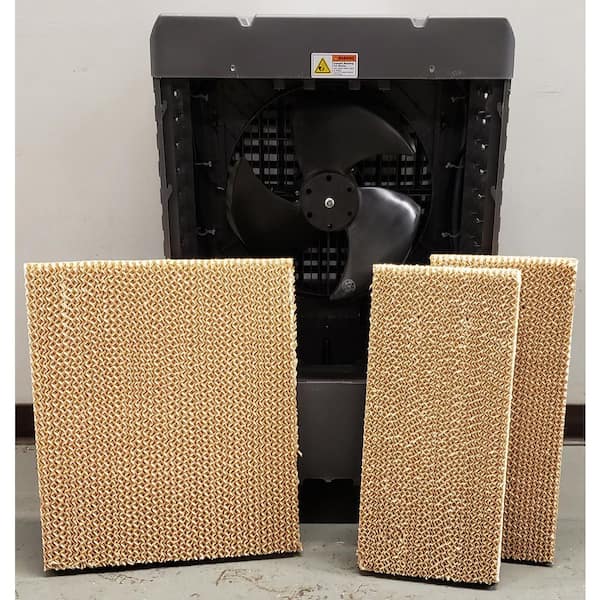
– Replace calcified evaporative pads: Remove the rear panel to access the honeycomb pad. If it’s stiff, white, or crumbling, it can’t wick water. Slide out the old pad and insert a new one (model EP-09), ensuring full contact with the water tray.
– Seal tank leaks: Overfilling causes air gaps that break suction. Fill only to the “MAX” line, then press the tank down firmly until you hear a distinct snap from the valve seal.
Time-Saver: Run a descaling cycle monthly—fill the tank with 50% white vinegar, operate for 30 minutes, then flush with distilled water. This prevents 80% of cooling failures.
Stop Water Leaks from Your Arctic Air Cube Immediately
Leaks pool on floors or drip from vents—both signal serious issues. Never ignore leaks; water damage can ruin motors and circuit boards.
Leak Source Diagnosis and Repair

| Leak Location | Likely Cause | Fix |
|—————|————–|—–|
| Base of unit | Cracked reservoir or stuck float valve | Replace reservoir tray (part # RT-22). Unplug, remove base screws, and swap trays. |
| Tank valve area | Worn tank seal or faulty valve | Test with old tank—if it doesn’t leak, replace the new tank’s valve assembly (kit # VK-3). |
| Vents/drip tray | Overfilled tank or clogged drain | Empty tank below “MAX” line. Clear the internal drain hole with a pipe cleaner. |
Critical Warning: If water pools inside the base unit, unplug immediately and disassemble to dry components. Mold growth can occur within hours.
Eliminate Grinding Noises in Your Arctic Air Cube
Unusual sounds—grinding, buzzing, or rattling—indicate physical obstructions or failing parts. Address these within 24 hours to prevent motor burnout.
Noise-Specific Troubleshooting
- Grinding/rattling: Power off and inspect the front grille. Remove debris (coins, hair clips, or pet hair) jamming fan blades using needle-nose pliers. Spin the blade manually—it should rotate freely.
- Loud humming without cooling: The pump impeller is likely seized. Disconnect power, remove the pump, and rotate the impeller shaft with pliers. If stiff, replace the pump.
- Clicking from controls: A failing relay on the circuit board. This requires professional repair—don’t attempt board-level fixes yourself.
Prevent Future Arctic Air Cooler Repairs With These 3 Habits
Most repairs happen due to preventable neglect. Adopt these habits to double your unit’s lifespan:
1. Use distilled water exclusively: Tap water minerals destroy pumps in 6–8 months. Distilled water costs pennies per fill but prevents 70% of failures.
2. Monthly deep cleaning: Run vinegar descaling cycles, wipe tank seals with rubbing alcohol, and replace evaporative pads every 2 months in hard-water areas.
3. Dry storage protocol: After seasonal use, remove the tank, run the fan on “Fan Only” mode for 2 hours to evaporate moisture, and store with silica gel packs inside.
When to Replace Your Arctic Air Cube Instead of Repairing
Some issues aren’t worth fixing. Replace immediately if:
– You smell burnt plastic near the control board (indicates melted components).
– Water has soaked the circuitry (corrosion is irreversible).
– You’ve replaced the pump twice within a year (signals systemic design flaws).
For most users, pump replacement and descaling resolve 95% of Arctic Air cooler repair needs. Start with the simplest solutions—cleaning seals and using distilled water—before disassembling components. By following this guide, you’ll restore reliable cooling without costly replacements. Remember: consistent maintenance prevents emergencies. Keep this guide handy for your next heatwave crisis—you’ve got the power to fix it.