Your beach picnic dreams just got derailed. You unzip the cooler expecting crisp sandwiches and chilled fruit, but instead find soggy bread swimming in murky meltwater. This isn’t just annoying—it’s dangerous. Waterlogged food spoils faster, breeds bacteria, and turns your carefully packed feast into a safety hazard. The core issue? Melted ice inevitably pools at the bottom of every cooler, drowning your food. But here’s the good news: keeping food dry in a cooler is 100% achievable with the right systems. Forget soggy disasters. This guide reveals battle-tested methods to guarantee bone-dry food from the first bite to the last, using smart barriers, strategic elevation, and ice tricks that slash meltwater by 70%. You’ll learn exactly how to pack like a pro—no special skills required.
Stop Meltwater Before It Drowns Your Food
The secret isn’t preventing ice from melting—it’s controlling where that water goes. Most cooler failures happen because people treat their cooler like a refrigerator, dumping food directly on ice. Meltwater always sinks, so your food must live above the flood zone. Three non-negotiable rules form your dry-cooler foundation: First, isolate food with waterproof barriers (like a submarine hull). Second, elevate everything off the cooler floor (think lifeboat above waves). Third, slow meltwater at the source using smart ice alternatives. Ignore any one of these, and your food will get soaked. For example, double-bagging sandwiches but placing them directly on ice guarantees disaster—water seeps through bag seams. Combine all three, and you’ll pull out perfectly dry birthday cake on day three of your camping trip.
Build Fail-Proof Waterproof Shields
Your first line of defense is creating literal waterproof bunkers for food. This isn’t optional for moisture-sensitive items like bread, cakes, or deli meats. Never trust a single plastic bag—even heavy-duty Ziplocs leak under pressure from stacked items. Instead:
- Triple-wrap critical items: Wrap sandwiches in plastic wrap, slide them into a Stasher bag, then place that inside a gallon-sized freezer bag. The inner layer catches condensation; the outer two block meltwater.
- Use hard containers as fortresses: Lock & Lock containers with silicone seals are impenetrable. Nest smaller containers (like Tupperware for potato salad) inside larger ones for double protection. Pro tip: Fill dead space inside containers with crumpled paper towels to absorb any stray moisture.
- Deploy dry bags for zero-risk submersion: Those $20 waterproof bags sold for kayaking? They’re game-changers. Seal burritos inside, press out air, and drop the bag directly into ice meltwater—it stays bone-dry for hours. Ideal for multi-day trips where coolers get jostled.
Critical mistake: Using flimsy shopping bags or thin produce bags. They tear instantly when packed tightly, flooding your food within minutes.
Lift Food Above the Flood Zone
Even with barriers, water finds weak points. Elevation creates a physical moat between food and meltwater. The goal: Keep all food at least 1.5 inches above the cooler floor—the depth where water pools fastest.
- Install a cooler basket: These wire or plastic grids (like Coleman’s Universal Cooler Basket) clip over your cooler’s rim, lifting food safely above water. They pay for themselves when you avoid soggy chips on day one.
- Build a DIY platform in 60 seconds: No basket? Place a wire cooling rack from your kitchen on the ice layer. Can’t find one? Stand empty plastic water bottles upright on the cooler floor, then lay a clean cutting board across them. Instant dry deck.
- Zone-pack like a Navy SEAL: Designate the bottom 30% as the “wet zone” (for sealed drinks and ice packs), the middle 40% as the “damp zone” (for double-bagged items), and the top 30% as the “dry zone” (for hard containers only). This creates natural water separation.
Visual cue: After packing, tilt your cooler slightly. If food touches the wet zone, rebuild your platform—it’s too low.
Freeze Smart, Not Hard: Ice Hacks That Slash Meltwater
Ice cubes are the enemy. Their massive surface area melts 3x faster than solid blocks, flooding your cooler with unnecessary water. Switch to contained ice alternatives to starve meltwater at the source.
Use Frozen Bottles as Supercharged Ice Packs

A single 2-liter soda bottle frozen solid lasts 2-3x longer than a bag of cubes and produces almost no water until the final melt phase. Fill plastic bottles 90% full (to prevent cracking), freeze them upright, and stack them vertically against your cooler’s walls. Why this works:
- Less surface area = slower melting: A 2L bottle has 1/10th the surface area of the same volume of ice cubes.
- Dual-purpose water source: As bottles thaw, you gain drinking water—no more hauling heavy jugs.
- Structural support: They won’t shift during transport like loose ice, preventing food crush.
Pro tip: Freeze juice boxes or sauce containers for meals—you get cold food and meltwater reduction.
Pre-Chill Like a Pro (The Overlooked Game-Changer)
Warm food melts ice 400% faster. Pre-chilling is your secret weapon against excess water. Chill all food/drinks in your fridge for 24 hours before packing. Then:
- Toss sacrificial ice packs into the empty cooler for 30 minutes to pre-chill its interior
- Pack only fridge-cold items (never room-temperature food)
- Place frozen bottles against the walls first—they’ll maintain cold longer
This simple step cuts daily meltwater by half. Skipping it? You’re basically cooking ice with hot food.
Pack in 4 Steps for Guaranteed Dryness
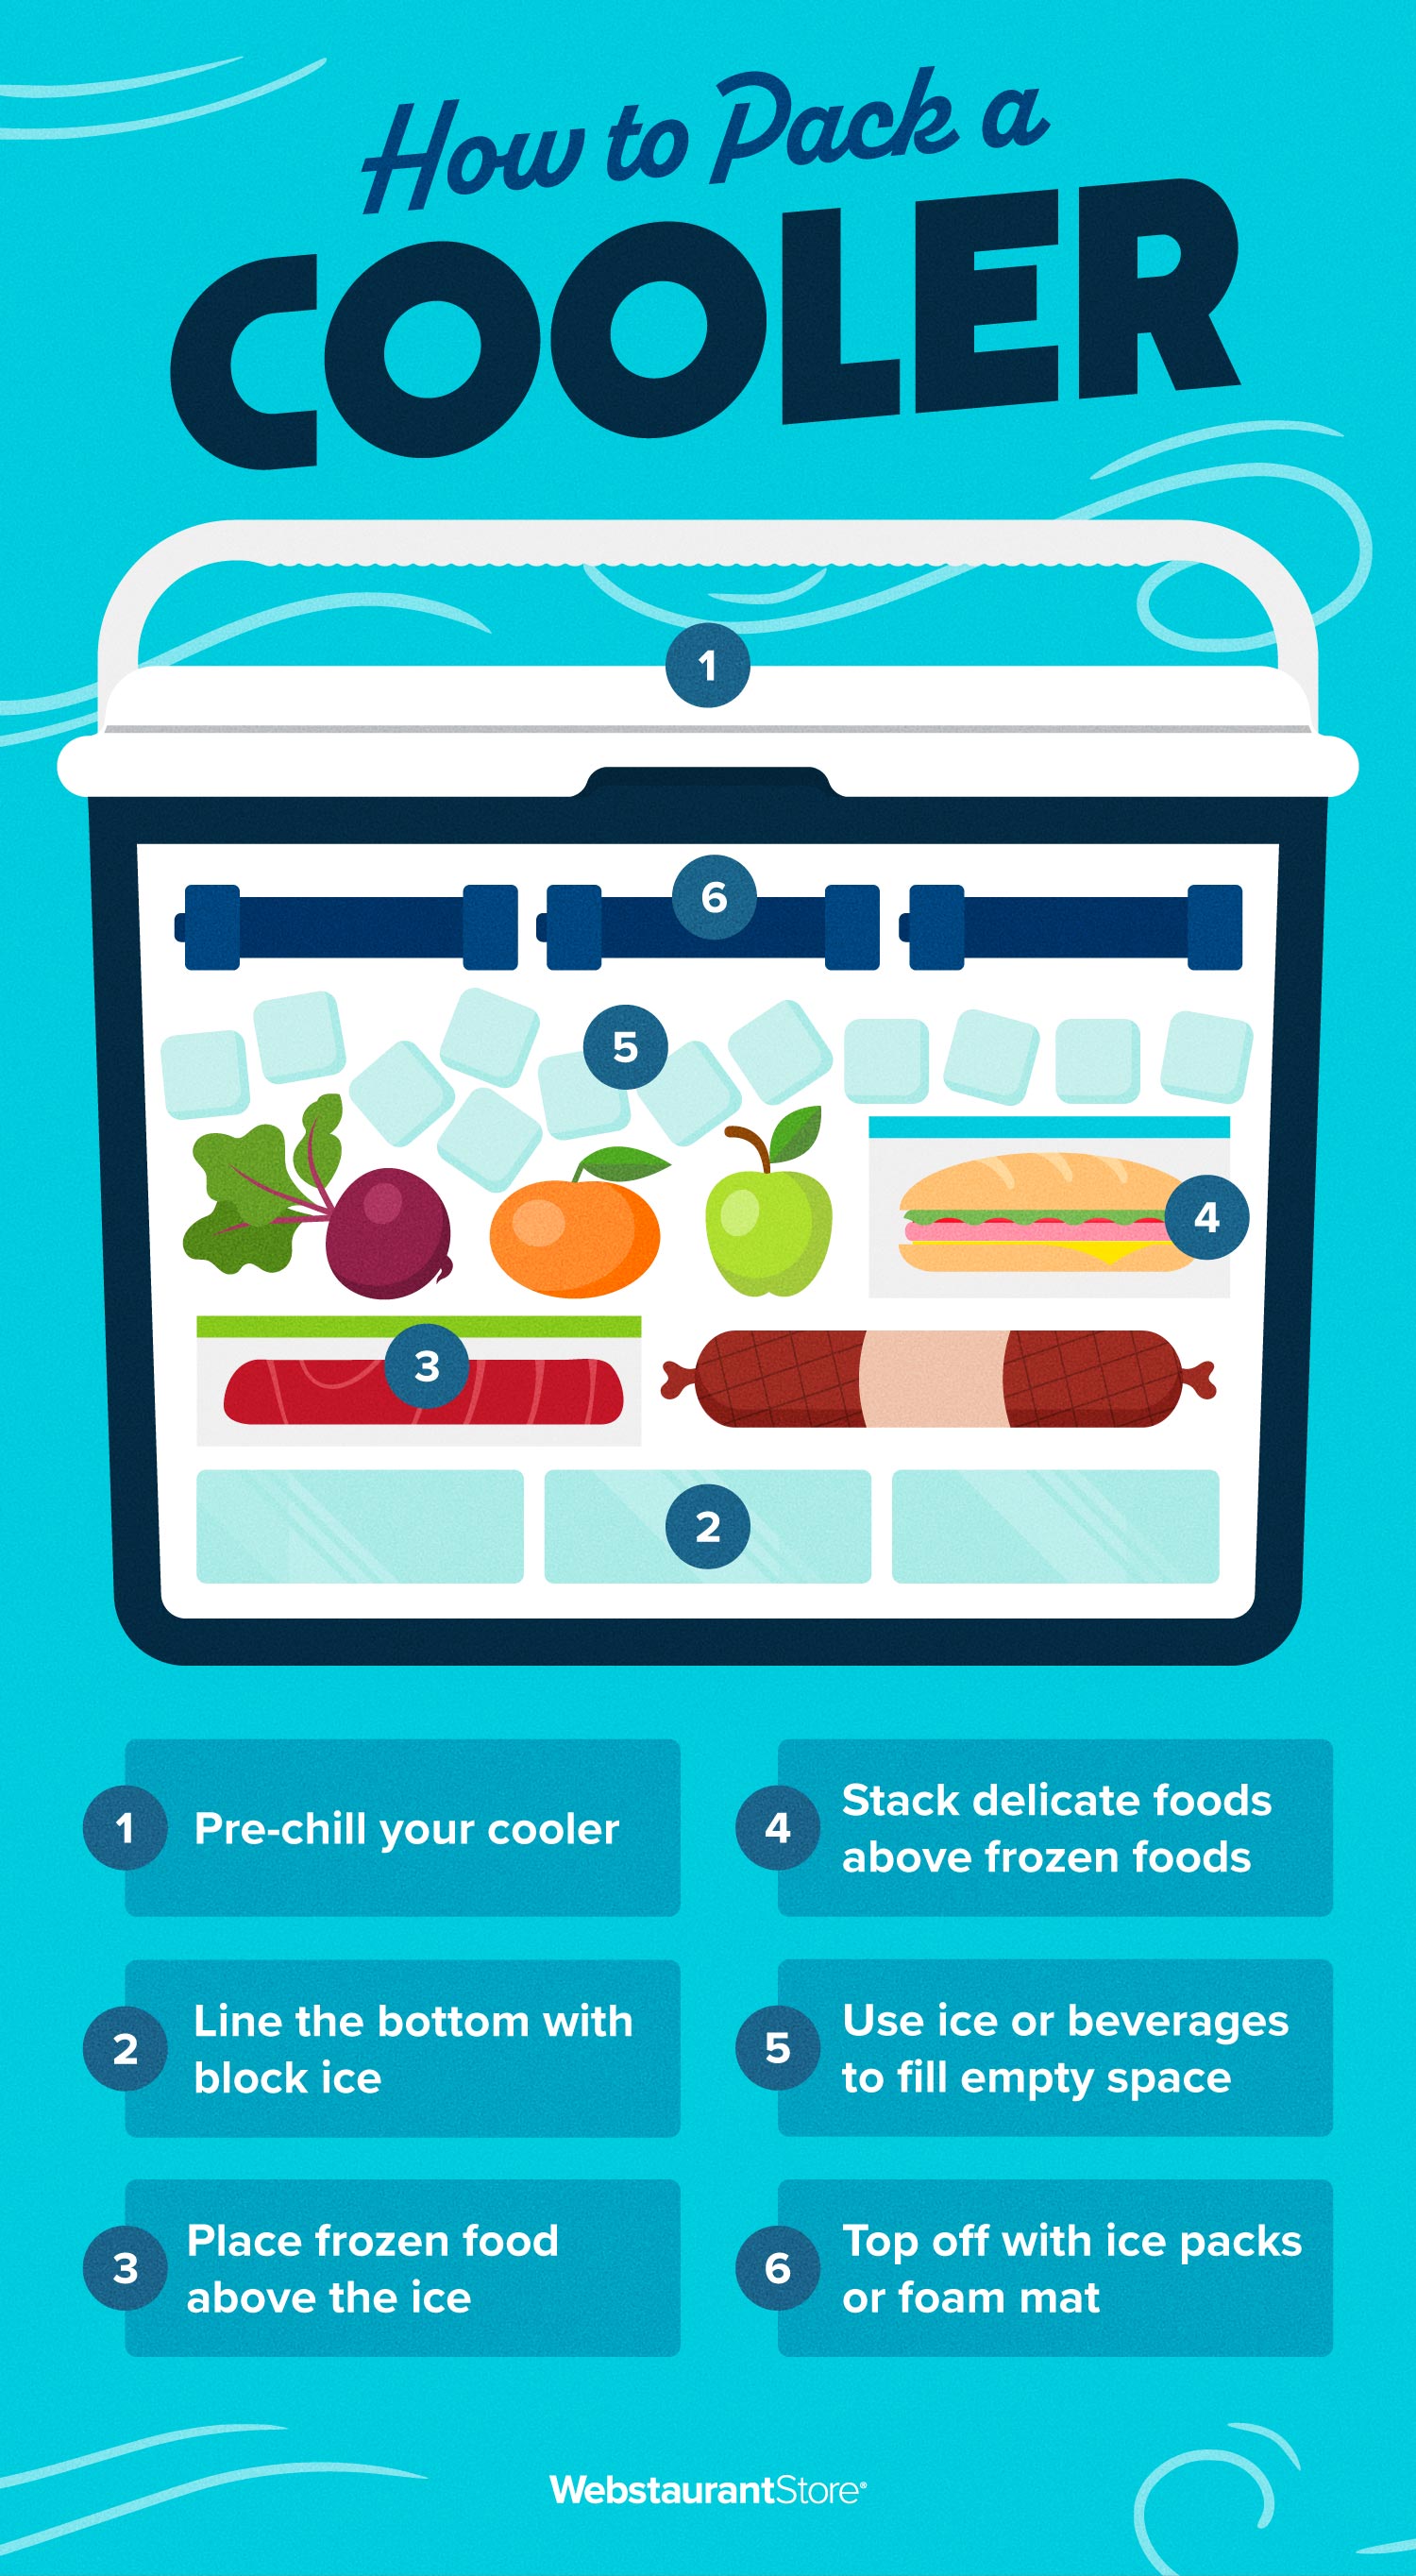
Follow this exact sequence to lock in dryness. Deviate, and water wins.
Step 1: Build the Wet Zone Foundation (2 minutes)
Start with 2 inches of frozen 2L bottles or ice packs covering the entire cooler floor. Never use loose ice here—it melts too fast. This layer absorbs heat from the ground and creates your water reservoir.
Step 2: Install the Dry Deck (1 minute)
Place your wire rack or DIY platform directly on the frozen bottles. Ensure it’s stable—wobble means food will dip into water.
Step 3: Load the Dry Zone Strategically (5 minutes)
Pack food from bottom to top:
– Bottom shelf (on platform): Double-bagged items (sandwiches, fruits)
– Middle shelf: Hard containers (salads, cheeses)
– Top shelf: Ultra-sensitive items (bread, cake) in sealed containers
Pro move: Pack meals in separate dry bags labeled “Lunch Day 1″—minimizes cooler openings.
Step 4: Seal the Cold Lock (2 minutes)
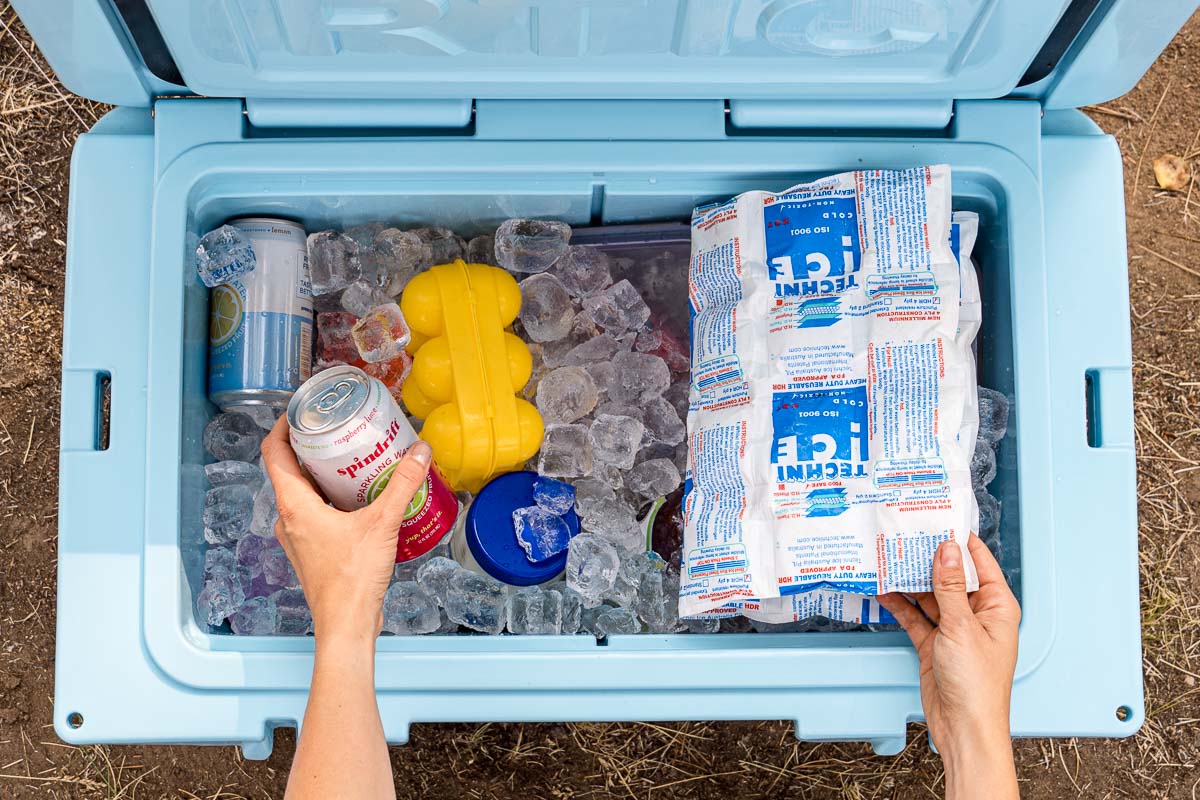
Fill every air gap with extra frozen bottles. Top with a final layer of ice packs. A full cooler stays cold 50% longer than a half-empty one—air is the enemy. Close the lid firmly; warm air inflow melts ice 3x faster.
Advanced Tactics for Zero-Water Coolers
Run a Two-Cooler System (For Trips Over 24 Hours)
Dedicate one cooler only for drinks/ice (the “wet cooler”), opened 10-20x daily. Keep your food in a second “dry cooler” opened just 3x daily (mealtimes). This reduces warm air exposure by 70%, slashing meltwater. Label them clearly—confusion causes soggy disasters.
Drain Water Daily Without Losing Cold
If your cooler has a drain plug (like Yeti models), tilt it toward the plug each morning and drain water before it rises above your platform. Never let water touch food—even 5 minutes of submersion soaks through bags. No plug? Siphon water with a clean tube into a bucket.
Pack in Reverse Order of Use
Last-in, first-out packing is critical. Place Day 3 dinner at the bottom of the dry zone. Your first meal? Right on top. This avoids digging through ice—which dumps meltwater onto lower layers. Every unnecessary lid opening adds 15 minutes of melt time.
Final Note: Keeping food dry in a cooler isn’t luck—it’s physics. By combining waterproof barriers, strategic elevation, and contained ice sources, you eliminate soggy food permanently. Stick to the four-step packing protocol, and you’ll pull out crisp sandwiches even after 72 hours in 90°F heat. Remember: Pre-chill everything, freeze 2L bottles, and always pack your dry zone above the waterline. Your next adventure deserves fresh, safe food—not a swampy mess. Ready for more? Master cooler organization next with our guide to “How to Pack a Cooler for a 3-Day Camping Trip.”